Golf Drills/Practice
This has to be the Craziest Golf Drill of All Time
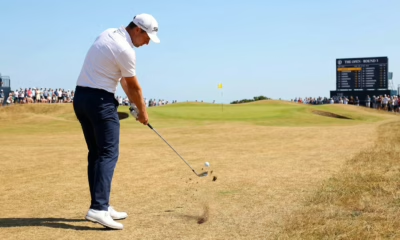
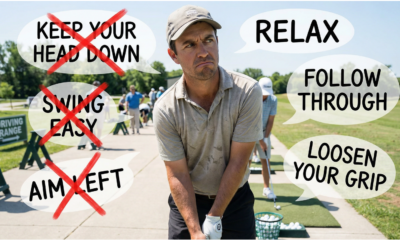
It’s safe to say that we don’t expect Tiger Woods or Rory McIlroy to use this drill on the PGA Tour anytime soon after seeing a video of a golfer demonstrating the craziest golf drill ever recorded on social media.
The video, which was released on Instagram by the well-known @hackpatrol account, shows our amateur golfer putting a range bucket over his head while another bucket controls his arms and chest movements.
He also places a range bucket behind him with an alignment stick, well, going straight up his…
The drill could probably do with an extra bit of work, however, as he ends up shanking the ball well right of his intended target line.
Anyway, each to their own and all that.
WATCH THE HILARIOUS VIDEO BELOW
Here’s how golf fans reacted to the video post:
“Some say he’s a cagey player.”
“The bucket between the arms is not a bad idea to be fair.”
“Definitely giving this a go at the weekend.”
“Haha he absolutely shanked it.”
“Love this. Trying it tomorrow.”
“Great impact position.”
“This is the best drill I’ve ever seen.”
“Well I’ve seen it all now.”
“Not sure Tiger Woods will be using this one.”
“WTF is he doing… golf is not for him.”
“Imagine rocking up to St Andrews and doing this on the range.”
“I tell you what, I’ll make sure I keep that posture right with that alignment stick in a scary position.”
“Why have I never thought of this drill?”
“What a guy. This is sick.”
Read the original article on Golf Magic.
Golf Drills/Practice
A Justin Thomas-Inspired Drill to Improve Your Backswing
Try this “TRUNK” DRILL to slow your downswing and help you gain maximum power with just one step
Do you feel rushed when starting the downswing? If you are like most amateur golfers, myself included, then you know this can lead to all kinds of awful outcomes. Check out this great visualization of the drill from our friend Clay Ballard on the”TRUNK” drill to slow the downswing transition. The ultimate goal is to swing the club through the ball and stay balanced with your weight on your left foot and the right heel almost up.
If you’re working on your swing start here ->
WATCH BELOW ???
The case for high hands at the top of the backswing
Like Bobby Jones, Sam Snead, Byron Nelson, Jack Nicklaus, Payne Stewart, Ernie Els, and Dustin Johnson, Justin Thomas carries a pretty upright lead arm at the top of his swing.
I have asked his dad, and coach, Mike, about it. Mike mentioned that he has no problem with the swing being more upright and that all they keep tabs on are the club shaft not getting too far across the line and the swing not getting too long.
There certainly are advantages to a higher arm plane at the top. The position creates a feeling of less restriction and more freedom leading to a better swing rhythm. High hands allow more time for the clubhead to accelerate in the downswing creating more speed and likely more success with longer irons and clubs. Ultimately high hands can create a steeper angle of attack making it easier to play out of the rough and bad lies.

Typically, players with higher hands at the top are better iron players too. Now let’s be realistic about the expectations…Not everything is the next great elixir for your ball-striking (including this drill sadly) where you can immediately expect to put it in play and go out and start shooting in the 70’s every round. However, Like any swing drill, with time, persistence, and most of all focused practice, the goal is for it to pay off in the end.
My take on it is – If all of the best players do it- (some much more than others) it must have some merit and is at least worth evaluating in your swing. You will notice that some players have a quick transition while others have almost a full-second pause at the top before beginning the downswing. Take a minute to watch the drill and then take it to the range. Give it a few buckets…See if you don’t feel like you are seeing /feeling better impact and a more powerful position at the top. My guess is that you will. I know I did! Comment below if you have tried this drill or have any others that might help our golfers out there.
Until next time, hit ’em straight and stay in the shortgrass.
Drills
The One Setup Change That Instantly Improves Ball Striking
Discover the one setup change that can instantly transform your ball striking. Resident PGA Pro breaks down how a simple shift in sternum alignment and weight distribution can eliminate fat and thin shots for good.
I see it every single day on the lesson tee. A golfer walks up, pulls a mid-iron from their bag, and proceeds to strike the ground three inches behind the ball or thin a shot that screamingly misses the green. They usually look at their clubface or complain about their swing plane, but the reality is much simpler. Most amateur struggles aren’t born in the middle of the downswing; they are rooted in the address position. Today, I want to share the one setup change that has transformed more of my students’ games than any complex swing thought ever could.
Let’s work through this together. We often get caught up in the flashy world of technology and high-speed video analysis, but the fundamentals remain the ultimate gatekeeper of your scorecard. If you are tired of inconsistent contact and want to finally feel that buttery-soft compression at impact, you don’t need a new swing. You need a better foundation. This single adjustment to your lead-side alignment is the game improvement secret you’ve been searching for to stabilize your strike and gain immediate distance.
The Power of the One Setup: Shifting Your Sternum
The key is understanding where your center of gravity sits in relation to the ball. Most golfers set up with their weight distributed 50/50 or, even worse, leaning slightly toward their trailing foot. While this feels powerful, it moves the low point of your swing arc behind the golf ball. When I talk about the one setup change that matters, I am talking about preset forward shaft lean and centering your sternum slightly ahead of the ball at address.
When your sternum is behind the ball, you are essentially asking your body to perform a miracle to get back to a clean impact position. By shifting your upper body center just an inch or two toward the target during your setup, you are pre-setting a downward strike. This is the hallmark of professional ball striking. It ensures that the clubhead reaches its lowest point after it has already made contact with the turf, creating that elusive ball-then-turf interaction we all crave.
Here’s how I want you to visualize it: imagine a plumb line hanging from the center of your chest. In your current setup, that line likely points directly at the ball or behind it. For the one setup that changes everything, I want that plumb line to point exactly one inch in front of the ball toward your target. This subtle shift ensures your weight stays internal and forward, preventing the dreaded “hang back” that causes chunks and thins.
Why This Game Improvement Tactic Works for Every Club
You might be wondering if this applies to your wedges as much as your long irons. The answer is a resounding yes. In fact, this is one of the most versatile golf tips I can offer because it standardizes your delivery. When your lead hip and sternum are stacked correctly, the radius of your swing becomes predictable. Predictability is the cornerstone of game improvement today, where we prioritize consistency over raw, uncontrolled power.
During a recent lesson with a high-handicap student, we focused entirely on this lead-side pressure. He was convinced he had a “casting” problem with his wrists. I showed him that his wrists were only casting because his body was trying to reach a ball that his setup had placed too far forward relative to his center. Once we implemented the one setup adjustment—leaning the shaft forward and centering the chest over the lead foot—his “casting” disappeared instantly. His body finally had the space to rotate properly.
The Role of Forward Shaft Lean
A major component of this setup change is the position of your hands. If your sternum moves forward, your hands must follow. At address, your lead arm and the club shaft should form a straight line that points toward your lead shoulder. This prevents the clubhead from passing the hands too early in the hitting zone. It’s a simple mechanical advantage that delofts the club and increases ball speed without any extra physical effort.
Mastering the Lead-Side Pivot
Now that we’ve adjusted the address, we have to talk about how it affects the movement. Because you are starting in a more “forward” position, your backswing will naturally feel more compact and controlled. You won’t feel the need to sway off the ball to find power. Instead, you’ll find that you can pivot around your lead leg with much more efficiency. This is a primary pillar of modern game improvement: minimizing unnecessary lateral movement.
Focus on the fundamentals of the turn. As you take the club back from the one setup position, maintain the pressure in the inside of your lead foot. You should feel like you are winding up against a sturdy post. This coiled tension is what translates into explosive speed on the way down. If you sway back, you lose the advantage of the setup. Stay centered, stay tall, and let your shoulders rotate around that slightly forward-leaning spine angle.
I often tell my students to imagine they are standing in a narrow barrel. You want to turn within that barrel without bumping the sides. By starting with your weight slightly forward, you’ve already cleared the space you need for the downswing. It’s a proactive approach to the golf swing rather than a reactive one. You are no longer fighting your own geometry; you are using it to your advantage.
Drill: The Lead-Toe Balance
If you’re struggling to feel this, try this simple drill. Set up to the ball normally, then lift the heel of your trailing foot off the ground, balancing only on your toe. This forces nearly 80% of your weight onto your lead side. Hit a few half-shots from this position. You’ll notice how easy it is to strike the ball cleanly when your center is stabilized forward. This is the extreme version of the one setup change we’re looking for, and it’s a great way to build muscle memory.
Applying Swing Principles to Your Routine
As we move further into 2026, the trend in instruction is moving toward simplicity. We are moving away from the thousand-point checklists and toward singular, impactful changes. This setup adjustment fits that mold perfectly. It’s a “set it and forget it” mechanic. Once you verify your alignment and sternum position in your pre-shot routine, you no longer have to think about it during the swing.
Incorporating this into your routine is easy. Start by standing behind the ball and picking your target. As you walk into your stance, place your lead foot first and align your lead hip over it. Only then should you set your trailing foot. This ensures your foundation is built from the target-side back, rather than just standing wide and hoping for the best. It’s these small golf tips that separate the single digits from the mid-handicappers.
Remember, the goal of game improvement isn’t just to hit one good shot; it’s to make your bad shots better. When you utilize the one setup that favors the lead side, your “misses” become thin shots that still chase up toward the green, rather than fat shots that leave you 40 yards short. That shift in your miss-hit profile is what actually lowers your handicap over the course of a season.
Conclusion: Your Path to Better Contact
Improving your ball striking doesn’t require a total swing overhaul or hours of grueling practice. By focusing on the one setup change—centering your sternum and pressure slightly forward—you create the optimal conditions for a crisp, compressed strike. We’ve covered why this works, how it stabilizes your swing arc, and how to drill the feeling into your subconscious. These fundamentals are the most reliable path to better golf in 2026 and beyond.
I want you to take this to the range this weekend and see the difference for yourself. Focus on that lead-side alignment and watch your ball flight flatten out and penetrate. Consistency is just one setup change away. Have you tried this technique before, or do you tend to keep your weight back? Let us know how it worked for you in the comments below! What’s your biggest challenge with ball striking right now? Tell us below, and let’s get your game on track together.
Golf Drills/Practice
How to Finally Eliminate Your Slice (Without Rebuilding Your Swing)
Learn how to eliminate your slice without rebuilding your swing. A PGA Pro shares simple fixes for grip, alignment, and clubface control that work for everyday golfers.
If you’re reading this article, chances are you’ve hit more than your fair share of banana balls off the tee. You know the feeling—you step up to the first tee with confidence, make what feels like a decent swing, and watch in frustration as your ball curves dramatically to the right, landing in the trees or worse. The slice is the most common swing fault I see in my teaching, affecting roughly eighty percent of amateur golfers at some point in their journey. Here’s the good news: you don’t need to rebuild your entire swing to fix it. In fact, most slices can be dramatically improved with just a few simple adjustments that you can start working on today.
Understanding What Actually Causes a Slice
Before we dive into the fixes, let’s talk about what’s really happening when you slice the ball. A slice occurs when the clubface is open relative to the path of your swing at impact. In simpler terms, the club is pointing to the right of where it’s moving, which puts sidespin on the ball and sends it curving away from your target. This is important to understand because many golfers try to fix their slice by aiming further left, which only makes the problem worse.
The slice is not a character flaw, and it doesn’t mean you’re a bad golfer. It’s simply a predictable ball flight pattern that results from specific positions and movements in your swing. Once you understand the cause, you can address it systematically. Most slices come from a combination of three factors: grip issues, alignment problems, and lack of clubface awareness. The beauty of this is that all three can be improved without changing your natural swing motion.

Fix Number One: Get Your Grip Right
Your grip is the foundation of everything that happens in your golf swing. If your grip is too weak—meaning your hands are rotated too far to the left on the club—it becomes nearly impossible to square the clubface at impact. This is the single most common cause of slicing that I see in my lessons, and it’s also the easiest to fix.
Here’s how to check your grip. Take your normal grip and look down at your hands. You should be able to see at least two knuckles on your left hand. If you can only see one knuckle or none at all, your grip is too weak. To strengthen your grip, rotate both hands slightly to the right on the club. Your left hand should show two to three knuckles, and the V formed by your right thumb and forefinger should point toward your right shoulder.
This adjustment might feel strange at first, and that’s completely normal. Your old grip has been ingrained through repetition, so a new grip will feel uncomfortable for a while. Give yourself at least a few range sessions to adapt before judging the results. I promise you, a proper grip will make squaring the clubface exponentially easier, and you’ll start seeing straighter ball flights almost immediately.

Fix Number Two: Check Your Alignment
This might surprise you, but many golfers who think they’re slicing are actually just aimed to the right from the start. Poor alignment is an invisible swing killer because you can’t see it yourself when you’re standing over the ball. You might be making a perfectly good swing, but if your feet, hips, and shoulders are aimed right of your target, the ball is going to start right and curve even further right.
The solution is simple but requires discipline. Before every shot, pick a spot on the ground about three feet in front of your ball that’s on your target line. Use that spot as your reference point for alignment. Set the clubface square to that spot first, then align your feet, hips, and shoulders parallel to your target line. Think of it like standing on railroad tracks—the ball is on one track heading toward the target, and your body is on the parallel track.
If you’re serious about fixing your alignment, invest in a set of alignment sticks. These inexpensive training aids are worth their weight in gold. Place one along your target line and another parallel to it where your feet will be. Practice with these sticks on the range until proper alignment becomes second nature. You’ll be amazed at how much straighter your shots become when you’re actually aimed at your target.
Fix Number Three: Develop Clubface Awareness
Most golfers have no idea where their clubface is pointing at impact. They focus on their swing path, their tempo, their weight shift—everything except the one thing that matters most. The clubface is responsible for roughly seventy-five percent of your ball’s starting direction. If you want to eliminate your slice, you need to develop an awareness of where that clubface is pointing throughout your swing.
Here’s a simple drill to build clubface awareness. Take your setup position with a seven-iron, then slowly swing the club back to waist height. Stop and look at the clubface. The leading edge should be roughly matching the angle of your spine. If it’s pointing more toward the sky, the face is open. Now swing through to waist height on your follow-through and check again. The toe of the club should be pointing up, not out toward the target line.
The goal is to feel the clubface rotating naturally through impact. Many slicers hold the face open because they’re afraid of hooking the ball. This fear creates tension in the hands and wrists, which prevents the natural release of the club. Trust that a proper grip and good alignment will allow the clubface to square up naturally. You don’t need to manipulate it—you just need to let it happen.

The Range Drill That Changes Everything
Now that we’ve covered the three main fixes, let’s talk about a simple drill you can do at the range to tie everything together. I call it the “Feet Together Drill,” and it’s one of the most effective exercises for eliminating a slice because it forces you to use your body rotation instead of your arms.
Start by teeing up a ball and taking your normal setup, but bring your feet together so they’re almost touching. Make smooth, controlled swings focusing on rotating your body through impact. You’ll immediately notice that you can’t muscle the ball or swing too hard from this position—you have to use rotation and timing. This drill promotes a proper release of the club and helps you feel what it’s like to square the clubface through impact.
Start with half swings and work your way up to fuller swings as you get comfortable. Don’t worry about distance—focus on making solid contact and hitting straight shots. Once you can hit ten consecutive straight shots with your feet together, gradually widen your stance back to normal. You’ll find that the feeling of proper rotation and release carries over into your regular swing.
Progress Over Perfection: The Mental Shift You Need
Here’s something I tell every student who comes to me with a slice: you’re not going to fix this overnight, and that’s okay. Golf improvement is a journey, not a destination. The goal isn’t to hit every shot perfectly straight—the goal is to make consistent progress and reduce the severity of your slice over time.
Give yourself permission to be patient with the process. Work on one fix at a time rather than trying to change everything at once. Start with your grip, spend a week getting comfortable with it, then add alignment work. Once those two elements feel natural, focus on clubface awareness. This systematic approach will lead to lasting improvement rather than temporary band-aids.
Also, understand that you might hit some hooks or pulls as you work on these changes. That’s actually a good sign—it means you’re overcorrecting, which is a natural part of the learning process. A hook is much easier to fix than a slice because it means you’re now closing the clubface. You’re on the right track; you just need to fine-tune the amount of rotation.

You Can Do This
I’ve taught thousands of golfers over my career, and I can tell you with absolute certainty that the slice is fixable. I’ve seen fifteen handicappers become single-digit players simply by addressing these fundamental issues. I’ve watched frustrated golfers rediscover their love for the game once they could finally hit the ball straight. You can be one of those success stories.
The key is commitment to the process. Take these fixes to the range and give them an honest effort. Work on your grip until it feels natural. Use alignment sticks until proper setup becomes automatic. Practice the feet-together drill until you can feel the clubface squaring through impact. Track your progress over weeks and months, not days. Celebrate the small victories—the drive that only curved slightly instead of dramatically, the approach shot that started on line, the round where you kept more balls in play.
Remember, every great golfer you’ve ever watched on television has dealt with swing issues at some point. The difference between them and the average golfer isn’t talent—it’s the willingness to identify problems, work on solutions, and trust the process. You have everything you need to eliminate your slice. Now it’s time to get to work.
The next time you’re at the range, before you start hitting balls, take a moment to check your grip, verify your alignment, and make a few slow swings focusing on clubface awareness. Then work through the feet-together drill. I guarantee you’ll see improvement. And when you do, remember this feeling—because that’s the feeling of progress, and it’s what will keep you coming back for more.
Your best golf is ahead of you. Let’s go find it together.
-
Product Review6 years agoThe Perfect Practice Putting Mat Review by Jason Tenzer
-
Blog5 years agoLoophole Rule Offers PGA Tour Pros a Mulligan
-
Blog5 years ago2021 Buyer’s Guide: The Top 10 Value Golf Balls For Distance & Feel
-
Blog5 years agoGolf Marriage Counselor
-
Product Review6 years agoTHE ADJUSTABLE IRONS: WALKING STICKS GOLF CLUBS
-
Blog7 years ago9 Biggest Chokes Of The Past Decade
-
Blog5 years agoWhat Your Golf Clubs Say About You
-
Golf News2 months agoThe latest news in golf

