Connect with us

Golf Drills/Practice

How to Finally Eliminate Your Slice (Without Rebuilding Your Swing)

Learn how to eliminate your slice without rebuilding your swing. A PGA Pro shares simple fixes for grip, alignment, and clubface control that work for everyday golfers.

Avatar photo

Published

on

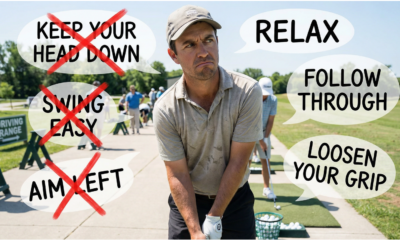
If you’re reading this article, chances are you’ve hit more than your fair share of banana balls off the tee. You know the feeling—you step up to the first tee with confidence, make what feels like a decent swing, and watch in frustration as your ball curves dramatically to the right, landing in the trees or worse. The slice is the most common swing fault I see in my teaching, affecting roughly eighty percent of amateur golfers at some point in their journey. Here’s the good news: you don’t need to rebuild your entire swing to fix it. In fact, most slices can be dramatically improved with just a few simple adjustments that you can start working on today.

Understanding What Actually Causes a Slice

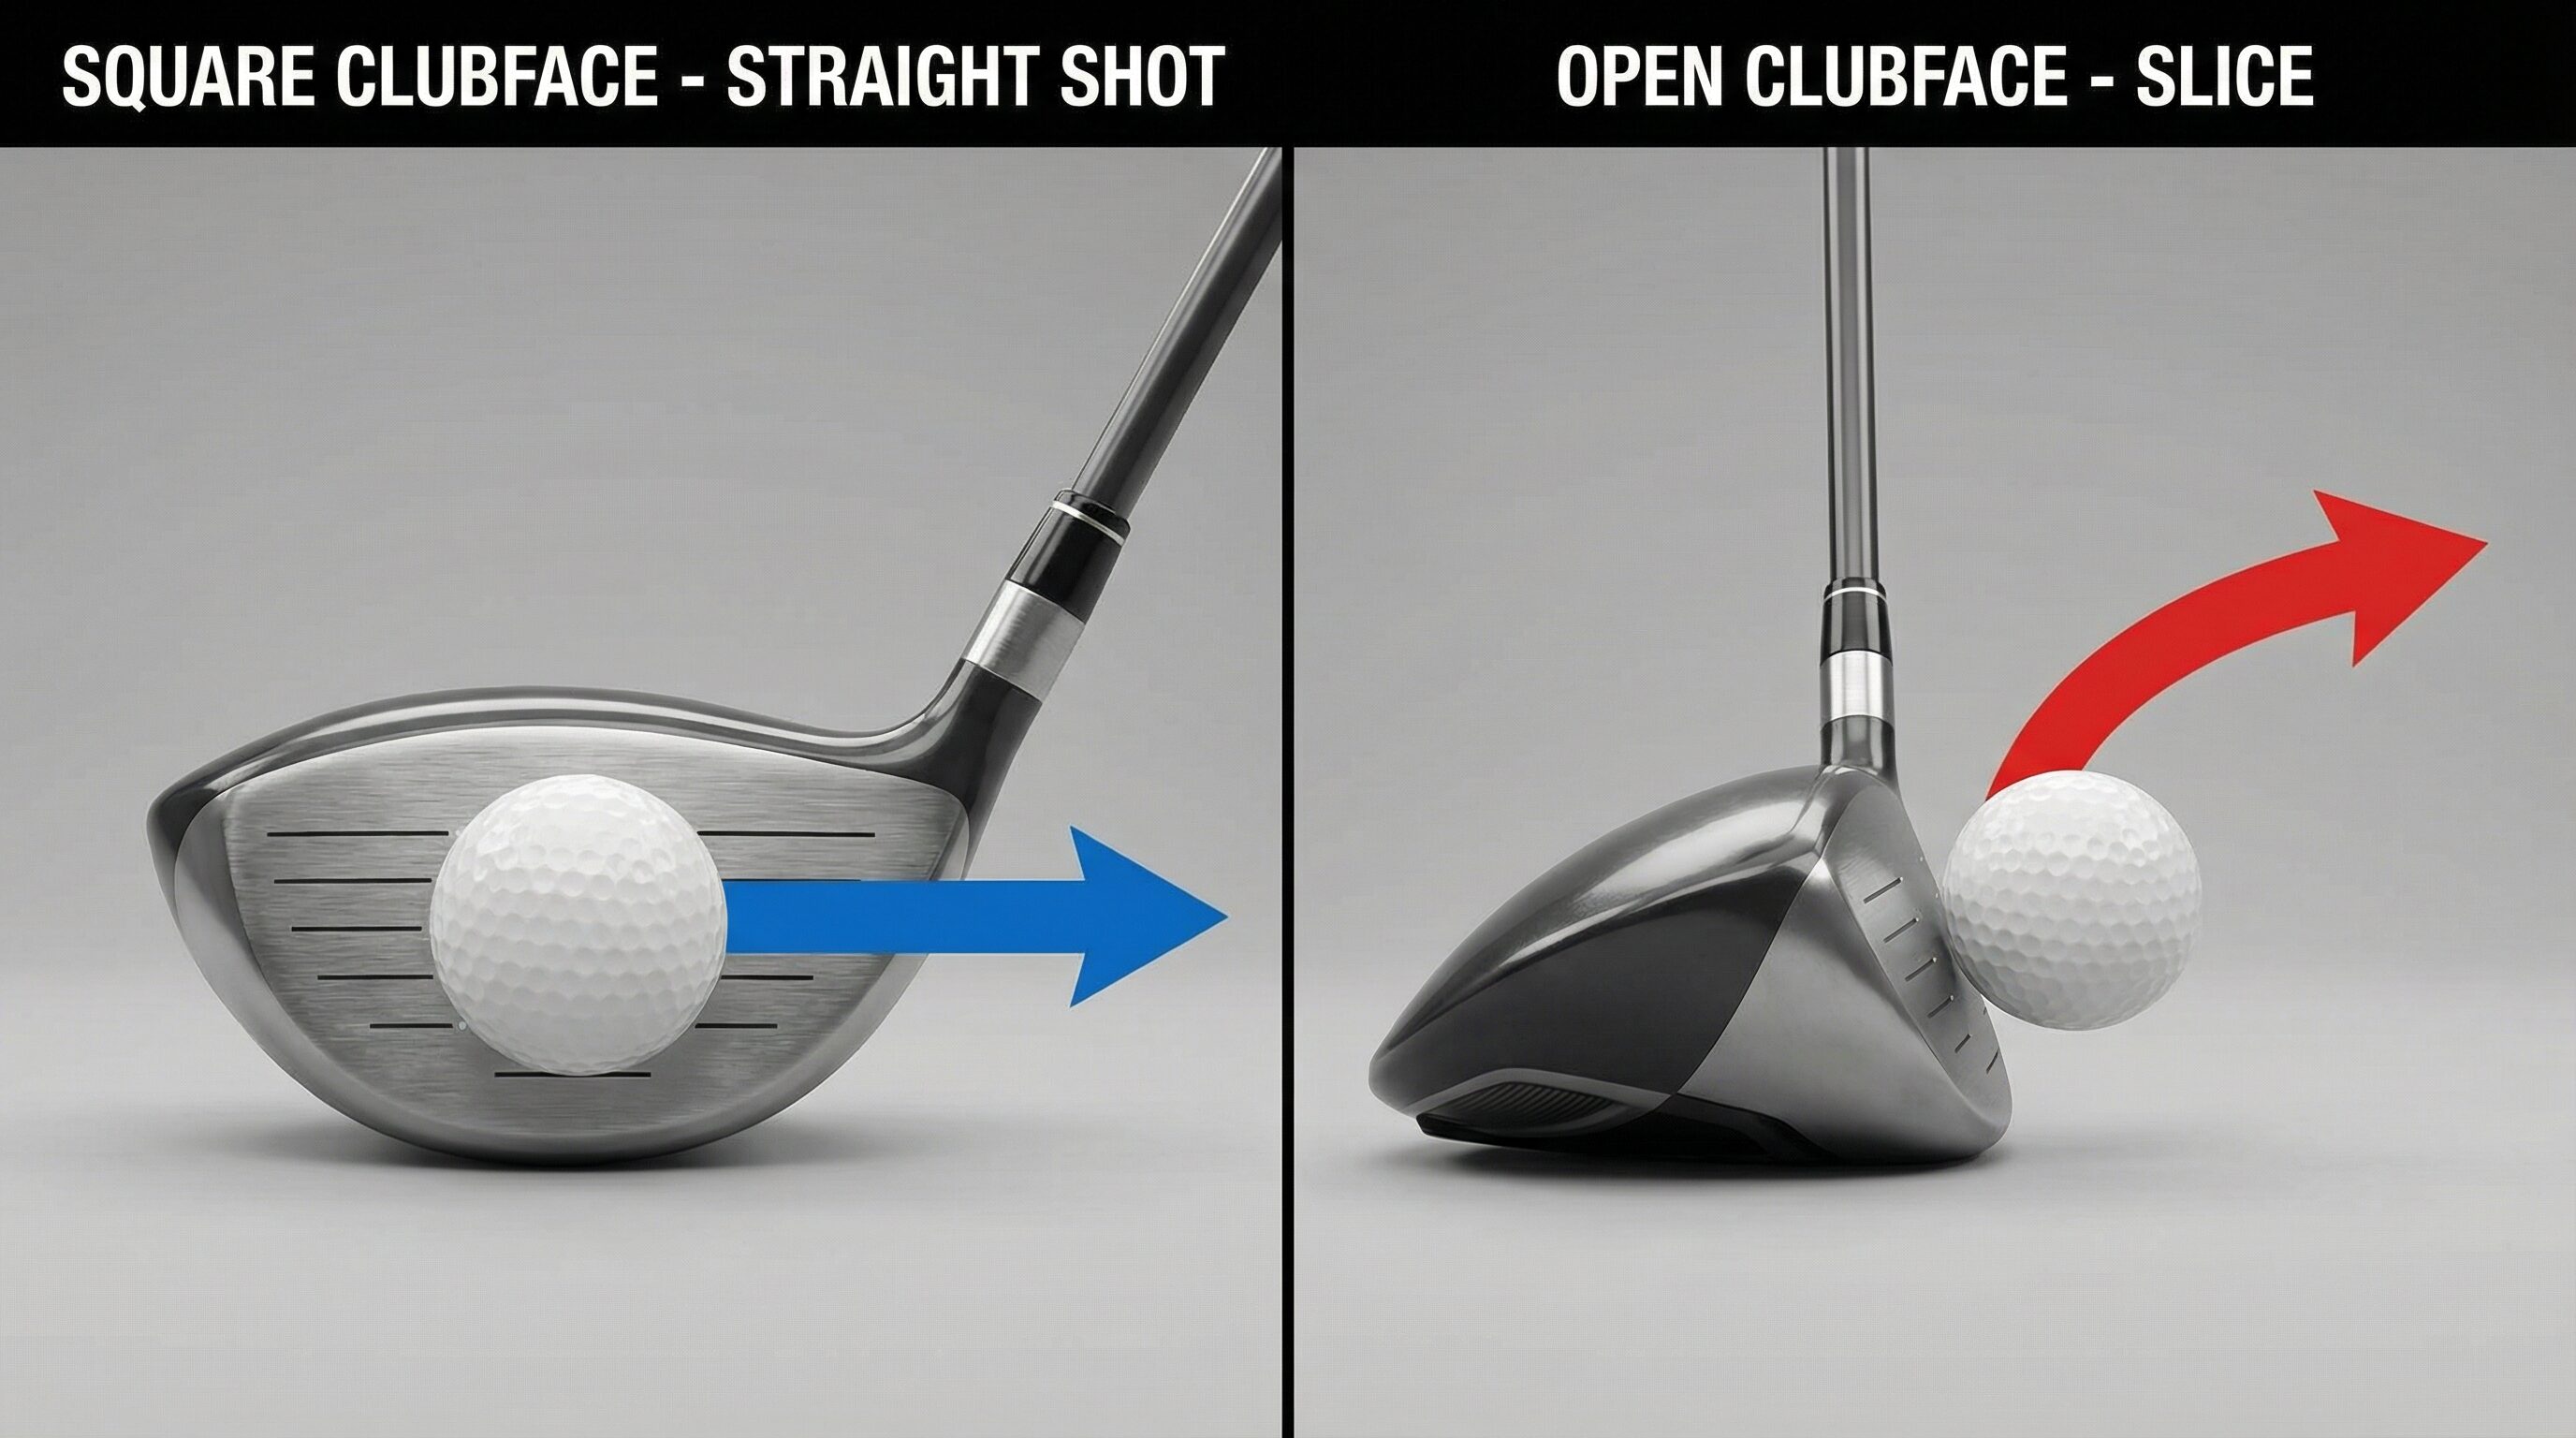
Before we dive into the fixes, let’s talk about what’s really happening when you slice the ball. A slice occurs when the clubface is open relative to the path of your swing at impact. In simpler terms, the club is pointing to the right of where it’s moving, which puts sidespin on the ball and sends it curving away from your target. This is important to understand because many golfers try to fix their slice by aiming further left, which only makes the problem worse.

The slice is not a character flaw, and it doesn’t mean you’re a bad golfer. It’s simply a predictable ball flight pattern that results from specific positions and movements in your swing. Once you understand the cause, you can address it systematically. Most slices come from a combination of three factors: grip issues, alignment problems, and lack of clubface awareness. The beauty of this is that all three can be improved without changing your natural swing motion.

A side-by-side comparison showing a closed clubface versus an open clubface at impact, with arrows indicating ball flight direction.

Fix Number One: Get Your Grip Right

Your grip is the foundation of everything that happens in your golf swing. If your grip is too weak—meaning your hands are rotated too far to the left on the club—it becomes nearly impossible to square the clubface at impact. This is the single most common cause of slicing that I see in my lessons, and it’s also the easiest to fix.

Here’s how to check your grip. Take your normal grip and look down at your hands. You should be able to see at least two knuckles on your left hand. If you can only see one knuckle or none at all, your grip is too weak. To strengthen your grip, rotate both hands slightly to the right on the club. Your left hand should show two to three knuckles, and the V formed by your right thumb and forefinger should point toward your right shoulder.

This adjustment might feel strange at first, and that’s completely normal. Your old grip has been ingrained through repetition, so a new grip will feel uncomfortable for a while. Give yourself at least a few range sessions to adapt before judging the results. I promise you, a proper grip will make squaring the clubface exponentially easier, and you’ll start seeing straighter ball flights almost immediately.

Fix Number Two: Check Your Alignment

This might surprise you, but many golfers who think they’re slicing are actually just aimed to the right from the start. Poor alignment is an invisible swing killer because you can’t see it yourself when you’re standing over the ball. You might be making a perfectly good swing, but if your feet, hips, and shoulders are aimed right of your target, the ball is going to start right and curve even further right.

The solution is simple but requires discipline. Before every shot, pick a spot on the ground about three feet in front of your ball that’s on your target line. Use that spot as your reference point for alignment. Set the clubface square to that spot first, then align your feet, hips, and shoulders parallel to your target line. Think of it like standing on railroad tracks—the ball is on one track heading toward the target, and your body is on the parallel track.

ADVERTISEMENT

If you’re serious about fixing your alignment, invest in a set of alignment sticks. These inexpensive training aids are worth their weight in gold. Place one along your target line and another parallel to it where your feet will be. Practice with these sticks on the range until proper alignment becomes second nature. You’ll be amazed at how much straighter your shots become when you’re actually aimed at your target.

Fix Number Three: Develop Clubface Awareness

Most golfers have no idea where their clubface is pointing at impact. They focus on their swing path, their tempo, their weight shift—everything except the one thing that matters most. The clubface is responsible for roughly seventy-five percent of your ball’s starting direction. If you want to eliminate your slice, you need to develop an awareness of where that clubface is pointing throughout your swing.

Here’s a simple drill to build clubface awareness. Take your setup position with a seven-iron, then slowly swing the club back to waist height. Stop and look at the clubface. The leading edge should be roughly matching the angle of your spine. If it’s pointing more toward the sky, the face is open. Now swing through to waist height on your follow-through and check again. The toe of the club should be pointing up, not out toward the target line.

The goal is to feel the clubface rotating naturally through impact. Many slicers hold the face open because they’re afraid of hooking the ball. This fear creates tension in the hands and wrists, which prevents the natural release of the club. Trust that a proper grip and good alignment will allow the clubface to square up naturally. You don’t need to manipulate it—you just need to let it happen.

A golfer demonstrating the waist-high checkpoint drill, showing proper clubface position at waist height in the backswing.

The Range Drill That Changes Everything

Now that we’ve covered the three main fixes, let’s talk about a simple drill you can do at the range to tie everything together. I call it the “Feet Together Drill,” and it’s one of the most effective exercises for eliminating a slice because it forces you to use your body rotation instead of your arms.

Start by teeing up a ball and taking your normal setup, but bring your feet together so they’re almost touching. Make smooth, controlled swings focusing on rotating your body through impact. You’ll immediately notice that you can’t muscle the ball or swing too hard from this position—you have to use rotation and timing. This drill promotes a proper release of the club and helps you feel what it’s like to square the clubface through impact.

Start with half swings and work your way up to fuller swings as you get comfortable. Don’t worry about distance—focus on making solid contact and hitting straight shots. Once you can hit ten consecutive straight shots with your feet together, gradually widen your stance back to normal. You’ll find that the feeling of proper rotation and release carries over into your regular swing.

Progress Over Perfection: The Mental Shift You Need

Here’s something I tell every student who comes to me with a slice: you’re not going to fix this overnight, and that’s okay. Golf improvement is a journey, not a destination. The goal isn’t to hit every shot perfectly straight—the goal is to make consistent progress and reduce the severity of your slice over time.

Give yourself permission to be patient with the process. Work on one fix at a time rather than trying to change everything at once. Start with your grip, spend a week getting comfortable with it, then add alignment work. Once those two elements feel natural, focus on clubface awareness. This systematic approach will lead to lasting improvement rather than temporary band-aids.

Also, understand that you might hit some hooks or pulls as you work on these changes. That’s actually a good sign—it means you’re overcorrecting, which is a natural part of the learning process. A hook is much easier to fix than a slice because it means you’re now closing the clubface. You’re on the right track; you just need to fine-tune the amount of rotation.

A golfer on the practice range with alignment sticks, working through drills with a focused, positive demeanor.

You Can Do This

I’ve taught thousands of golfers over my career, and I can tell you with absolute certainty that the slice is fixable. I’ve seen fifteen handicappers become single-digit players simply by addressing these fundamental issues. I’ve watched frustrated golfers rediscover their love for the game once they could finally hit the ball straight. You can be one of those success stories.

The key is commitment to the process. Take these fixes to the range and give them an honest effort. Work on your grip until it feels natural. Use alignment sticks until proper setup becomes automatic. Practice the feet-together drill until you can feel the clubface squaring through impact. Track your progress over weeks and months, not days. Celebrate the small victories—the drive that only curved slightly instead of dramatically, the approach shot that started on line, the round where you kept more balls in play.

Remember, every great golfer you’ve ever watched on television has dealt with swing issues at some point. The difference between them and the average golfer isn’t talent—it’s the willingness to identify problems, work on solutions, and trust the process. You have everything you need to eliminate your slice. Now it’s time to get to work.

The next time you’re at the range, before you start hitting balls, take a moment to check your grip, verify your alignment, and make a few slow swings focusing on clubface awareness. Then work through the feet-together drill. I guarantee you’ll see improvement. And when you do, remember this feeling—because that’s the feeling of progress, and it’s what will keep you coming back for more.

Your best golf is ahead of you. Let’s go find it together.

Continue Reading
Advertisement
Click to comment

Leave a Reply

Your email address will not be published. Required fields are marked *

Drills

Master Your Game: 3 Range Drills You Can Do in Just 20 Minutes

Short on time but want to lower your scores? Our Resident PGA Pro shares 3 range drills that take only 20 minutes but deliver maximum results for your game improvement.

Avatar photo

Published

on

3 Range Drills You Can Do in 20 Minutes - professional golf photography for Master Your Game: 3 Range Drills You Can Do in Just 20 Minutes

We have all been there. You have a tee time in forty minutes, your swing feels a bit out of sync, and you are frantically pounding a bucket of balls without a clear plan. As a PGA Pro, I see this every single day on the practice tee—golfers searching for a miracle in a bucket of 100 balls. The truth is, more volume rarely leads to better scores. What you actually need is a structured, purposeful routine that sharpens your mechanics and prepares your mind for the course.

Quality practice is about intention, not duration. In today’s fast-paced world, finding three hours for the range is a luxury most of us don’t have. That is why I have developed these 3 range drills specifically designed for the golfer on a schedule. Whether you are looking for game improvement or just a quick tune-up before your Saturday morning round, let’s work through this together to ensure every swing you take actually moves the needle on your handicap.

The Gate Drill for Pure Ball Striking

The first of our 3 range drills focuses on the most fundamental aspect of the game: center-face contact. I often tell my students that you can have the most beautiful swing in the world, but if you cannot find the middle of the clubface, it simply does not matter. This drill is designed to provide immediate, tactile feedback on your swing path and impact point.

To set this up, place two alignment sticks or even two golf tees just slightly wider than the width of your clubhead. Place your ball directly in the center of this “gate.” The goal is simple: strike the ball without touching the gates. If you tend to come over the top, you will likely clip the outer gate. If your path is too far from the inside, the inner gate will let you know immediately. This is about precision and discipline.

Why Feedback Matters in Game Improvement

The reason this works so well for game improvement is that it removes the guesswork. When you are practicing alone, it is easy to fall into the trap of “feeling” like you made a good swing when the result was actually a lucky miss. The gate drill forces your hands and brain to coordinate a neutral path. Start with half-swings using a 7-iron to get the feel, then gradually work up to full speed.

In my years of teaching, I have found that golfers who spend just five minutes on this drill develop a much higher level of “clubhead awareness.” You begin to feel where the head is in space. By the time you reach the first tee, your subconscious is already calibrated to find the sweet spot. Remember, we aren’t looking for power here; we are looking for the pure click of a centered strike.

ADVERTISEMENT

The 9-Shot Challenge: Mastering Flight Control

Once we have established solid contact, we need to move toward shot-making. This is the second of our 3 range drills, and it is a personal favorite of mine for 2025 prep. On the course, you rarely face a perfectly flat lie with no wind. You need to be able to curve the ball and control the trajectory. The 9-Shot Challenge forces you to become a creator rather than a mechanical robot.

Here is how it works: you are going to attempt nine different shots in a row. These include a low draw, a low straight shot, and a low fade; then a medium draw, medium straight, and medium fade; and finally, a high draw, high straight, and high fade. Don’t worry if you can’t pull off all nine perfectly at first. The key is the intent. By trying to change your ball flight, you learn how your setup and swing path affect the outcome.

Technical Adjustments for Shape and Height

To hit it low, move the ball slightly back in your stance and keep your finish abbreviated. To hit it high, move it forward and let your hands finish high over your shoulder. For the draws and fades, focus on your alignment and your clubface at impact. If you want to fade it, open your stance slightly but keep the face pointed at the target. To draw it, do the opposite.

This drill is one of the best golf tips I can give for mental toughness. It prevents you from getting into a “range groove” where you hit the same club to the same target over and over. In a real round, every shot is different. By practicing these variations, you are building a toolkit that you can rely on when the wind picks up or you need to navigate around a tree on the back nine.

The Pressure-Cooker Finish

The final phase of our 20-minute session is about simulation. Many golfers can hit beautiful shots on the range but struggle to translate that to the course. This is often because the range lacks consequences. To fix this, we use the “Pressure-Cooker” drill. Pick a specific target on the range—perhaps a yardage marker or a specific flag—and imagine it is the 18th green with a career-best score on the line.

You must hit three different clubs (for example, a driver, a 6-iron, and a wedge) to three different targets. If you miss a target, you have to start the sequence over. This introduces a small but effective level of performance anxiety. It forces you to go through your full pre-shot routine: pick your line, take your breath, visualize the flight, and execute. You aren’t just hitting balls anymore; you are playing golf.

Incorporating Game Improvement Goals

As we look toward your goals for the coming year, this type of “random practice” is what separates the single-digits from the high-handicappers. It builds what we call “functional skill.” When you only have 20 minutes, spending the last five minutes under self-imposed pressure ensures that your brain stays engaged. It bridges the gap between the relaxed environment of the practice tee and the high-stakes environment of the competition.

I always tell my students: don’t leave the range until you’ve “completed” a pressure task. Even if it’s just hitting one fairway with your driver, that small win builds confidence. You want to walk to your car feeling like a winner, not like someone who just went through the motions. This intentionality is the secret sauce to rapid improvement.

Conclusion: Making the Most of Your Practice

Effective practice doesn’t require hours of your time; it requires a plan. By utilizing these 3 range drills—the Gate Drill for contact, the 9-Shot Challenge for control, and the Pressure-Cooker for realism—you can transform your game in just 20 minutes. Focus on the fundamentals, stay disciplined with your routine, and remember that every shot should have a purpose. If you commit to this structured approach, I guarantee you will see your scores begin to drop as your confidence rises.

I want to hear from you as you implement these routines. Which of these drills do you think will be the biggest challenge for your current game? Have you tried this type of timed practice before? Share your thoughts and your progress in the comments below! Let’s make 2026 your best year on the links yet.

Continue Reading

Drills

The 3-Putt Killer: A Simple Drill to Master Your Speed Control

Eliminate three-putts for good with this simple and effective putting drill. Our Resident PGA Pro breaks down how to master your speed control and transform your game on the greens.

Avatar photo

Published

on

There is nothing more frustrating in golf than a three-putt. You’ve done the hard work of getting to the green, only to give away a shot with a clumsy performance on the putting surface. The primary culprit for most amateurs? Poor speed control. In this article, we will break down a simple drill, which is an effective putting drill designed to help you eliminate three-putts by mastering your speed control. This is a fundamental putting practice that can transform your game.

Understanding the Importance of Speed Control

Most golfers focus excessively on the line of their putt. While the line is important, speed is the dominant factor in successful putting. If your speed is correct, the ball has a much better chance of falling into the hole, even if the line is slightly off. Good speed control ensures that even your missed putts leave you with a simple tap-in, taking the dreaded three-putt out of play. This putting drill is designed to train your brain and body to feel the correct distance, which is the key to consistent speed.

The Ladder, A Simple Drill: Your Path to Fewer Putts

One of the most effective drills for improving speed control is the “Ladder Drill.” It’s a simple putting practice that requires only three balls and a putter. Here’s how to set it up and execute it to perfection.

Step 1: Setting Up the Drill

Find a relatively flat area on the practice green. You don’t need a hole for this drill. Place three balls in a line, about three feet apart from each other, starting about 10 feet from the edge of the green. Your setup should look like a ladder, with each ball representing a rung.

ADVERTISEMENT

Step 2: Executing the Drill

1.First Putt (10 feet): Start with the ball closest to you (10 feet from the edge). Your goal is to putt the ball so that it stops as close to the fringe as possible without going off the green.

2.Second Putt (13 feet): Move to the second ball. Again, your goal is to get the ball as close to the fringe as possible.

3.Third Putt (16 feet): Finally, putt the third ball with the same objective.

After you have completed the first “ladder,” retrieve your balls and repeat the process from different distances and angles. The key is to create a new challenge each time. This forces you to adapt and develop a feel for different putt lengths.

A close-up of a golf ball rolling on a putting green showing speed control.

Why This Putting Drill Works

The Ladder Drill is effective because it isolates the feeling of distance. By removing the hole as a target, you are forced to concentrate solely on the speed of the putt. This helps you develop a more intuitive sense of how hard to hit the ball to cover a specific distance. Consistent practice of this drill will help you eliminate three-putts and build confidence on the greens.

Key Takeaways for Your Putting Practice

•Focus on Speed: Prioritize speed over line in your putting practice.

•Practice with Purpose: Use drills like the Ladder Drill to create a structured and effective practice routine.

•Develop Your Feel: The goal is to develop an intuitive feel for distance, which will translate to better performance on the course.

By incorporating this simple putting drill into your regular practice, you will be well on your way to becoming a more confident and consistent putter. Say goodbye to the frustration of the three-putt and hello to lower scores. What are your favorite putting drills for speed control? Share your thoughts in the comments below!

Continue Reading

Drills

Golf Fitness for the Off-Season: Build Strength, Flexibility, and Power Before Spring

Now is the time to get in shape before the season starts. Start your routine now so you can be ready.

Avatar photo

Published

on

As the days grow shorter and the golf courses are covered in a blanket of frost or snow, it’s easy to let your clubs gather dust in the garage. But what if this winter off-season wasn’t an end, but a beginning? What if you could use these next few months to build a stronger, more flexible, and more powerful body, emerging in the spring not just rust-free, but fundamentally better than you were last season?

Welcome to your off-season game plan. This isn’t about grueling, two-hour gym sessions. This is a smart, targeted approach to golf fitness that will increase your clubhead speed, improve your consistency, and dramatically reduce your risk of injury. By focusing on the three pillars of athletic performance—Mobility, Strength, and Power—you can transform your game without ever hitting a ball.

Why Off-Season Fitness is a Game-Changer

During the golf season, our focus is on playing. It’s difficult to make significant physical gains when your body is also trying to recover from rounds and practice sessions. The off-season, however, presents a golden opportunity. It’s a dedicated block of time where you can push your body, build a solid foundation, and make improvements that are simply not possible mid-season .

Furthermore, the physical qualities required for a powerful and resilient golf swing are the exact same qualities essential for long-term health and vitality. As we age, we naturally lose muscle mass, strength, and power—a process that is catastrophic for both our golf game and our quality of life. The good news? All of these factors are incredibly trainable at any age. Research on adults aged 60 to 83 years found that just 8-16 weeks of resistance training improved maximal strength by approximately 18% and rate of force development by 27% . The workout that adds 15 yards to your drive is the same one that helps you carry groceries with ease and stay independent for decades to come.

The Three Pillars of a Powerful Golf Swing

A successful golf fitness program doesn’t need to be complicated. It should be built on a consistent and progressive approach focused on three key areas.

The three pillars of golf fitness

Pillar 1: Mobility – The Foundation of a Fluid Swing

Mobility is the ability to move a joint through its full range of motion with control. For golfers, this is non-negotiable. Without adequate mobility in your hips, thoracic spine (upper back), and shoulders, your body will be forced to find that rotation from other, less stable areas, like your lower back—a leading cause of golf-related pain and injury.

Why it Matters: A bigger turn in your backswing creates a longer arc, which directly translates to more clubhead speed. How much you turn your pelvis and torso, and how far your hands travel around the clock in the backswing, play a very important role in your club head speed . Improved mobility allows you to generate this rotation safely and efficiently.

The Focus: Hips, Thoracic Spine, Shoulders. The beauty of mobility training is that it doesn’t require any equipment, is not very taxing, and the gains are immediate. It doesn’t even require much training time.

Key golf mobility exercises demonstration

Pillar 2: Strength – The Engine of Your Swing

Strength is the ability to produce force. It’s the engine that powers your golf swing. A stronger body is a more stable body, allowing you to maintain your posture and balance from address to follow-through. It’s also the foundation upon which you build power.

Why it Matters: Strength is essential for creating speed, controlling the club, and preventing the breakdown of swing mechanics due to fatigue over 18 holes. It is arguably the most underappreciated physical quality in the general population, and it requires specific training to maintain . Everyday tasks or just being active is not sufficient to preserve muscle strength as we age.

ADVERTISEMENT

The Focus: Full-body, compound movements like squats, hinges (deadlifts), presses, and rows. These exercises engage multiple muscle groups simultaneously, building functional strength that translates directly to the golf course.

Pillar 3: Power – Unleashing Your Speed

If strength is the size of your engine, power is how quickly you can rev it. In golf, this is known as Rate of Force Development (RFD)—how rapidly you can generate force. The golf swing is an explosive, athletic movement that happens in the blink of an eye. You don’t have time to gradually ramp up to maximum force; you need to be able to summon it instantly.

Why it Matters: RFD is the physical quality most closely correlated with clubhead speed. It declines more rapidly with age than strength or muscle mass, which is why explosive training is a critical, yet often overlooked, component of golf fitness . A minuscule percentage of adults train explosively, but those who do see dramatic improvements in their ability to generate speed.

The Focus: Explosive movements like medicine ball throws, jumps, and kettlebell swings. These exercises train your nervous system to recruit muscle fibers rapidly, creating the explosive power needed for a fast, powerful swing.

Your At-Home Off-Season Workout Plan

You don’t need a fancy gym membership to build a golf-ready body. This simple and effective workout can be done at home with minimal equipment (a few dumbbells or kettlebells and resistance bands are helpful).

Frequency: Perform this full-body workout 2-3 times per week on non-consecutive days.

Exercise CategoryExercise ExampleSets & RepsWhy It Helps Your Golf Game
1. Dynamic Warm-Up90/90 Hip Switches2 sets of 10 reps/sideImproves hip internal and external rotation, crucial for a powerful backswing and follow-through.
(Mobility)Cat-Cow2 sets of 10 repsMobilizes the spine, warming up the muscles of the back and core.
Thoracic Rotations (Quadruped)2 sets of 8 reps/sideIncreases rotation in the upper back, allowing for a bigger, safer turn away from the ball.
2. PowerMedicine Ball Rotational Slams3 sets of 5 reps/sideDevelops explosive power in the transverse (rotational) plane, mimicking the golf swing.
Box Jumps (or Broad Jumps)3 sets of 5 repsTrains lower body explosiveness and improves your ability to use the ground for power.
3. StrengthGoblet Squats3 sets of 8-10 repsBuilds lower body and core strength, essential for stability and power generation.
Dumbbell Bent-Over Rows3 sets of 8-10 repsStrengthens the back and shoulders, helping to maintain posture throughout the swing.
Glute Bridges3 sets of 12-15 repsActivates and strengthens the glutes, the most powerful muscles in your body and key for a stable swing.
4. CorePallof Press3 sets of 10 reps/sideAn anti-rotation exercise that builds incredible core stability to resist unwanted movement during the swing.
Dead Bug3 sets of 10 reps/sideImproves coordination and strengthens the deep core muscles that protect your lower back.

Progression: Start at an appropriate level for your current fitness, and slowly and gradually increase the demand of the training as you improve. This principle of progressive overload is the key to long-term gains.

Injury Prevention: Play Smarter, Not Harder

The repetitive nature of the golf swing can take a toll on the body. The most common injuries are not acute, sudden events, but chronic overuse issues that build up over time . The lower back, wrists, and elbows are particularly vulnerable.

“People often think swinging a golf club is just about the arms and shoulders, but it’s really a total body workout,” explains Dr. Daniel Komlos, an orthopedic surgeon at Houston Methodist. “Building strength is also critical for injury prevention, since the repetitive motions and prolonged gripping that come with playing golf can take a toll on your muscles and joints.”

Golf injury prevention guide

Interestingly, while golfer’s elbow (medial epicondylitis) gets its name from the sport, lateral epicondylitis—more commonly known as tennis elbow—is actually the more prevalent elbow injury among golfers . This happens because of the prolonged grip and positioning of the wrist while gripping a golf club. Other potential injuries include triceps tendonitis, rotator cuff injuries, and lower back sprains and strains.

Here are the most important strategies to stay injury-free:

Always Warm Up: Never step onto the first tee cold. A 5-10 minute dynamic warm-up (like the one in the workout plan) increases blood flow to your muscles and prepares your joints for the rotational demands of the swing. Stretch frequently, using slow, controlled movements that work through your full range of motion. Pay particular attention to the mobility of your shoulders, neck, wrists, and lower back, since flexibility is key for a smooth swing .

Listen to Your Body: This is the golden rule. Pain is your body’s signal that something is wrong. The “no pain, no gain” mantra does not apply to joint pain in golf. If you feel a sharp or unusual pain, it’s time to rest. After about two weeks, you should be pain-free and can return to playing. But if you notice the pain comes back, you should stop and see a doctor . Pushing through pain is the fastest way to turn a minor issue into a major setback.

Strengthen Your Core: A strong and stable core is your best defense against lower back pain. It acts as a corset, protecting your spine from excessive rotational forces. Incorporate exercises like planks, bridges, and rotational core work into your routine.

Build Gradually: If you haven’t played in a while, don’t jump into a full round or multiple rounds in quick succession. Increase practice intensity and frequency slowly to avoid overuse. This is especially important as we age, when muscles and joints are more prone to overuse injuries.

Conclusion: The Time to Start is Now

The winter off-season is a gift. It’s an opportunity to invest in your most important piece of golf equipment: your body. By dedicating just a few hours a week to a structured fitness program, you can build a foundation of mobility, strength, and power that will pay massive dividends when the season begins.

Don’t wait for spring to start thinking about your golf game. Start today. Begin with the mobility exercises, gradually incorporate the strength and core work, and then add in the power movements as you feel comfortable. Track your progress, stay consistent, and trust the process. When you step onto the first tee next season, you won’t just feel ready—you’ll be objectively, measurably better. Your swing will be faster, your body will be more resilient, and your scores will reflect the work you put in during the cold months.

References

[1] Carroll, M. (2025, October 8). Off Season Golf Workouts: Build Speed, Strength, and Mobility. Fit For Golf.

[2] Houston Methodist. (2025, February 24). A Golfer’s Guide to Strength, Mobility, and Injury Prevention.

Continue Reading

Trending

Click here to get all the latest golf news

Close
0

Subtotal