Golf Drills/Practice
How Using a Headcover Can Help You Hit Longer Drives

Everyone wants to drive the golf ball like the pros do. There’s nothing like teeing the ball high, rearing back, and smacking the ball long and far down the fairway. But for a lot of recreational players, that sequence is just a fantasy.
For many players, a steep swing is the culprit for the inability to hit long and towering drives. With a steep angle of attack, the clubhead hits the outside of the ball and does not have enough loft to properly launch the ball off the tee. The result is low and spinny fades that lack power.
To fix this flaw, you’ll need to teach yourself to route the clubhead from an inside path as you approach the ball, and with an upward angle of attack. GOLF Top 100 Teacher Jonathan Yarwood has the perfect drill for this move — and all the components can be found in your golf bag.

Great drill alert! Get the path more to the right and angle of attack more up with this simple training aid that’s already in your bag! #jonathanyarwood #golfswing #jy #golf @GOLF_com @golfmagazine @titleist @golfchannel #nike @nike @golfdigest #golflessons #teamtitleist #coachin pic.twitter.com/FDl3aIpmbA— JonathanYarwood (@JonathanYarwood) December 10, 2021
Inside path
Tee the ball up like you would for a normal tee shot and place a headcover parallel to your target line on the opposite side of the ball. With the headcover outside the club path, you’ll have to hit the ball from the inside to avoid the headcover on your swing. This will teach you the correct feel of swinging “in to out” and hitting the inside part of the ball.
Upward angle of attack
Tee the ball up once again just like you would for a normal tee shot, but this time place the headcover in front of the ball. With the headcover in this position, you’ll have to hit up on the ball to keep your clubhead from hitting it on the follow through. This will teach you to hit up on the ball and produce a higher launch angle, key for smashing longer drives.
This article originally appeared on Golf.com.


Blog
Struggling with Focus? Here’s How a Pre-Shot Routine Can Transform Your Golf Game
Struggling to focus on the course? A solid pre-shot routine boosts confidence, sharpens your mind, and leads to better swings and lower scores. Here’s how to build your own.

There’s nothing more frustrating than flushing it on the range, only to crumble once you step onto the first tee. If that sounds like you, you’re not alone—and your swing might not be the issue.
More often than not, what’s missing is mental consistency.
The truth is, your brain craves structure, especially when tension is high and pressure builds. That’s where a pre-shot routine comes in—a simple, repeatable sequence that calms your mind, centers your focus, and allows your body to do what it already knows how to do.
Whether you’re lining up a tee shot or facing a tricky downhill chip, a reliable pre-shot routine gives you the confidence and clarity you need to execute.
What Is a Pre-Shot Routine And Why It Matters?
A pre-shot routine is a structured sequence of actions and thoughts you go through before every shot. It’s your mental warm-up.
Think of it like an autopilot system—by triggering familiar steps before each swing, you reduce overthinking and let muscle memory take over.
“The brain doesn’t like surprises. Routines give us the freedom to perform without hesitation.”
— Dr. Bob Rotella, Golf Sports Psychologist
Tour pros swear by it. Watch Rory, Tiger, Nelly Korda—you’ll notice they do almost the exact same thing before every shot. It’s no accident.
A great pre-shot routine:
- Calms nerves
- Builds rhythm
- Improves focus
- Creates consistency under pressure
The 5 Key Steps to a Simple, Effective Pre-Shot Routine
No two routines are exactly alike, but the best ones include these core elements:
1. Pick a Target and Commit
Before anything else—decide what you’re aiming at. Pick a small, specific target (like a tree behind the green, not just “the fairway”).
Then—and this is key—commit to it. No second-guessing. You’ve got one shot. Choose it and trust it.
2. Visualize the Shot
Take a moment to see the shot you want to hit in your mind’s eye. High draw? Low spinner? Picture it from start to finish. This connects your brain and body.
Visualization is a powerful cue to bring your focus away from distractions and into the present.
3. Feel the Swing
Take one or two slow, deliberate practice swings. Match the feel to your intended shot. Don’t just go through the motions—feel the tempo, balance, and rhythm.
This tells your muscles what they’re about to do.
4. Step In with Purpose
This is the physical transition into go-mode. Walk up, align your clubface to the target, set your feet, and glance once more at the target.
At this point, you’re no longer thinking—you’re executing.
5. Pull the Trigger Without Delay
Once you’re set, don’t freeze. Take a breath and go. Overthinking kills more good swings than bad mechanics ever will.
From setup to swing, this part should take 5–10 seconds max.
Common Mistakes to Avoid
- Overcomplicating the routine: Keep it short. 15–20 seconds total is plenty.
- Changing it mid-round: Consistency is the key. Stick with your process—even if you’re struggling.
- Focusing on outcome: Once you’ve committed, let the result go. Focus only on the execution.
Pro Tip – Practice It Like a Skill
Here’s where most amateurs drop the ball: they practice swings, not routines.
Next time you hit the range, practice your full routine on every shot. Visualize, commit, breathe, swing. You’ll not only groove your motion—you’ll make your process automatic.
Build One That Fits You
Here’s a simple example you can adapt:
- Pick your target
- Visualize the ball flight
- Take 1 practice swing
- Step in, align clubface, set feet
- Glance at target
- Breathe and swing
It should feel natural, not robotic. Once it does, you’ve got something you can rely on in the clutch.
The difference between a great shot and a chunked one often happens before the club ever moves. With a consistent pre-shot routine, you’ll play with more confidence, stay focused under pressure, and hit more solid shots—even when nerves kick in.
Want to play better golf without overhauling your swing? Start with your routine.
And when you’re ready for more real-world, no-BS golf tips that make you better—come back to ClickItGolf.com.
@clickitgolfofficial Struggling with focus on the golf course? Discover how a simple pre-shot routine can transform your game, boost your confidence, and improve your consistency. Learn the key steps to developing your own routine and take your golf to the next level! #GolfTips #PreShotRoutine #GolfImprovement #MentalGame #GolfConsistency #ClickitGolf #GolfAdvice #GolfPerformance ♬ original sound – Clickit Golf
Blog
Breaking 90: Real Golf Improvement Tips That Actually Work
Tired of hovering in the low 90s? You’re not alone. Here are real, proven golf improvement tips that will finally help you break 90—and do it consistently.
Why Breaking 90 Feels Like the Mount Everest of Golf
If you’ve ever wrapped up a round with an 89 on the card, you know the rush. For amateur golfers, breaking 90 isn’t just a number—it’s a rite of passage. It means your hard work is paying off, your decisions are sharper, and you’re starting to play golf instead of just swinging a club.
But here’s the thing: most golfers try to improve the wrong way. They tinker with their swing for months, chase YouTube tips at midnight, and buy the latest tech gear hoping it’ll shave strokes. Sound familiar?
As someone who spent years flirting with that 90 barrier, I’m here to tell you: you don’t need a perfect swing—you need a better strategy. Let’s get into the golf improvement tips that actually work.
Think Like a Golfer, Not a Swing Coach
Manage Expectations—Golf Isn’t About Perfect
You won’t stripe every drive or stick every wedge. So stop expecting to. Golf is a game of misses. The trick is making your bad shots better.
Start by dropping the obsession with perfection. Accept the occasional duff or slice. Focus instead on smart decisions and simple, repeatable swings.
“Golf is not a game of perfect. It’s a game of recovery.” — Dr. Bob Rotella, sports psychologist
Know Your “Go-To” Shot
If you’re trying to shape every shot like you’re on Tour, stop. Pick one reliable shot shape—fade, draw, straight—and stick to it. If your natural shot is a fade, play for it.
The moment I embraced my push-fade as a feature, not a flaw, my scores improved. I stopped fighting my swing and started playing smarter.

Play the Right Tee Box—Seriously
Too many amateurs play from tees that are way too long. You don’t need to prove anything to anyone. Move up. Hit more greens. Have more fun. And yes—lower your score.
If you’re not getting to par 4s in two, or regularly hitting 3-woods into par 3s, it’s time to drop back to reality. You’ll thank yourself later.
Course Management—The Secret Weapon
Avoid the Hero Shot
Stuck in the trees? Don’t go for the 4-iron stinger through a two-foot gap. Punch out, get back in play, and take your medicine.
Par is great. Bogey is acceptable. Doubles are killers.
Know When to Lay Up
Got 210 yards into a narrow green with water short and right? Don’t be a hero. Hit it 150 and wedge it close. Most amateurs lose shots by trying to make up for a mistake with an even riskier shot. That never works.
Your scorecard rewards consistency, not courage.
The 3 Must-Have Skills to Break 90
1. A Reliable Tee Shot
You don’t need to hit bombs, but you need to keep it in play. Ditch the driver if it’s wild. I played a 5-wood for three months and dropped 7 strokes off my average.
2. A Dependable Wedge Game
From 100 yards and in, you need a club (or two) that you trust. Learn one shot—half swing, three-quarter, whatever—and own it.
3. No 3-Putts
Three-putting kills rounds. Focus on lag putting from long range and knocking in those nervy 4-footers. Spend twice as much time on putting as you do on full swings.
Practice With Purpose, Not Hope
Don’t just hit balls at the range. Practice like you play:
- Hit different clubs in random order
- Play imaginary holes
- Make putting drills competitive
- Keep score
“Deliberate practice leads to deliberate improvement.” — Mark Blackburn, PGA Tour Coach
Track Your Stats and Find the Leaks
Use an app or simple scorecard notes to track:
- Fairways hit
- Greens in regulation
- Putts per hole
- Penalty strokes
You’ll quickly spot where you’re leaking strokes. That’s where the real work starts.
Mindset Shift—Focus on Process, Not Score
I used to obsess over my score on every hole. Now, I focus on one swing at a time. Breaking 90 isn’t about shooting a 39 on the front and holding on. It’s about stacking smart decisions, one shot at a time.
Breaking 90 isn’t about hitting perfect shots. It’s about making better decisions, avoiding big numbers, and playing within your game. These golf improvement tips aren’t magic—they’re practical, proven strategies that work for real golfers.
Try them on your next round, and don’t forget to celebrate the small wins—like finally keeping your tee shot in play on Hole 1.
Want more golf improvement tips like these?
Bookmark ClickItGolf.com and check back weekly for advice, gear guides, laughs, and insights to help you play better golf—without losing your mind.

For amateur golfers seeking to enhance their game, stay updated on golf news, or simply enjoy engaging discussions, podcasts offer a convenient and informative medium. Based on recommendations from reputable sources and golf communities, here are some top golf podcasts tailored for non-professional enthusiasts:

Hosted by CBS commentator Mark Immelman, this podcast features weekly interviews with instructors, coaches, players, and other golf experts. With over 700 episodes, it provides in-depth discussions aimed at helping golfers improve their skills.
A favorite among golf enthusiasts, No Laying Up offers a mix of tour coverage, player interviews, and discussions on various golf topics. It’s known for its insightful commentary and engaging content.
Featuring European Tour player Eddie Pepperell, this podcast provides a blend of tour insights and personal experiences, offering listeners a unique perspective on the professional golf scene.
This podcast chronicles the journey of two amateur golfers striving to achieve a scratch handicap. It’s relatable for many non-professional players and offers both entertainment and insights into the challenges of improving one’s game.
Hosted by golf coach Mark Crossfield, this podcast delves into various aspects of the game, from equipment reviews to swing techniques, providing practical advice for amateur golfers.

Hosted by Rick Shiels, a former golf teaching professional from Bolton, this podcast covers a wide range of topics, including equipment reviews, interviews with golf personalities, and discussions on current events in the golf world.
Hosted by popular golfer Andrew “Beef” Johnston and comedian John Robins, this podcast offers a light-hearted take on the game, discussing various golf topics and sharing personal anecdotes.
This podcast explores the highs and lows of being a golf enthusiast, sharing stories and experiences that many amateur golfers can relate to.
Featuring instructors Mark Crossfield, Greg Chalmers, and Lou Stagner, this podcast discusses various aspects of the game, offering insights and tips to help golfers improve.
Hosted by Peter Finch, this podcast features discussions with various guests, covering a wide range of golf-related topics, from equipment to personal experiences.

These podcasts offer a variety of content tailored to amateur golfers, from instructional advice to entertaining discussions. Whether you’re looking to improve your game or simply enjoy golf-related conversations, there’s likely a podcast on this list that suits your interests.
- Advertisment


On the Importance of Not Caring: A Guide to Lowering Your Score

The Art of the Unsolicited Golf Tip: How to Annoy Your Playing Partners with Wisdom

Why Your Golf Balls Disappear (and It’s Not the Gophers)


-
 Product Review6 years ago
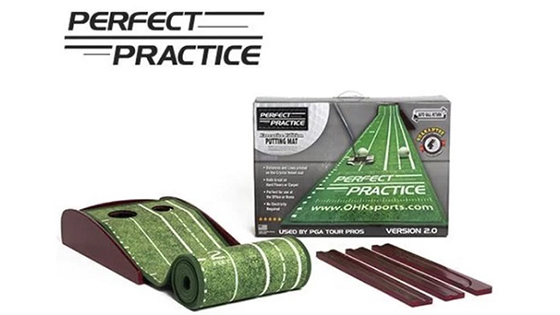
The Perfect Practice Putting Mat Review by Jason Tenzer
-
 Blog4 years ago
Loophole Rule Offers PGA Tour Pros a Mulligan
-
Blog4 years ago
2021 Buyer’s Guide: The Top 10 Value Golf Balls For Distance & Feel
-
Blog4 years ago
Golf Marriage Counselor
-
 Blog6 years ago
9 Biggest Chokes Of The Past Decade
-
 Product Review6 years ago
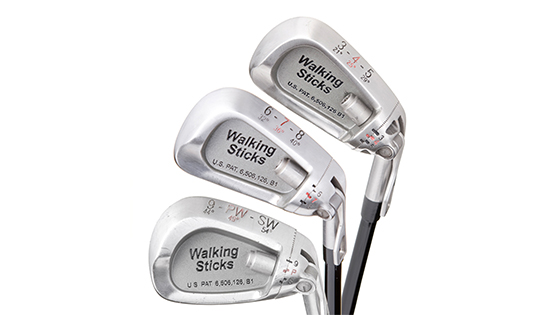
THE ADJUSTABLE IRONS: WALKING STICKS GOLF CLUBS
-
Blog4 years ago
What Your Golf Clubs Say About You
-
Equipment6 years ago
OHK Sports Interview by Jason Tenzer