Golf Hacks
Shave 10 Strokes Overnight with This Simple Trick!

Attention golf enthusiasts! Are you tired of watching your golf balls plunge into water hazards or get lost in the rough? Have you spent countless dollars on the latest gear, only to see minimal improvement in your game? What if we told you that there’s a ridiculously simple hack that could revolutionize your game, and it’s something most players overlook?
Unlock the Secret Weapon of Golf Pros
While everyone else is obsessing over driving distances and the latest high-tech clubs, we’ve discovered the secret weapon that golf pros use to dominate the course: mastering the short game. Yes, you read that right. The key to dramatically improving your golf game lies not in the long drive but in the art of putting and chipping.
Why This Trick Is a Game Changer
Forget about complicated swing adjustments or expensive gadgets. By redirecting your focus to the short game, you can achieve astonishing improvements in your overall performance. Here’s why:
- Transform Your Scorecard: Putting can make up 40-50% of your total strokes. Imagine the impact on your score if you could putt like a pro!
- Boost Your Confidence: Excelling at chipping and putting builds a level of confidence that transforms your entire game.
- Save Strokes Like Never Before: Mastering your short game means you’re always just a chip and a putt away from par.
How to Leverage This Hack and Dominate the Greens
- Revolutionize Your Practice Sessions: Allocate at least 50% of your practice time to mastering the greens. It’s not just about hitting; it’s about hitting with purpose.
- Master Distance Control: Become a wizard of the greens by practicing putts from various distances. Your future self will thank you.
- Conquer All Lies: Practice chipping from every imaginable situation. When the pressure’s on, you’ll know exactly how to handle it.
- Mimic Real-Game Pressure: Challenge yourself with high-pressure putting and chipping scenarios. When it’s game time, you’ll be cool, calm, and collected.
The Shortcut to Golfing Greatness
If you’re seeking a foolproof way to elevate your golf game, look no further. This simple yet wildly effective focus shift is your shortcut to lower scores and higher bragging rights. So, are you ready to leave your golf buddies in awe? Embrace the short game mastery, and watch as your game transforms overnight. Say goodbye to double bogeys and hello to birdies and pars. Your golf game will never be the same again!
Blog
5 Sneaky Hacks to Crush Your Spring Golf Game in 2025
Gear up, swing smart, and snag pre-season deals with ClickitGolf to kick off your 2025 golf season like a pro!

Spring’s creeping up, golfers! The fairways are shaking off winter, and it’s time to get your game dialed in for 2025. Whether you’re chasing pars or just happy to keep it on the grass, here’s your chill guide to hitting the ground swinging. Let’s go!
Hack 1: Gear Check—Don’t Let Last Year’s Clubs Hold You Back
Dust off your bag and give it a look. Grips feeling like a slip-n-slide? Swap ‘em out—control’s king. And if your driver’s ancient, maybe peek at something fresh. We’ve got the lowdown on the Mizuno OMOI putters—heavier heads, smoother rolls, pure magic. Read the full review; it might just fix your green woes.
Hack 2: Swing Smarter, Not Harder
No need to rebuild your swing from scratch—just polish it. Try the “One-Club Challenge”: grab a 7-iron, hit the range, and mix it up—high, low, whatever. It’s all about feel over force. You’ll be outfoxing courses before the grass turns green.
Hack 3: Mindset Matters
Golf’s a mental game, and winter’s your prep window. Get inspired with some Pebble Beach greatness—like this hole-by-hole flyover narrated by Jim Nantz from Golf Digest. It’s a quick tour of every iconic shot at Pebble, perfect for daydreaming your spring opener. Visualize your ball sticking the green—you’ll be ready.
Hack 4: Score Early Deals
ClickitGolf’s serving up pre-season heat. The shop has deals flowing—Check out all the cool products. Grab ‘em now before the snowbirds invade. Road trip on the brain? Our HotelPlanner Travel partnership cuts costs on hotels and flights. More golf, less cash—done.
Hack 5: Ryder Cup Hype – Channel the Pros
Keegan Bradley captaining the 2025 Ryder Cup at Bethpage? Unexpected and awesome. Start channeling that Team USA energy—watch Pebble Beach’s greatest moments on our video page for some clutch inspo. September’s gonna be a party; we’ll keep you posted on the news page.
Tee It Up!
Gear up, swing smart, snag deals, and get hyped—2025’s your year to own the course. What’s your spring prep go-to? Drop it in the comments—let’s get this crew fired up!

For amateur golfers seeking to enhance their game, stay updated on golf news, or simply enjoy engaging discussions, podcasts offer a convenient and informative medium. Based on recommendations from reputable sources and golf communities, here are some top golf podcasts tailored for non-professional enthusiasts:

Hosted by CBS commentator Mark Immelman, this podcast features weekly interviews with instructors, coaches, players, and other golf experts. With over 700 episodes, it provides in-depth discussions aimed at helping golfers improve their skills.
A favorite among golf enthusiasts, No Laying Up offers a mix of tour coverage, player interviews, and discussions on various golf topics. It’s known for its insightful commentary and engaging content.
Featuring European Tour player Eddie Pepperell, this podcast provides a blend of tour insights and personal experiences, offering listeners a unique perspective on the professional golf scene.
This podcast chronicles the journey of two amateur golfers striving to achieve a scratch handicap. It’s relatable for many non-professional players and offers both entertainment and insights into the challenges of improving one’s game.
Hosted by golf coach Mark Crossfield, this podcast delves into various aspects of the game, from equipment reviews to swing techniques, providing practical advice for amateur golfers.
Hosted by Rick Shiels, a former golf teaching professional from Bolton, this podcast covers a wide range of topics, including equipment reviews, interviews with golf personalities, and discussions on current events in the golf world.
Hosted by popular golfer Andrew “Beef” Johnston and comedian John Robins, this podcast offers a light-hearted take on the game, discussing various golf topics and sharing personal anecdotes.
This podcast explores the highs and lows of being a golf enthusiast, sharing stories and experiences that many amateur golfers can relate to.
Featuring instructors Mark Crossfield, Greg Chalmers, and Lou Stagner, this podcast discusses various aspects of the game, offering insights and tips to help golfers improve.
Hosted by Peter Finch, this podcast features discussions with various guests, covering a wide range of golf-related topics, from equipment to personal experiences.
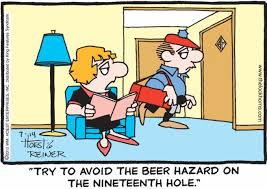
These podcasts offer a variety of content tailored to amateur golfers, from instructional advice to entertaining discussions. Whether you’re looking to improve your game or simply enjoy golf-related conversations, there’s likely a podcast on this list that suits your interests.
Golf Hacks
How to Play Better Golf Without Changing Your Swing
Improve your golf game without changing your swing by focusing on smarter strategies, better equipment, and a winning mindset.

Improving your golf game often feels like it requires endless swing changes and hours at the range. But the truth is, you can elevate your performance without altering your swing mechanics. With smart strategies and subtle adjustments, you can lower your scores and enjoy the game more. Here’s how to play better golf while keeping your swing as is.
1. Fine-Tune Your Equipment
One of the quickest ways to improve is by ensuring your clubs and accessories are suited to your game.

- Custom Club Fitting: Adjusting your clubs to match your swing can improve distance, accuracy, and comfort without any changes to your technique. Seek out a fitting session with a local pro or a retailer like PGA Tour Superstore.
- Choose the Right Ball: Matching your golf ball to your swing speed and play style can enhance control and maximize distance.
- Replace Your Grips: Fresh grips improve your hold and prevent slippage, helping you hit better shots consistently.
2. Focus on Course Management
Great golfers don’t just play harder—they play smarter.

- Play the Safe Shot: Stick to shots you know you can execute well rather than chasing risky plays.
- Understand Your Distances: Knowing how far you hit each club can help you make better decisions on the course.
- Avoid Trouble Areas: Be mindful of hazards and tough pin placements, opting for strategies that keep you out of trouble.
3. Prioritize the Short Game
A strong short game is essential for lowering scores, and it doesn’t require any swing overhauls.

- Master Your Putting: Work on reading greens and improving your speed control to sink more putts.
- Refine Your Chipping: A simple, repeatable chipping motion can make all the difference around the greens.
- Practice Sand Play: Confidence in bunkers can save strokes and boost your overall game.
4. Work on Fitness and Flexibility
Your physical condition can directly impact your golf performance.

- Build Core Strength: A strong core provides stability and power, making your swing more efficient.
- Improve Flexibility: Stretching regularly helps maintain a full range of motion, reducing strain and enhancing consistency.
- Stay Active on the Course: Walking instead of riding in a cart can help maintain your rhythm and focus during a round.
5. Develop a Winning Mindset
Golf is as much a mental game as a physical one. Sharpening your mental approach can improve your results significantly.

- Stick to a Routine: A consistent pre-shot routine builds confidence and reduces anxiety.
- Focus on the Positive: Visualize successful shots and stay calm under pressure.
- Learn to Let Go: Don’t let a bad shot ruin your round. Accept mistakes and focus on the next opportunity.
6. Use Helpful Tools
The right accessories can make your game easier and more enjoyable.
- Rangefinders and GPS Devices: Knowing precise distances lets you make smarter club selections.
- Alignment Aids: Tools like alignment sticks can improve your aim and help you stay consistent on the course.
- Golf Shoes: A solid pair of shoes provides the stability you need to maintain balance during your swing.
Your Path to Smarter Golf
Improving your game doesn’t have to mean endless swing adjustments. By focusing on smarter strategies, optimizing your equipment, and sharpening your mental approach, you can achieve better results and enjoy golf more. Embrace these tips, and let your natural swing take center stage as you play your best rounds yet!
-

 Product Review6 years ago
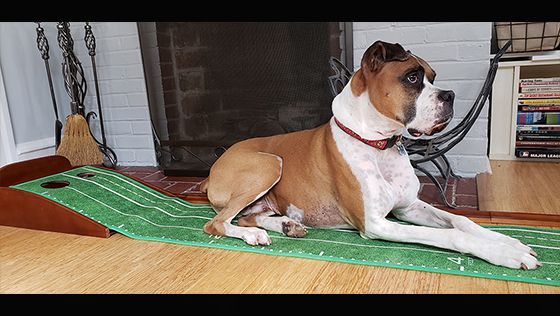
The Perfect Practice Putting Mat Review by Jason Tenzer
-

 Blog4 years ago
Loophole Rule Offers PGA Tour Pros a Mulligan
-

 Blog4 years ago
2021 Buyer’s Guide: The Top 10 Value Golf Balls For Distance & Feel
-

 Blog4 years ago
Golf Marriage Counselor
-

 Blog6 years ago
9 Biggest Chokes Of The Past Decade
-

 Product Review6 years ago
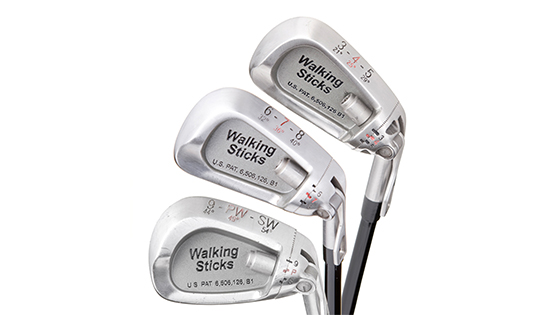
THE ADJUSTABLE IRONS: WALKING STICKS GOLF CLUBS
-

 Blog4 years ago
What Your Golf Clubs Say About You
-

 Equipment6 years ago
OHK Sports Interview by Jason Tenzer


