Golf Drills/Practice
Instantly Lower Your Score With These 10 Short Games Tips

One of the most efficient ways to lower your golf scores is to improve your short game. A combination of good technique, proper shot selection, structured practice can add up quickly.
Sometimes, however, life gets in the way, and it’s hard to find the time to take a lesson or practice a much as you might like. Here are some shortcuts and ways to improve your technique right away.
1. Putting turn toes in
Keeping your lower body still when you putt will make it much more likely to roll your golf ball on the line you are aimed and also be more consistent controlling distance.
You can improve your chances of staying still by turning your toes in much like Arnold Palmer used to do. This will force you to keep your lower body still as it limits your ability to move and turn. You can use this for a drill, but many times, drills can work just as well when used over the span of your round.
2. Pace your putts – one inch per step
For those golfers who have played for a long time, controlling distance with putting is something they do thanks to years of trial and error.
But for newer golfers or those who struggle around the green, having a system to control distance can be a welcome skill.
And while it may be a bit oversimplified, you can improve your distance control by using a simple system of adding one inch to your backstroke for every foot of putt distance. It’s not perfect, but it’s a Bryson-approved way of helping gauge your distances.
3. Stroke then look
A good habit when putting is to complete your stroke, hold the finish and THEN turn your eyes to see the ball rolling.
This goes back to being still over your putting stroke to eliminate unnecessary and unwanted movement that can make it difficult to control distance and direction.
Make sure you complete your stroke, hold your finish and once the ball is well away from you, then turn to see it either go in, or roll close to the pin on a longer putt.
4. Lean forward when putting
You’ve heard the cliche that golf is a game of inches. One of the more frustrating examples of that is when your ball rolls just past the pin, off the edge of the green and settles into really deep rough. While it can be very tricky to hit a soft chip or pitch if you are just a couple of feet into the rough, you can putt instead.
To do this, make one very important setup change: place a ton of weight on your forward foot and drop your forward shoulder to match.
This extreme shoulder tilt toward the target will change the angle that the putter head approaches the ball. Rather than a shallow, sweeping stroke, this stance will help the putter glance down the back of the ball, which makes it much easier to have direct contact between the ball and the putter face.
This extreme contact angle will cause the ball to “jump” a bit, which typically clears the longer grass and then when the ball lands onto the green it will start to roll normally.

Once you get the feel of this it is a great way to shave strokes and also limit risk.

5. Choke down on short shots
Those really short chips and pitches can often be a big challenge when it comes to getting your distance control right. Here is a wonderful opportunity to use physics: shorten the lever, and less power will be delivered. The lower you hold on the club the shorter your golf ball will travel. It’s as simple as that!
Don’t hesitate to hold the very bottom of the grip, and in extreme cases, come off of the grip and down to the shaft.
6. Heel up for chips
When you are hitting your basic chip shot, grip lower on the handle, narrow your stance and slightly lean your weight, club shaft and upper body forward toward the target.
Many golfers will incorrectly fall back and try to lift the golf ball. This can cause you to hit the ground before the ball or even top it, but in either case contact will suffer.
A great “trick” to avoid this is to get all set up and then pick up your back heel and keep it up throughout your stroke. This will help to avoid any inclination to fall back and try to lift the golf ball, helping to produce solid ball and turf contact.
While this may be used as a drill, if you find it makes a big difference in contact, you may want to consider adding it to your on-course play.
7. Square looks open for pitches
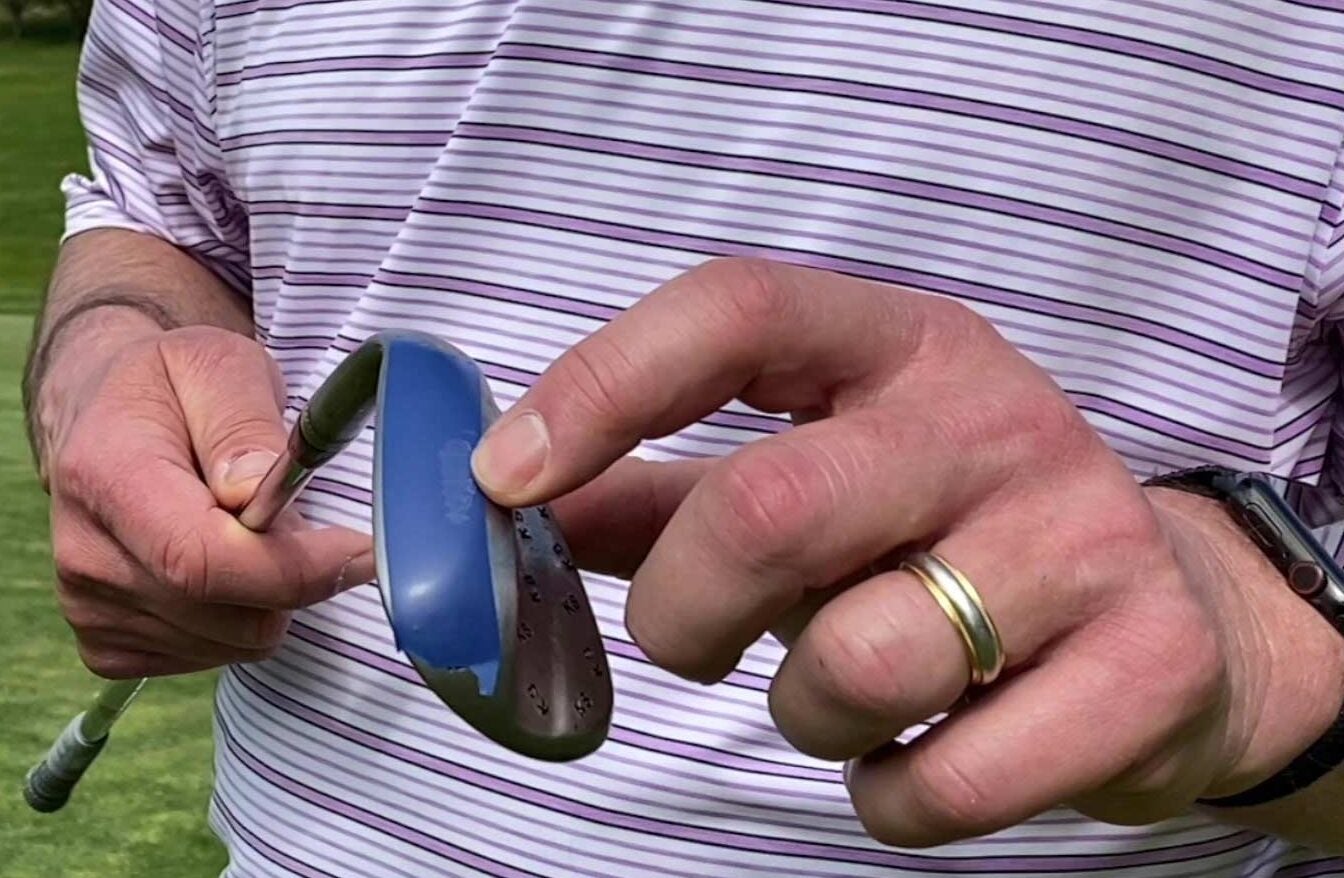
When you are hitting a pitch shot with your lob, sand or gap wedge, the bottom is rounded on purpose. It’s called bounce. This design characteristic is built to allow your club to glide across the grass and not dig.
The good news is when you set the club properly on the bottom — where it doesn’t dig — there’s no reason to be hesitant about letting it hit the ground. This is what will help you to hit high, soft, beautiful pitch shots.
Setting this club properly on its bottom can look “open,” but rest assured, it’s not. It’s lofted, which is just how you want it.

8. RemeMber: Speed and sand
Greenside sand is one of my favorite areas to teach because it seems to cause so many frustrations for regular golfers.
The two major skills you need to be a good bunker player are 1) to take a lot of sand and 2) to generate lots of speed. Speed without sand, well….it’s gone and going far away. Sand without speed and you probably get to take a few steps forward and try it again.
I think one of the best ways to get good at this is to practice simply throwing sand out of the bunker and onto the grass. By taking the golf ball out of the scenario, you can practice proper motion.
Once you have the proper motion for whenever you find yourself in a bunker, keep it. Don’t change your technique, change your club selection. Higher lofted for closer shots and less loft for longer ones, but the motion is always the same.
9. Dig your feet in when you’re in the bunker
When in a bunker it is important to have your clubhead enter the sand before the ball, and stay into the sand long enough to exit the sand well after the ball.
What makes this possible comes from understanding what needs to happen, and also a proper setup.
The more you dig your feet into the sand at address, the more you lower the bottom of your swing. If you struggle with taking enough sand, remember that the more you dig your feet, the easier it will be to make that nice long divot that will produce successful sand shots. And don’t be shy here. Really dig your feet in enough to make the soles of your shoes disappear.
10. Always remember: Putt, chip, pitch
One of the quickest ways to improve you score and your short game is to limit your risk by choosing the least risky shot when possible. And if you have been around me at all, you understand that this is such a key to success.
Your priority order for short game:
1. Putt whenever you can.
2. Chip when you can’t putt.
3. Pitch only when you have to.
Simply understanding that order and sticking to it when you play will limit your risk and also allow subtle misses to not show up on your scorecard.
You might be surprised to know that better players know to limit their risk and choose the shot they can execute the highest percentage of the time, even if they’re proficient in all areas of their short game.
While having time to practice and take lessons is nice and will pay off on the course, having little “tricks” to help you to make better decisions and understand fundamentals can help you to see results right away.
This article originally appeared on Golf.com.


Drills
Golf Fitness for the Off-Season: Build Strength, Flexibility, and Power Before Spring
Now is the time to get in shape before the season starts. Start your routine now so you can be ready.

As the days grow shorter and the golf courses are covered in a blanket of frost or snow, it’s easy to let your clubs gather dust in the garage. But what if this winter off-season wasn’t an end, but a beginning? What if you could use these next few months to build a stronger, more flexible, and more powerful body, emerging in the spring not just rust-free, but fundamentally better than you were last season?
Welcome to your off-season game plan. This isn’t about grueling, two-hour gym sessions. This is a smart, targeted approach to golf fitness that will increase your clubhead speed, improve your consistency, and dramatically reduce your risk of injury. By focusing on the three pillars of athletic performance—Mobility, Strength, and Power—you can transform your game without ever hitting a ball.
Why Off-Season Fitness is a Game-Changer
During the golf season, our focus is on playing. It’s difficult to make significant physical gains when your body is also trying to recover from rounds and practice sessions. The off-season, however, presents a golden opportunity. It’s a dedicated block of time where you can push your body, build a solid foundation, and make improvements that are simply not possible mid-season .
Furthermore, the physical qualities required for a powerful and resilient golf swing are the exact same qualities essential for long-term health and vitality. As we age, we naturally lose muscle mass, strength, and power—a process that is catastrophic for both our golf game and our quality of life. The good news? All of these factors are incredibly trainable at any age. Research on adults aged 60 to 83 years found that just 8-16 weeks of resistance training improved maximal strength by approximately 18% and rate of force development by 27% . The workout that adds 15 yards to your drive is the same one that helps you carry groceries with ease and stay independent for decades to come.
The Three Pillars of a Powerful Golf Swing
A successful golf fitness program doesn’t need to be complicated. It should be built on a consistent and progressive approach focused on three key areas.
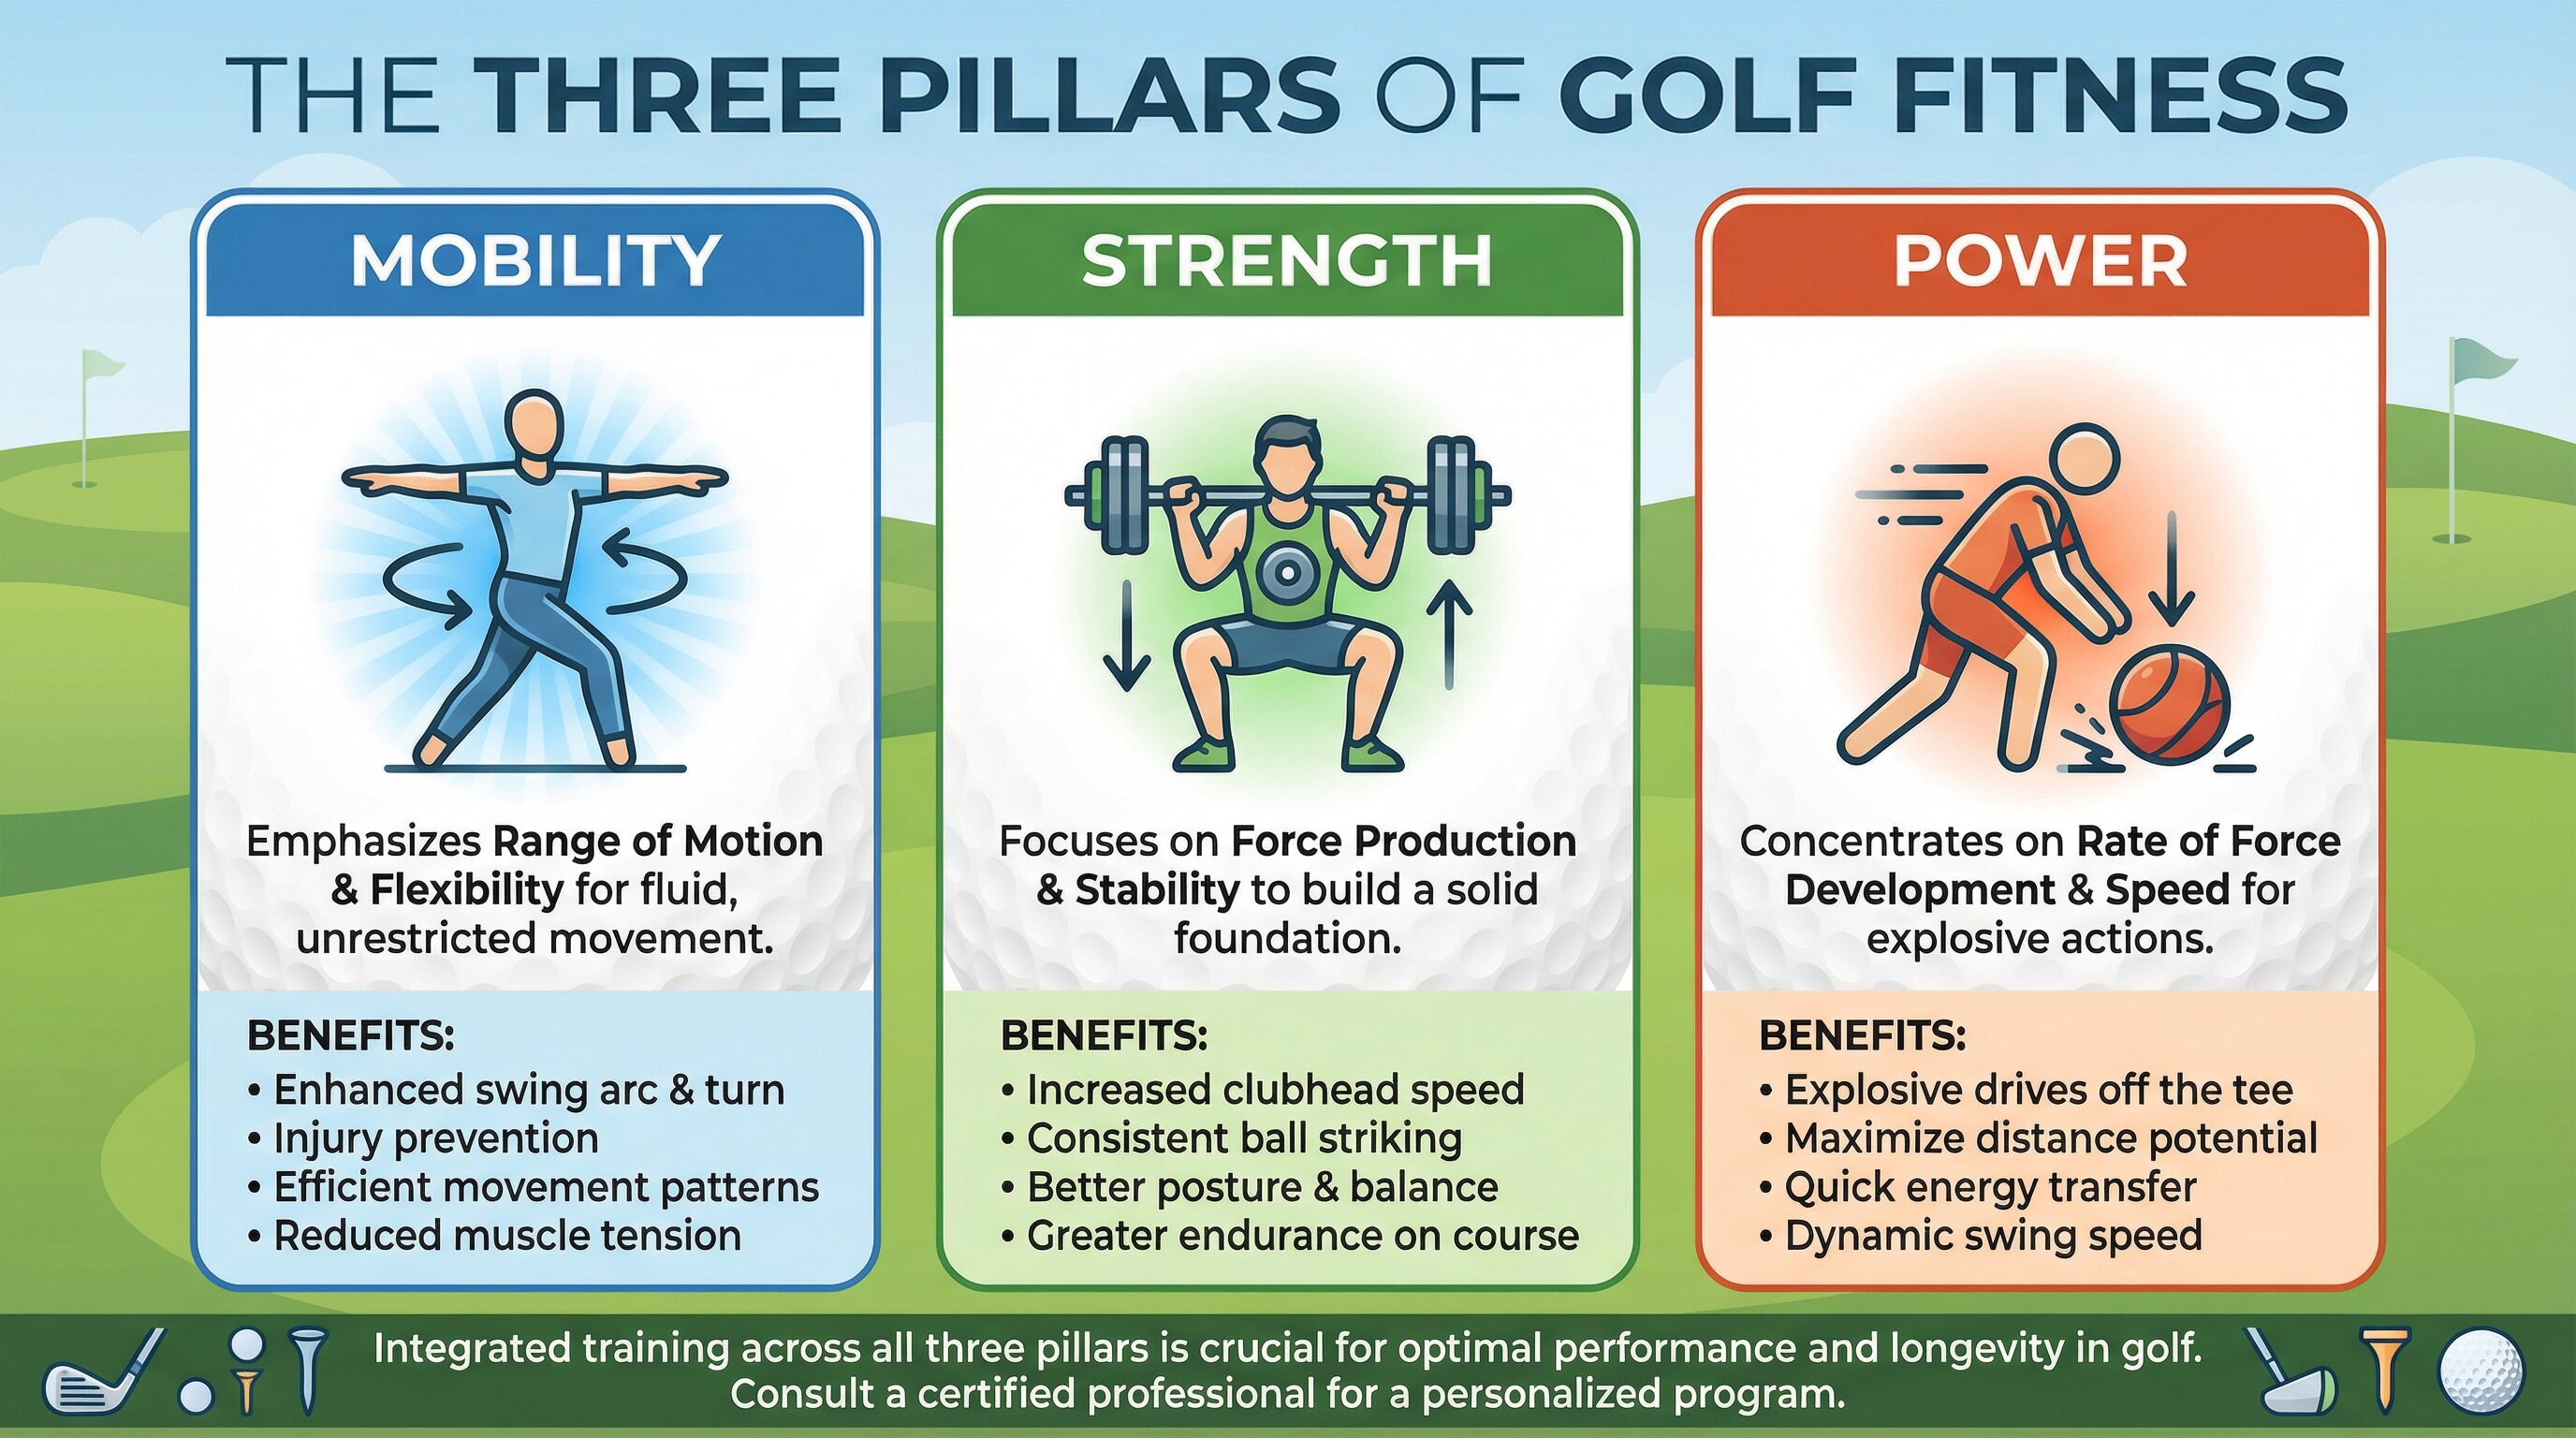
Pillar 1: Mobility – The Foundation of a Fluid Swing
Mobility is the ability to move a joint through its full range of motion with control. For golfers, this is non-negotiable. Without adequate mobility in your hips, thoracic spine (upper back), and shoulders, your body will be forced to find that rotation from other, less stable areas, like your lower back—a leading cause of golf-related pain and injury.
Why it Matters: A bigger turn in your backswing creates a longer arc, which directly translates to more clubhead speed. How much you turn your pelvis and torso, and how far your hands travel around the clock in the backswing, play a very important role in your club head speed . Improved mobility allows you to generate this rotation safely and efficiently.
The Focus: Hips, Thoracic Spine, Shoulders. The beauty of mobility training is that it doesn’t require any equipment, is not very taxing, and the gains are immediate. It doesn’t even require much training time.

Pillar 2: Strength – The Engine of Your Swing
Strength is the ability to produce force. It’s the engine that powers your golf swing. A stronger body is a more stable body, allowing you to maintain your posture and balance from address to follow-through. It’s also the foundation upon which you build power.
Why it Matters: Strength is essential for creating speed, controlling the club, and preventing the breakdown of swing mechanics due to fatigue over 18 holes. It is arguably the most underappreciated physical quality in the general population, and it requires specific training to maintain . Everyday tasks or just being active is not sufficient to preserve muscle strength as we age.
The Focus: Full-body, compound movements like squats, hinges (deadlifts), presses, and rows. These exercises engage multiple muscle groups simultaneously, building functional strength that translates directly to the golf course.
Pillar 3: Power – Unleashing Your Speed
If strength is the size of your engine, power is how quickly you can rev it. In golf, this is known as Rate of Force Development (RFD)—how rapidly you can generate force. The golf swing is an explosive, athletic movement that happens in the blink of an eye. You don’t have time to gradually ramp up to maximum force; you need to be able to summon it instantly.
Why it Matters: RFD is the physical quality most closely correlated with clubhead speed. It declines more rapidly with age than strength or muscle mass, which is why explosive training is a critical, yet often overlooked, component of golf fitness . A minuscule percentage of adults train explosively, but those who do see dramatic improvements in their ability to generate speed.
The Focus: Explosive movements like medicine ball throws, jumps, and kettlebell swings. These exercises train your nervous system to recruit muscle fibers rapidly, creating the explosive power needed for a fast, powerful swing.
Your At-Home Off-Season Workout Plan
You don’t need a fancy gym membership to build a golf-ready body. This simple and effective workout can be done at home with minimal equipment (a few dumbbells or kettlebells and resistance bands are helpful).
Frequency: Perform this full-body workout 2-3 times per week on non-consecutive days.
Exercise Category Exercise Example Sets & Reps Why It Helps Your Golf Game 1. Dynamic Warm-Up 90/90 Hip Switches 2 sets of 10 reps/side Improves hip internal and external rotation, crucial for a powerful backswing and follow-through. (Mobility) Cat-Cow 2 sets of 10 reps Mobilizes the spine, warming up the muscles of the back and core. Thoracic Rotations (Quadruped) 2 sets of 8 reps/side Increases rotation in the upper back, allowing for a bigger, safer turn away from the ball. 2. Power Medicine Ball Rotational Slams 3 sets of 5 reps/side Develops explosive power in the transverse (rotational) plane, mimicking the golf swing. Box Jumps (or Broad Jumps) 3 sets of 5 reps Trains lower body explosiveness and improves your ability to use the ground for power. 3. Strength Goblet Squats 3 sets of 8-10 reps Builds lower body and core strength, essential for stability and power generation. Dumbbell Bent-Over Rows 3 sets of 8-10 reps Strengthens the back and shoulders, helping to maintain posture throughout the swing. Glute Bridges 3 sets of 12-15 reps Activates and strengthens the glutes, the most powerful muscles in your body and key for a stable swing. 4. Core Pallof Press 3 sets of 10 reps/side An anti-rotation exercise that builds incredible core stability to resist unwanted movement during the swing. Dead Bug 3 sets of 10 reps/side Improves coordination and strengthens the deep core muscles that protect your lower back.
Progression: Start at an appropriate level for your current fitness, and slowly and gradually increase the demand of the training as you improve. This principle of progressive overload is the key to long-term gains.
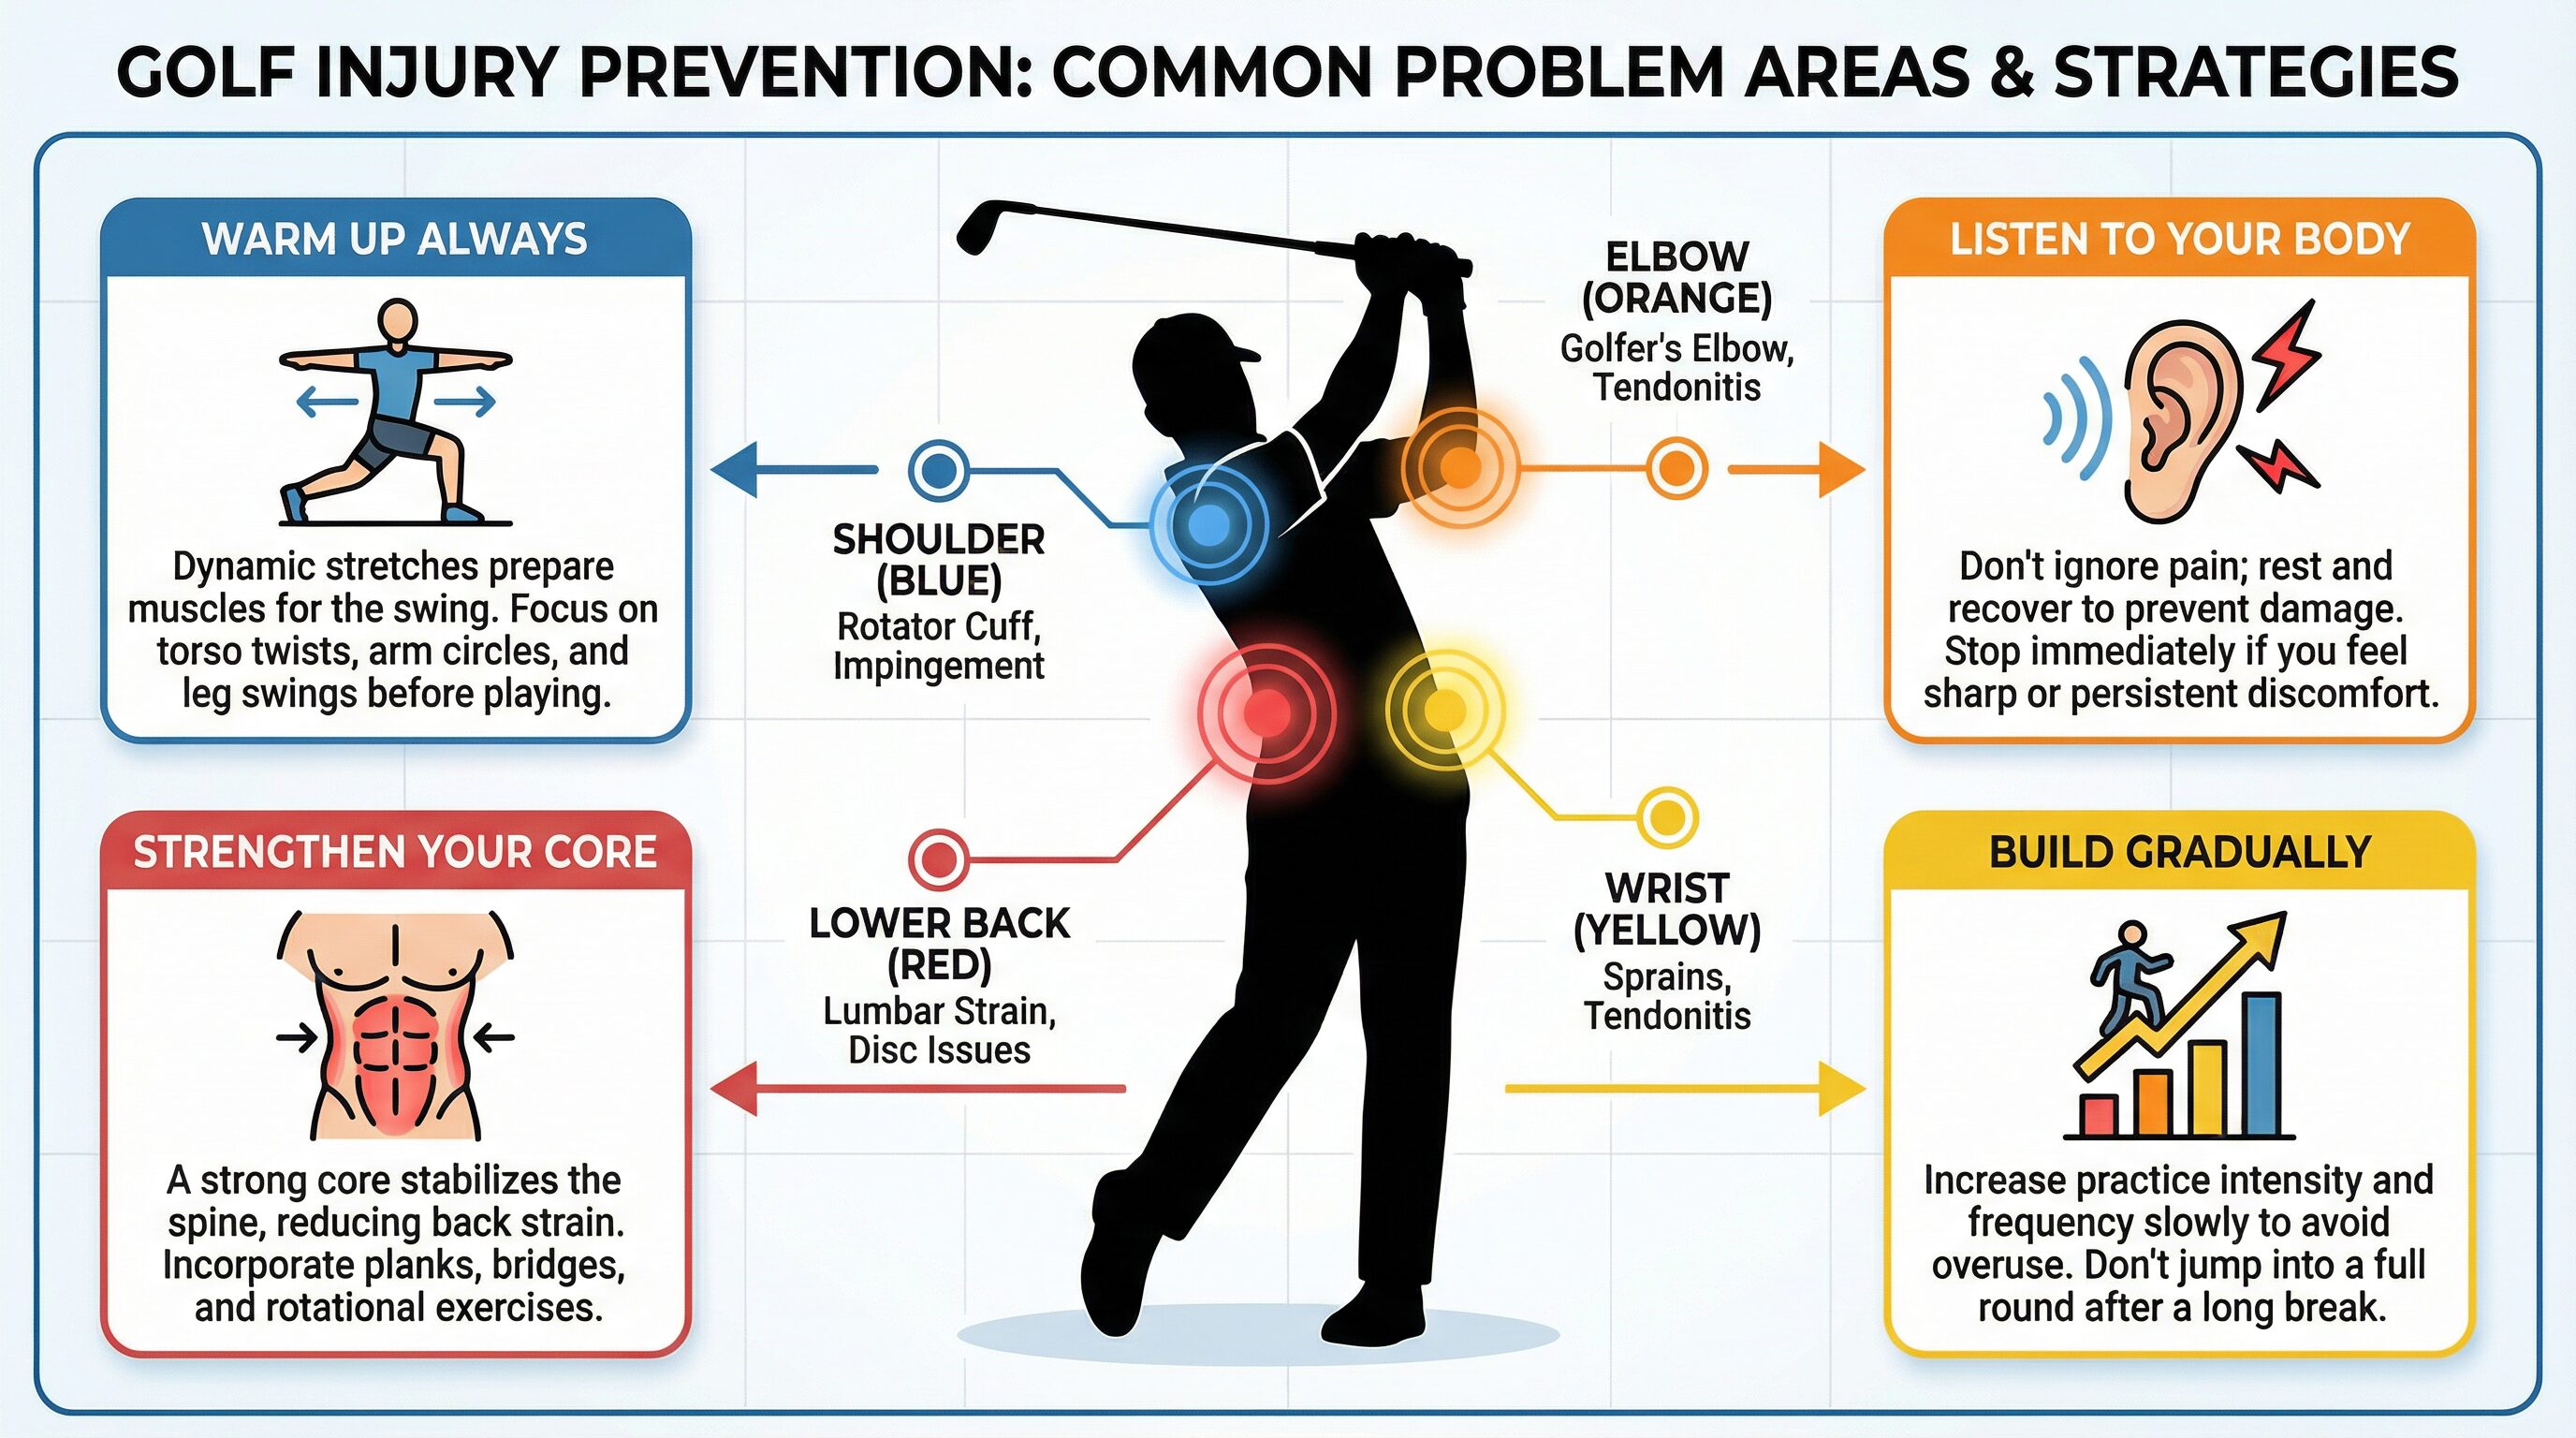
Injury Prevention: Play Smarter, Not Harder
The repetitive nature of the golf swing can take a toll on the body. The most common injuries are not acute, sudden events, but chronic overuse issues that build up over time . The lower back, wrists, and elbows are particularly vulnerable.
“People often think swinging a golf club is just about the arms and shoulders, but it’s really a total body workout,” explains Dr. Daniel Komlos, an orthopedic surgeon at Houston Methodist. “Building strength is also critical for injury prevention, since the repetitive motions and prolonged gripping that come with playing golf can take a toll on your muscles and joints.”
Interestingly, while golfer’s elbow (medial epicondylitis) gets its name from the sport, lateral epicondylitis—more commonly known as tennis elbow—is actually the more prevalent elbow injury among golfers . This happens because of the prolonged grip and positioning of the wrist while gripping a golf club. Other potential injuries include triceps tendonitis, rotator cuff injuries, and lower back sprains and strains.
Here are the most important strategies to stay injury-free:
Always Warm Up: Never step onto the first tee cold. A 5-10 minute dynamic warm-up (like the one in the workout plan) increases blood flow to your muscles and prepares your joints for the rotational demands of the swing. Stretch frequently, using slow, controlled movements that work through your full range of motion. Pay particular attention to the mobility of your shoulders, neck, wrists, and lower back, since flexibility is key for a smooth swing .
Listen to Your Body: This is the golden rule. Pain is your body’s signal that something is wrong. The “no pain, no gain” mantra does not apply to joint pain in golf. If you feel a sharp or unusual pain, it’s time to rest. After about two weeks, you should be pain-free and can return to playing. But if you notice the pain comes back, you should stop and see a doctor . Pushing through pain is the fastest way to turn a minor issue into a major setback.
Strengthen Your Core: A strong and stable core is your best defense against lower back pain. It acts as a corset, protecting your spine from excessive rotational forces. Incorporate exercises like planks, bridges, and rotational core work into your routine.
Build Gradually: If you haven’t played in a while, don’t jump into a full round or multiple rounds in quick succession. Increase practice intensity and frequency slowly to avoid overuse. This is especially important as we age, when muscles and joints are more prone to overuse injuries.
Conclusion: The Time to Start is Now
The winter off-season is a gift. It’s an opportunity to invest in your most important piece of golf equipment: your body. By dedicating just a few hours a week to a structured fitness program, you can build a foundation of mobility, strength, and power that will pay massive dividends when the season begins.
Don’t wait for spring to start thinking about your golf game. Start today. Begin with the mobility exercises, gradually incorporate the strength and core work, and then add in the power movements as you feel comfortable. Track your progress, stay consistent, and trust the process. When you step onto the first tee next season, you won’t just feel ready—you’ll be objectively, measurably better. Your swing will be faster, your body will be more resilient, and your scores will reflect the work you put in during the cold months.
References

It’s a scenario every golfer knows intimately: you’ve just striped a perfect drive down the middle of the fairway, only to follow it up with a chunked iron shot that barely advances the ball. Frustration mounts, your focus shatters, and the rest of the hole—and perhaps the round—unravels. While we often blame our swing mechanics for these inconsistencies, the true culprit frequently lies between our ears. Research consistently shows that the mental game accounts for a staggering 70-90% of performance in golf . Yet, despite its monumental importance, studies reveal that only about 14% of golfers regularly practice their mental skills .
This article is designed to change that. We will explore the critical role of psychology in golf, break down the most common mental errors that sabotage your scores, and provide you with professional-grade techniques and practical drills to build an unshakeable mental game. By the end, you will have a clear roadmap to not only lower your handicap but also to find more joy and resilience on the course.
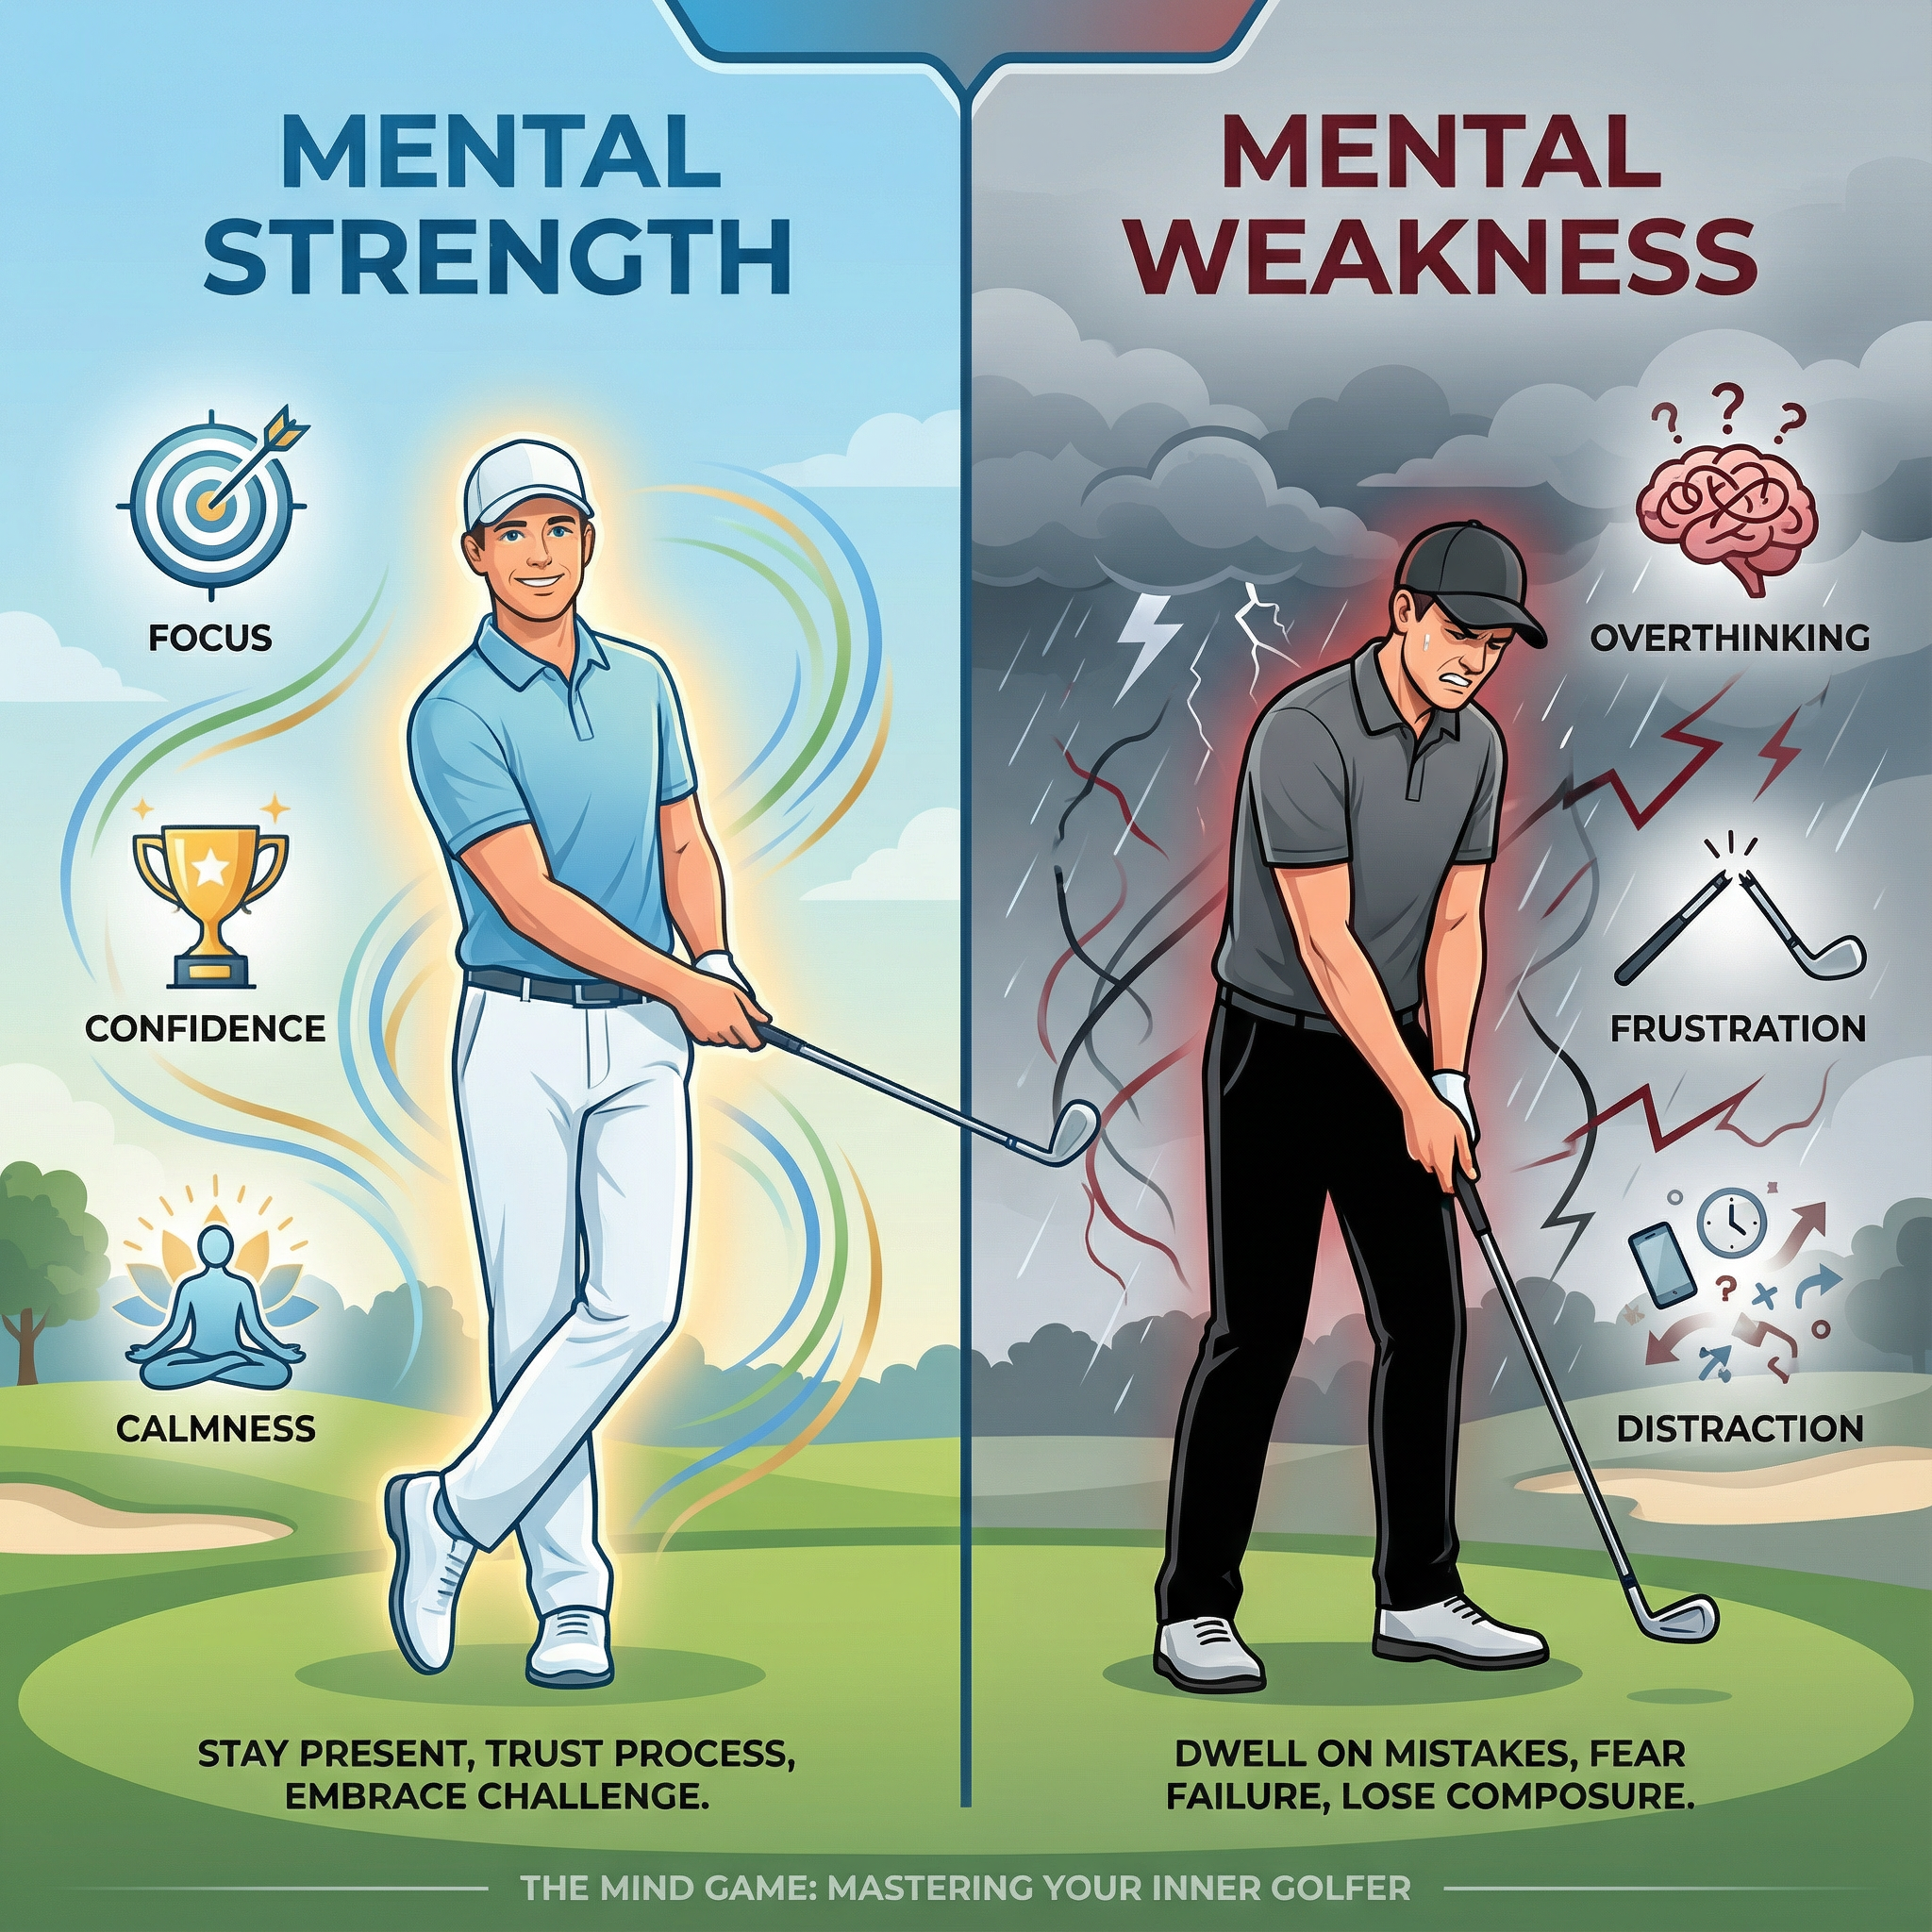
Why the Mental Game is Your Most Important Club
In golf, a quiet mind is a powerful asset. Your mental and emotional state directly influences your physical capabilities. When you are calm, focused, and confident, your body is relaxed, and your swing can flow freely and naturally. Conversely, when you are anxious, angry, or distracted, your muscles tighten, your coordination suffers, and your swing mechanics break down. This isn’t just a feeling; it’s a physiological reality. Negative emotions trigger a fight-or-flight response, which is fundamentally at odds with the fine motor control required for a successful golf shot .
A 2025 systematic review on mental fatigue in golf further highlights this connection. The research found that prolonged mental exertion during a round directly leads to a decline in performance, affecting everything from driving distance and iron accuracy to, most significantly, putting . Every decision, every calculation, and every moment of frustration depletes your cognitive resources, making it harder to execute shots as the round progresses. Mastering the mental game is therefore not just about thinking positively; it’s about efficiently managing your mental energy.
The 5 Mental Mistakes Costing You Strokes (and How to Fix Them)
Based on extensive analysis of amateur golfers, sports psychologists have identified several recurring mental errors. Here are five of the most common, along with strategies to overcome them, adapted from the work of mental game coach David MacKenzie .
Mental Mistake Description The Fix 1. Analyzing Your Swing Constantly dissecting your mechanics on the course, trying to “fix” your swing mid-round. Trust the swing you brought. The course is for playing, the range is for practicing. Focus on your target and let your body execute. If you need a swing thought, use a simple rhythm cue like “one-two-three.” 2. Obsessing Over Score Tying your emotional state to your score on every hole, leading to a rollercoaster of feelings. Focus on the process, not the outcome. Your goal for each shot should be to execute your routine flawlessly. The score will take care of itself. 3. Negative Self-Talk Berating yourself after a bad shot, which lowers confidence and increases tension. Become your own best caddy. After a poor shot, offer yourself the same encouragement you would a friend. Develop a post-shot routine that involves acknowledging the feeling, taking a deep breath, and moving on. 4. Vague Targeting Aiming for a general area like “the fairway” or “the green” instead of a specific point. Pick the smallest possible target. Top professionals aim at incredibly precise spots, like a specific tree branch or a single blade of grass. This sharpens focus and improves accuracy. 5. Neglecting Your Routine Lacking a consistent pre-shot and post-shot routine, leading to inconsistent mental preparation and reaction. Make your routine your primary goal. A well-defined routine is your mental armor against pressure. It ensures you are committed to every shot and can handle any outcome.
Building an Unshakeable Mental Game: Pro-Level Techniques
Top professional golfers are masters of the mental game. They employ specific techniques to stay focused, confident, and resilient under immense pressure. Here are a few you can incorporate into your own game.
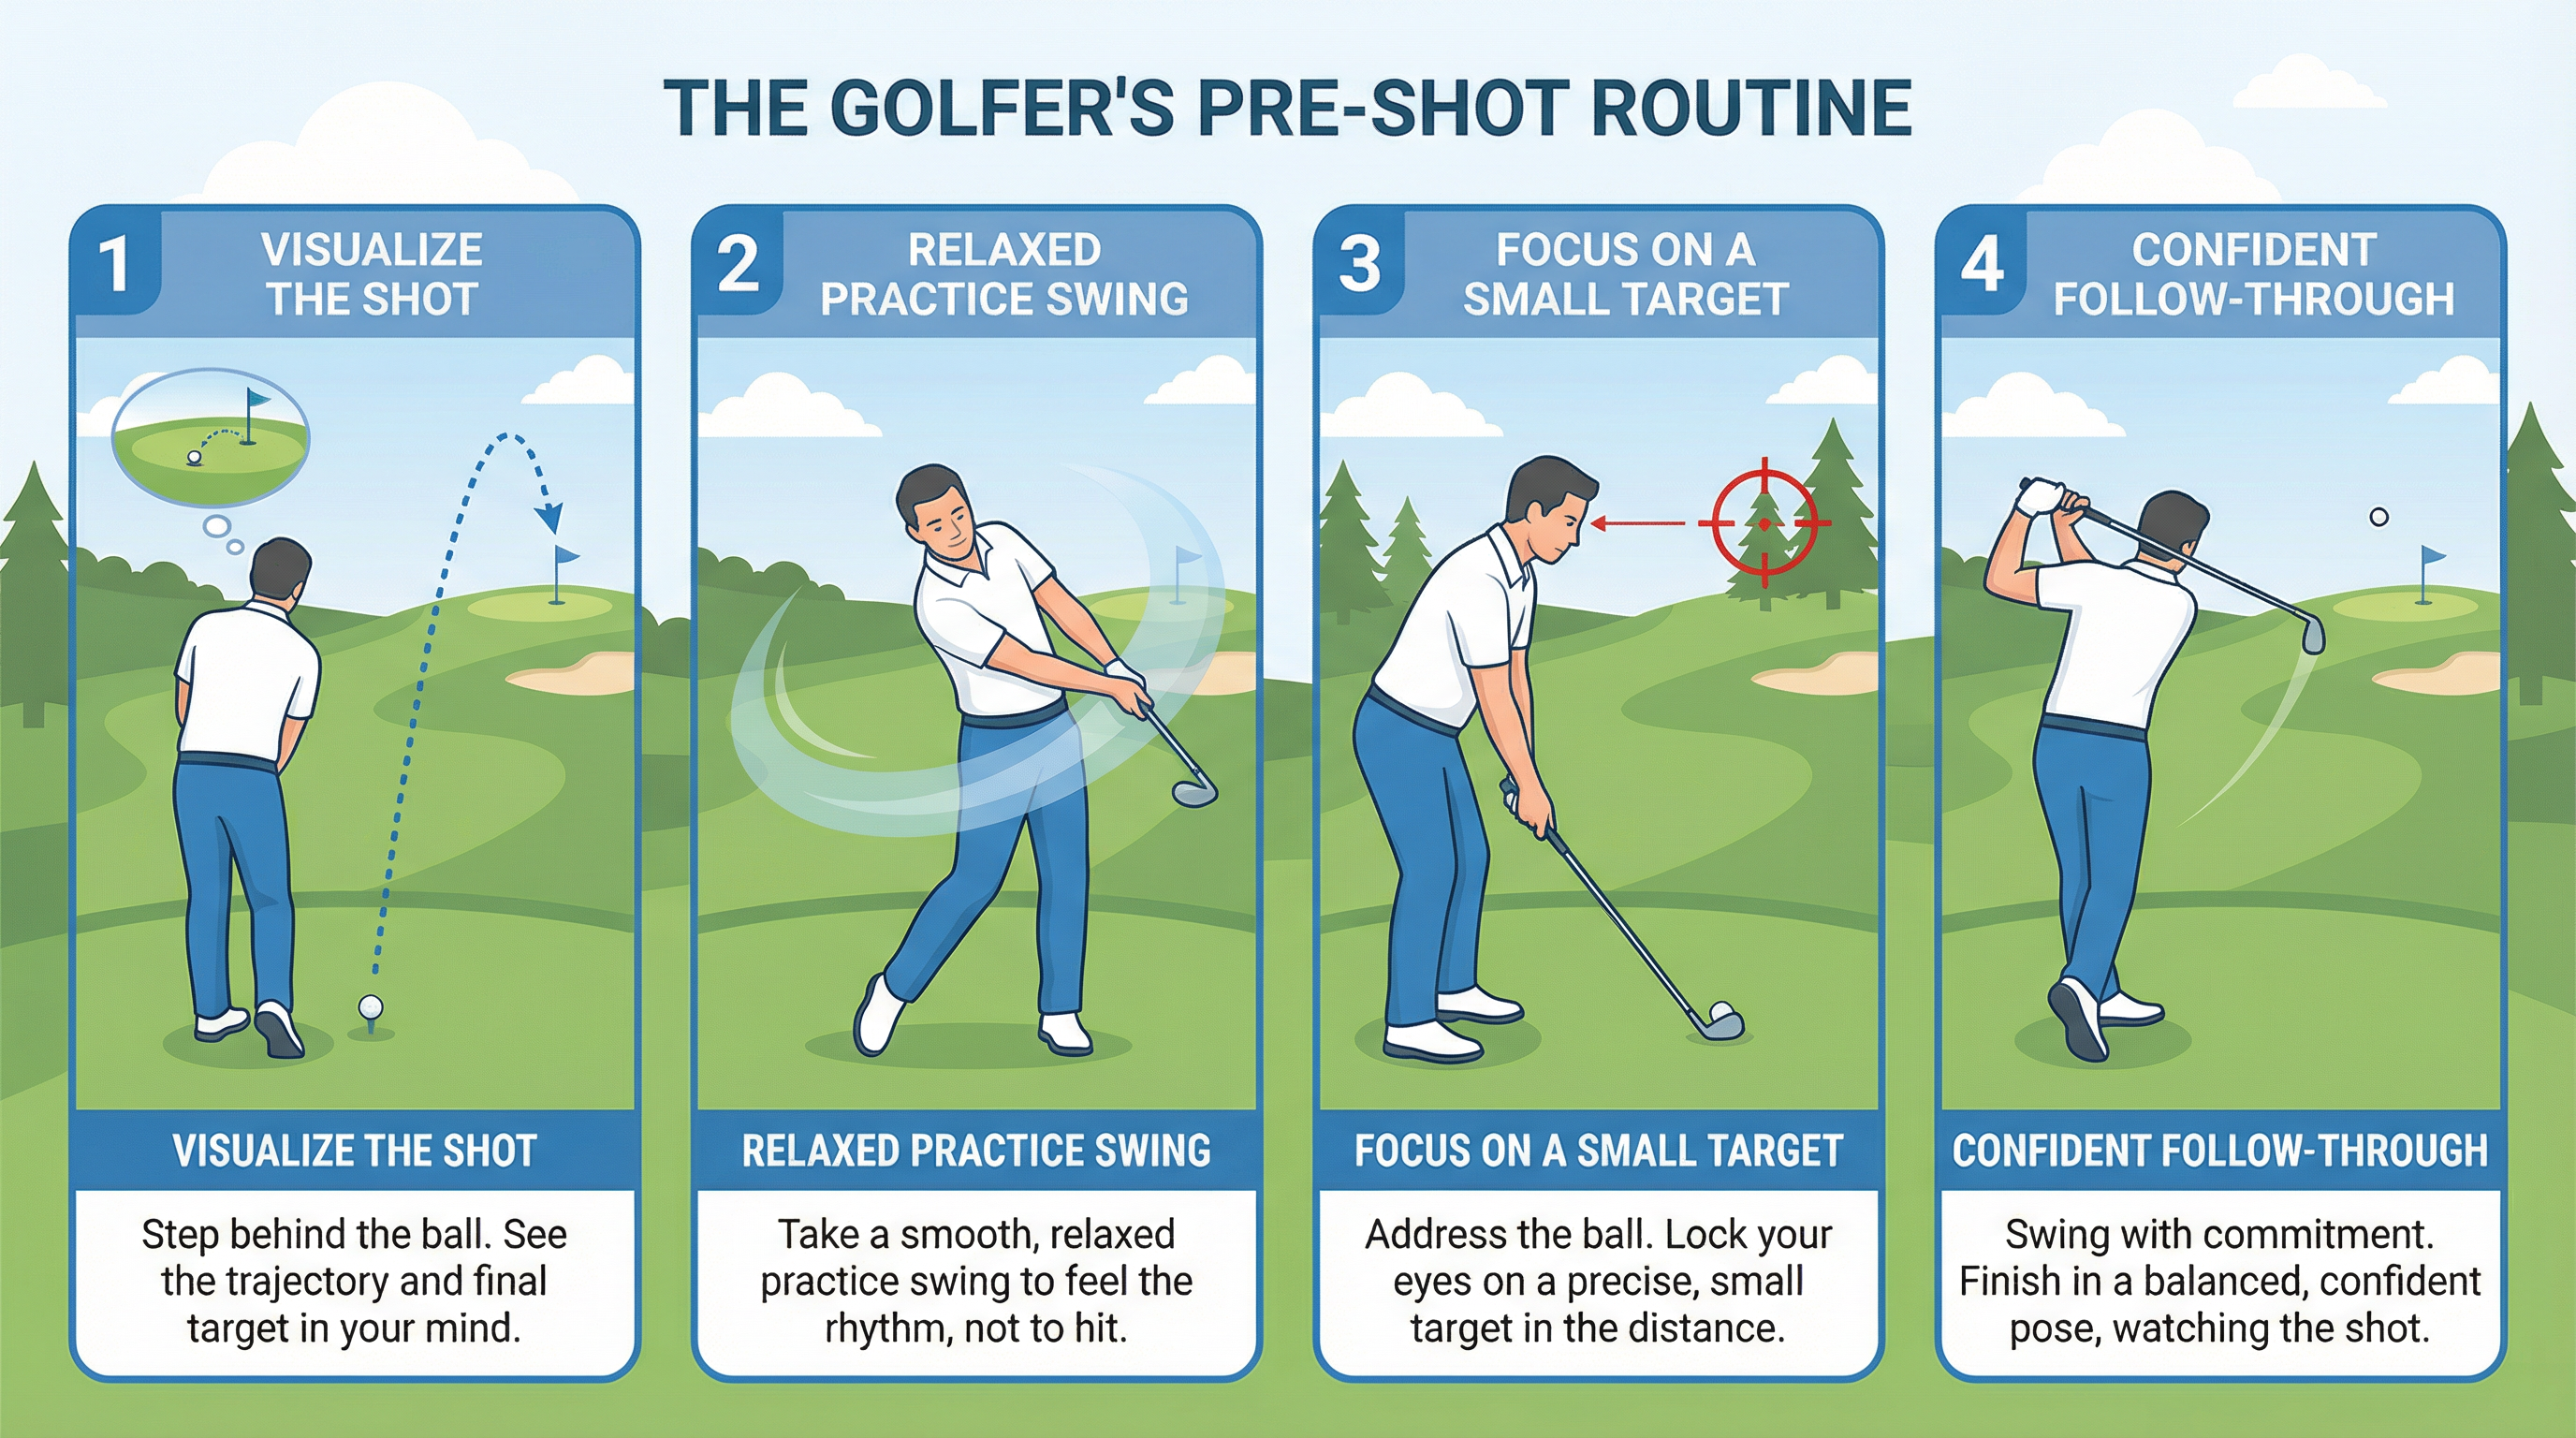
The Power of a “Pre-Shot Creation”
Instead of a rigid, robotic pre-shot routine, think of it as a “pre-shot creation.” This concept, inspired by the approach of players like Tiger Woods, reframes the process as an artistic and imaginative one . Rather than just going through the motions, you should feel the shot, engage your senses, and become genuinely interested in the unique puzzle each shot presents. This fosters a state of deep presence and curiosity, quieting the analytical mind.
Tiger Woods worked extensively with navy psychologist Dr. Jay Brunza early in his career, developing what he called “game training.” Woods emphasized the importance of bringing attention to “THIS SHOT in THIS moment” and described feeling the shot in his fingers rather than relying solely on visualization. At his best, Woods found a way to be immensely interested in each shot, playing from a position of curiosity rather than anxiety .
Mastering Your Mind: Awareness Over Control
One of the biggest paradoxes in golf psychology is that trying to control your thoughts often backfires. Telling yourself “don’t hit it in the water” only makes the water a more prominent feature in your mind . The key is not to suppress negative thoughts but to change your relationship with them through mindfulness and awareness. Acknowledge the thought without judgment, and then gently guide your focus back to your target and your breathing. The best players don’t have fewer negative thoughts; they are simply more skilled at not letting them take over.
Research shows that the average person has approximately 70,000 thoughts per day, with more than two-thirds being negative . The difference between elite golfers and amateurs is not the quantity of negative thoughts but how they respond to them. Elite players have developed the skill of awareness—noticing thoughts without becoming entangled in them—allowing the thoughts to pass like clouds in the sky.
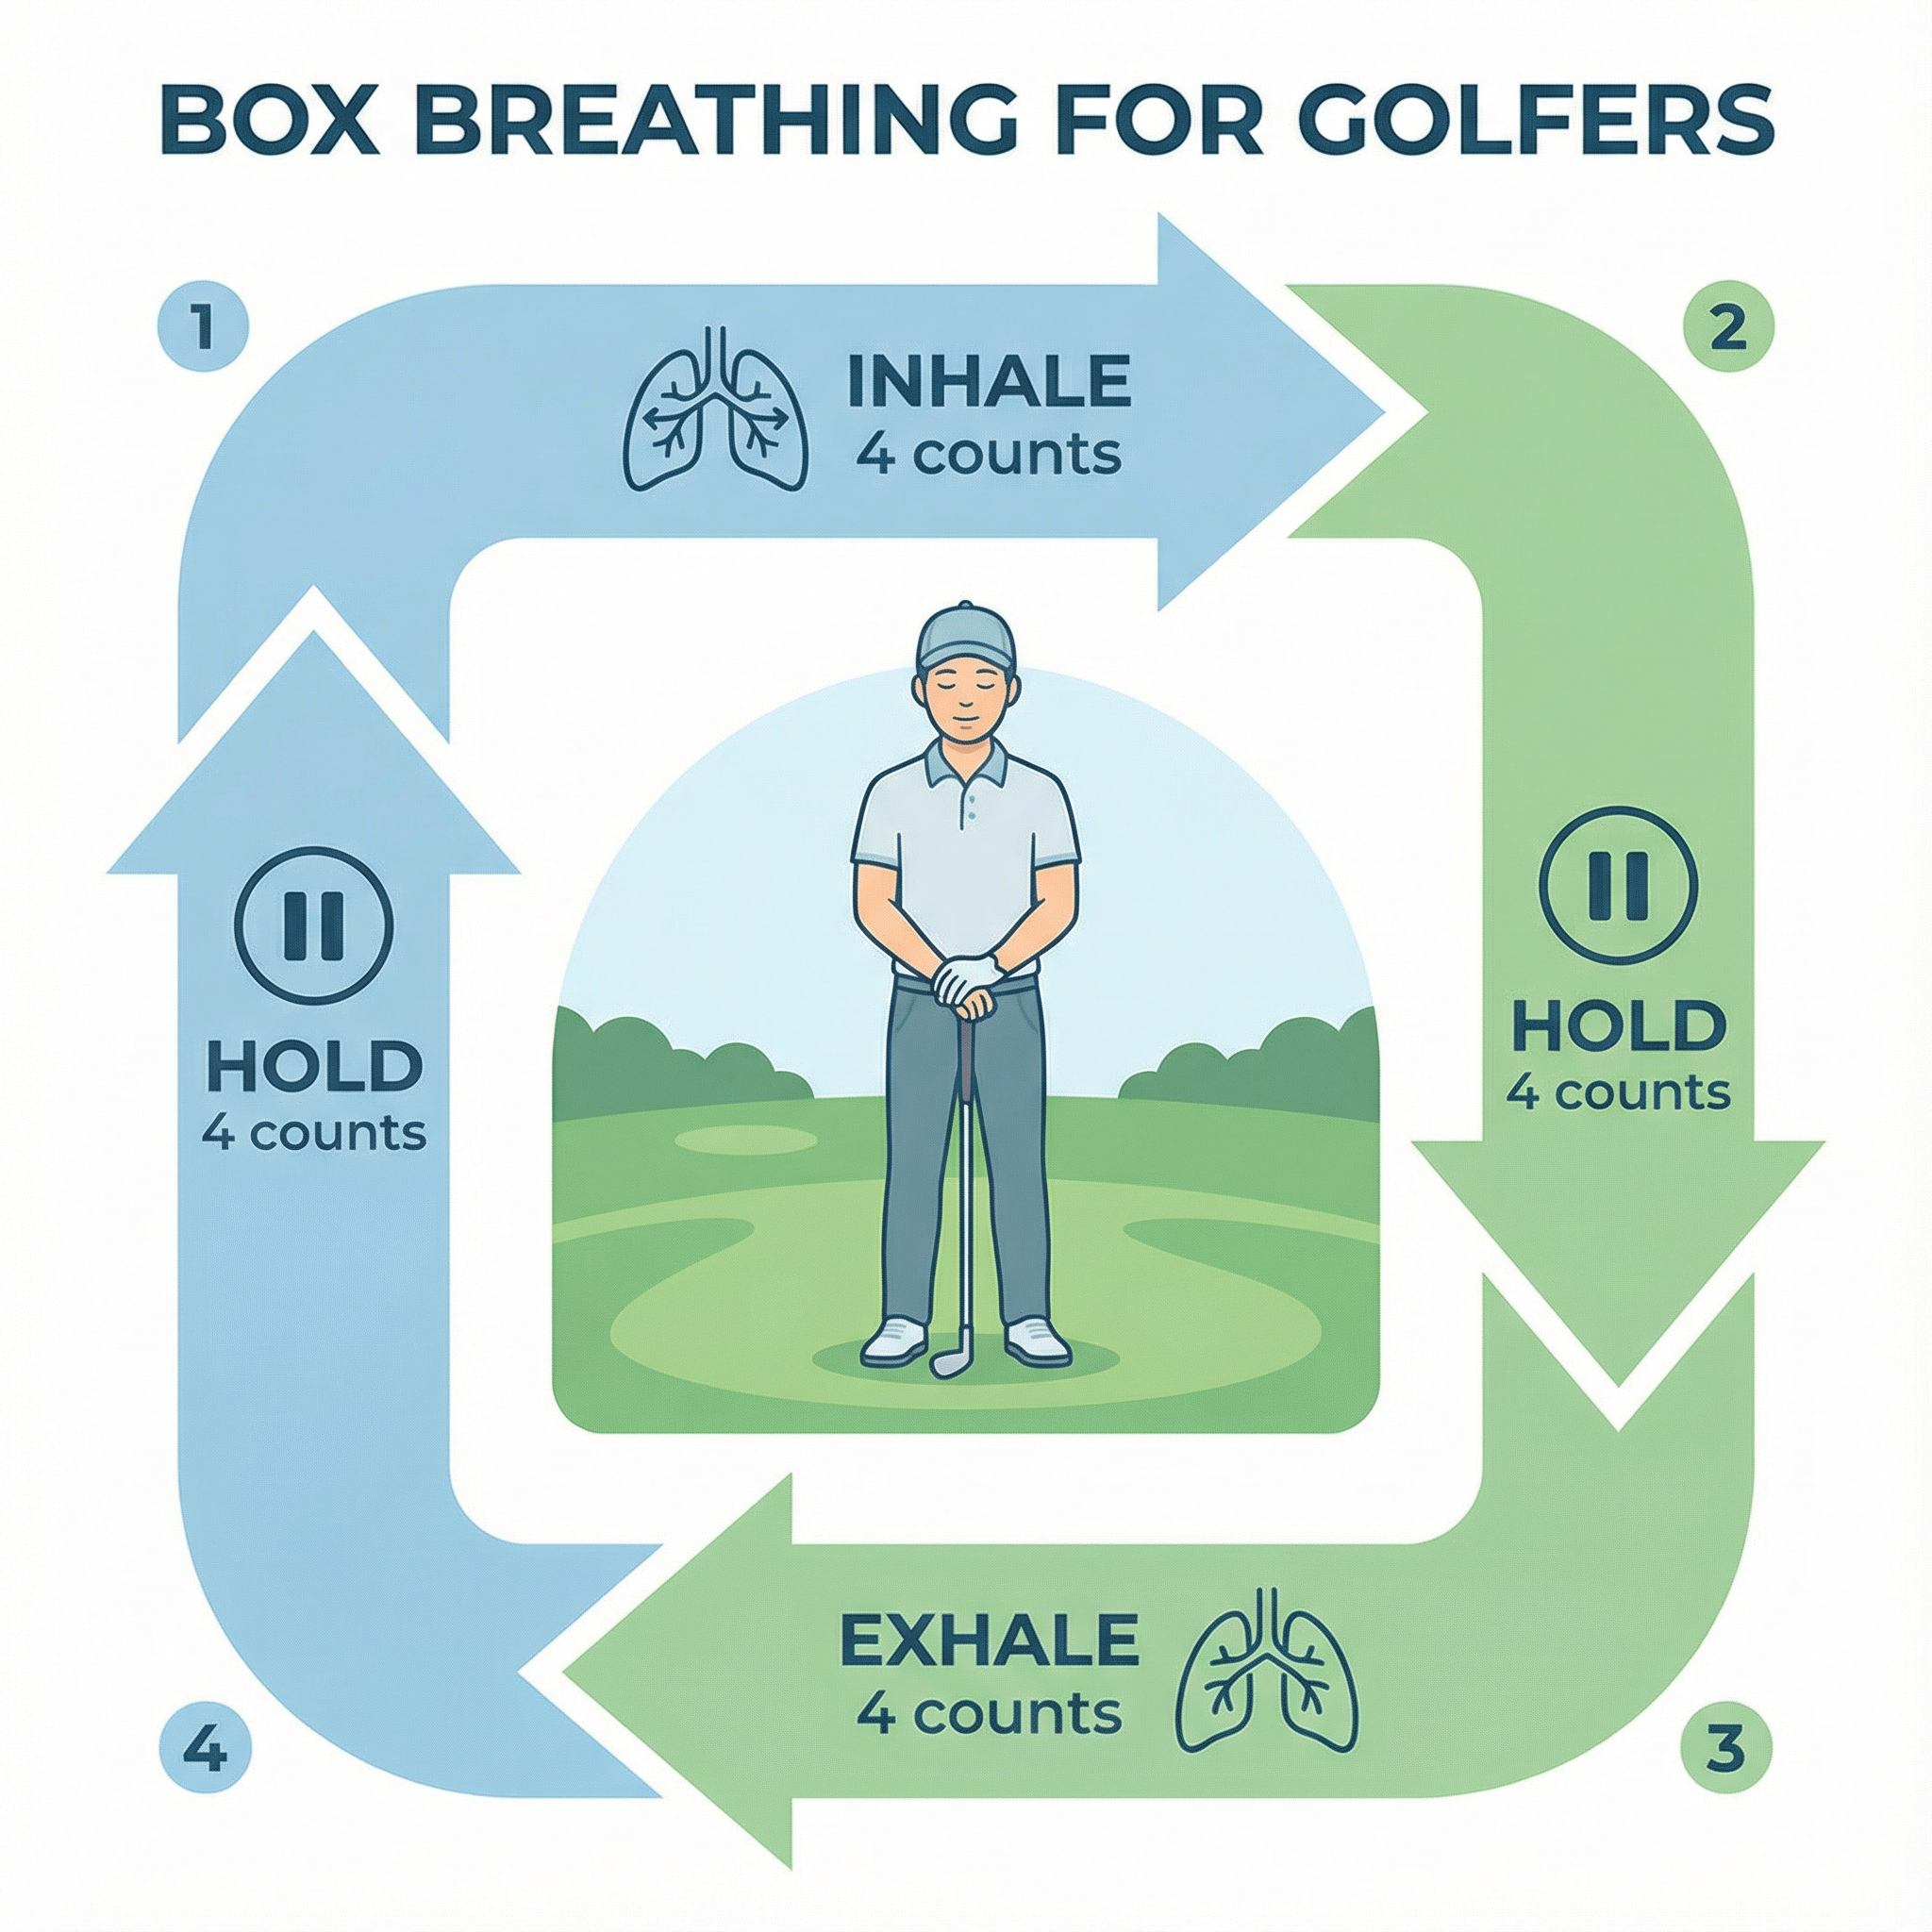
Breathe Like a Champion
Breathing is one of the most powerful and simple tools for managing your physiological state. When you feel pressure mounting, your breathing becomes shallow and rapid. By consciously slowing it down, you can signal to your nervous system that it’s time to calm down. A popular and effective technique is Box Breathing:
1.Inhale slowly for a count of four.
2.Hold your breath for a count of four.
3.Exhale slowly for a count of four.

4.Hold your breath for a count of four.
Repeating this cycle just a few times can significantly lower your heart rate and reduce muscle tension, allowing you to approach the shot from a state of calm focus .
The Science Behind Mental Training
Recent research validates what professional golfers have known intuitively for decades. A brain training study conducted with UCLA Golf demonstrated remarkable results: participants increased their greens in regulation by 12% and decreased three-putts per round by 9.7%. Perhaps most impressively, these improvements were sustained eight weeks after the training concluded . This demonstrates that mental skills, like physical skills, can be trained and improved with consistent practice.
A 2024 neuroscience study revealed that expert golfers exhibit distinct brain activity patterns during successful putts compared to unsuccessful ones. The research emphasized that mental preparation—not just physical technique—is the key differentiator between making and missing putts . This finding underscores the importance of developing a consistent mental routine before every shot.
Putting It Into Practice: Drills for a Stronger Mind
Improving your mental game requires consistent practice, just like your swing. Here are a few drills you can incorporate into your routine:
Pressure Putting Drill: Place three balls at 3, 6, and 9 feet from the hole. You must make all three in a row to complete the drill. If you miss, you start over. This simulates pressure and forces you to focus on your routine for each putt. As you improve, increase the difficulty by adding more balls or extending the distances.
Mindfulness on the Range: During your practice sessions, take a few moments between shots to simply be present. Feel the grip in your hands, notice the breeze, and listen to the sounds around you. This trains your ability to stay in the present moment, which is essential for peak performance on the course.
Post-Round Journaling: After each round, take five minutes to write down one thing you did well mentally and one mental challenge you faced. This builds self-awareness and helps you identify patterns in your mental game. Over time, you will notice recurring themes that you can address in your practice.
Target Practice with Consequences: On the range, pick a specific target for every shot—not just a general area. If you miss your target, perform a small penalty like five push-ups or hitting the next shot with your opposite hand. This adds consequences to your practice, making it more similar to on-course conditions where every shot matters.
Key Takeaways for Your Next Round
As you prepare for your next round, keep these fundamental principles in mind:
Trust over control. The more you try to consciously control your swing, the more tension you create. Trust the swing you have practiced and let your body execute naturally.
Process over outcome. Make your pre-shot routine your primary goal for every shot. When you focus on executing your process flawlessly, good scores follow naturally.
Awareness over suppression. You cannot eliminate negative thoughts, but you can change your relationship with them. Notice them, acknowledge them, and gently return your focus to the present moment.
Precision over generality. Always pick the smallest possible target. This sharpens your focus and gives your subconscious mind a clear objective.
Compassion over criticism. Treat yourself with the same kindness and encouragement you would offer a playing partner. Negative self-talk only compounds mistakes and drains your confidence.
Conclusion
The journey to mastering the mental game of golf is ongoing, but it is one of the most rewarding pursuits in the sport. By understanding the profound impact of your mind on your performance, recognizing common mental errors, and consistently practicing proven psychological techniques, you can unlock a new level of consistency, resilience, and enjoyment on the golf course. Remember, the next time you step onto the tee, your most powerful tool isn’t in your bag—it’s in your head. The difference between a good round and a great round often comes down to how well you manage the six inches between your ears.
Start small. Pick one technique from this article—perhaps developing a consistent pre-shot routine or practicing Box Breathing before important shots—and commit to it for your next three rounds. Track your progress, notice the changes, and gradually incorporate additional mental skills into your game. The mental game is not a quick fix, but a lifelong practice that will serve you well both on and off the course.
References
[1] NeuroTrackerX. (2023, December 1). Why Golf Performance is 90% Mental.
[2] McCarthy, P. (2025, November 8). The Mental Game of Golf: Pro Secrets You Haven’t Heard Before.
[3] Colorado Senior Golfers’ Association. The Brain Game – Spring Edition.
[4] McCarthy, P. (2025, November 8). The Mental Game of Golf: Pro Secrets You Haven’t Heard Before.
[5] Pan, X., et al. (2025). Mental fatigue in golf: A systematic review. PLOS ONE.
[7] Mind Caddie. (2025, November 9). Tiger Woods’ Mental Strategies.
[9] MyTPI. Mental Game: Brain Training Study With UCLA Golf.
[10] PsyPost. (2024, August 15). Golf: New neuroscience study reveals the secrets of better putting.
Blog
Stop Wasting Strokes: 5 Simple Drills to Kill the Dreaded 3-Putt
Tired of ruining a great hole with the dreaded 3-putt? These 5 simple drills fix your speed, conquer pressure, and turn three putts into two.

There is no feeling in golf quite as demoralizing as the 3-putt.
You smash a perfect drive. You hit a pure iron shot that lands safely on the green. You’re feeling like a pro, walking up to your ball with a birdie on your mind.
Then, disaster strikes. You blaze the first putt eight feet past the hole. Your comebacker for par is a nervous, jabby stroke that lips out. You tap in for a bogey, walking off the green with that all-too-familiar feeling of frustration, your good shots completely wasted.
The 3-putt is the great scorecard killer. It’s the difference between breaking 90 and shooting 95. The good news? It’s almost always the easiest problem to fix. It’s not about buying a $500 putter; it’s about controlling your speed and handling pressure.
Here are 5 simple, time-tested drills to kill the 3-putt and make you a confident force on the greens.
Why You 3-Putt (It’s Not What You Think)
Most amateurs 3-putt for two simple reasons, and neither has to do with a “bad stroke”:
- Poor Lag Putting: You leave your first putt so far from the hole that the second putt is still a challenge.
- Missed “Knee-Knockers”: You can’t consistently sink putts inside 3-5 feet.
These five drills are designed to fix both of those problems, starting today.
5 Drills to Become a 2-Putt Machine
Find a practice green and spend 20 minutes on these. You’ll see results in your very next round.
1. The Ladder Drill (For Lag Control)
This is the ultimate drill for dialing in your speed control.
- How to do it: Place three balls at 20, 30, and 40 feet from a hole (or use tees if you’re just practicing speed).
- The Goal: Hit the 20-foot putt, then the 30-foot, then the 40-foot. Your only goal is to get all three putts to stop within a 3-foot radius of the hole (imagine a hula-hoop around the cup).
- Why it works: It trains your brain to instinctively understand how hard to hit a putt based on distance. You’ll stop blazing putts 10 feet by or leaving them 10 feet short.
2. The Clock Drill (For Short Putt Pressure)
You must be automatic from three feet. This drill adds the pressure you feel on the course.
- How to do it: Place 12 balls in a 3-foot circle around the hole (like the numbers on a clock).
- The Goal: Go around the clock and make all 12 putts in a row. If you miss one, you must start over from the beginning.
- Why it works: It’s not just about mechanics; it’s about focus. When you get to ball #10, you will feel the pressure. This simulates the feeling of having to make a putt for par.
3. The Gate Drill (For a Pure Roll)
Missed short putts are often caused by a poor starting line. This drill gives you instant feedback.
- How to do it: Find a straight, 5-foot putt. Place two tees on the ground just wide enough for your putter head to pass through. About a foot in front of your ball, place two more tees just slightly wider than the ball itself.
- The Goal: Stroke the putter through the first “gate” and roll the ball through the second “gate.”
- Why it works: If you hit the ball off-center or have a wobbly stroke, the ball will hit the second gate. It forces you to hit the sweet spot and start the ball exactly where you’re aiming.
4. The 100-Footer (The “No 3-Putt” Zone)
This drill is simple: go to one end of the practice green and putt to a hole on the opposite end. Your goal is not to make it, but to get it inside that imaginary 3-foot circle. Do this 10 times. This makes 30 and 40-footers on the course feel like tap-ins by comparison.
5. The “Read, Roll, and React” Drill
Stop agonizing over every putt. This drill teaches you to trust your first instinct.
- How to do it: Take three balls to a 25-foot breaking putt.
- The Goal: You have 20 seconds total. In that time, you must read the green, take one practice stroke, and hit all three putts.
- Why it works: It stops “paralysis by analysis.” It trains you to pick a line, trust your speed, and accept the result. You’ll be amazed at how much better your instincts are than your over-analytical brain.
It’s About Process, Not Perfection
You’re still going to 3-putt occasionally. Even the pros do. But by practicing these drills, you’ll be building confidence and skill. You’ll stop fearing long putts and start knowing you can get them close. That confidence is the real secret to finally killing the 3-putt for good.
- Advertisment


Golf Fitness for the Off-Season: Build Strength, Flexibility, and Power Before Spring

The Smart Player’s Guide to Shaving Strokes Without Changing Your Swing

The Mental Game of Golf: Mastering the Psychology Behind Lower Scores


-
 Product Review6 years ago
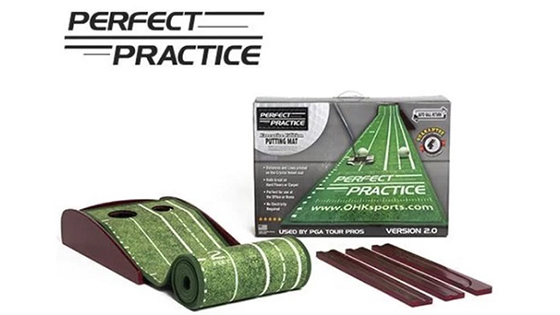
The Perfect Practice Putting Mat Review by Jason Tenzer
-
 Blog4 years ago
Loophole Rule Offers PGA Tour Pros a Mulligan
-
Blog5 years ago
2021 Buyer’s Guide: The Top 10 Value Golf Balls For Distance & Feel
-
Blog5 years ago
Golf Marriage Counselor
-
 Blog6 years ago
9 Biggest Chokes Of The Past Decade
-
 Product Review6 years ago
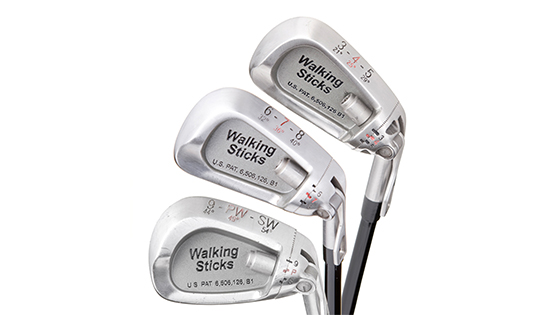
THE ADJUSTABLE IRONS: WALKING STICKS GOLF CLUBS
-
Blog5 years ago
What Your Golf Clubs Say About You
-
Equipment6 years ago
OHK Sports Interview by Jason Tenzer