Performance Lab
How to Improve Your Putting Grip: The 3 Grips That Work Best
Not sure which putting grip works best? The Resident PGA Pro breaks down the 3 most effective putting grips and how to choose the right one for you.

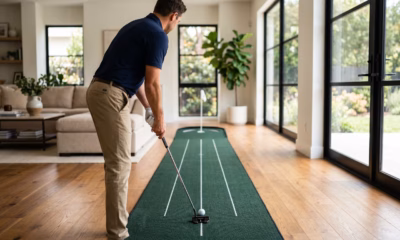
The putting grip is the most overlooked fundamental in golf — and it is costing you strokes every single round. If you are struggling to start the ball on your intended line, or if your distance control feels like a guessing game, the answer is almost always in your hands. The way your hands connect to the putter dictates face angle at impact, tempo, and release. Today, I am going to walk you through the three putting grips that actually work, how to execute each one correctly, and how to determine which one belongs in your game. Consider this the same instruction you would get in a $200 lesson — for free.
Why Your Putting Grip Matters More Than Your Putting Stroke
Most golfers spend hours obsessing over the path of their putter head. They buy alignment training aids, they watch slow-motion videos of tour pros, and they try to force a perfect straight-back, straight-through motion. But here is the truth: your stroke path is largely a reaction to your setup and your putting grip.
The primary job of the putting grip is to quiet the wrists and hands. In a full swing, wrist hinge creates power. On the putting green, power is the enemy of consistency. We need the large muscles of the shoulders and upper back to control the motion — not the small muscles of the hands and wrists. If your grip is too tight, too weak, or poorly positioned, those small muscles will take over. The result is a flipped putter face, a pulled putt, and the dreaded deceleration through impact.
A correct putting grip neutralizes the hands and allows the putter face to return to square naturally. Before you change your stroke, change your grip. The improvement will be immediate.
Grip Type Primary Benefit Best For Conventional Overlap Feel and distance control Golfers with a smooth pendulum stroke Cross-Handed (Left Hand Low) Face stability, prevents breakdown Golfers who pull short putts Claw Eliminates right-hand dominance Golfers with the yips or a handsy stroke
Putting Grip #1: The Conventional Overlap Grip
The conventional overlap — more precisely called the reverse overlap — is the most common putting grip in golf. It is the grip most golfers learn first, and it is still used by a significant percentage of tour professionals, including many of the best putters in the world.
How to Execute It:
1.Place your right hand (for right-handed golfers) on the grip first, lower down the shaft.
2.Place your left hand above it, so the left thumb runs straight down the flat front of the grip.
3.Instead of overlapping the right pinky over the left index finger as you would in a full-swing grip, do the reverse: the left index finger rests over the fingers of the right hand.
4.Both thumbs should point straight down the flat front of the putter grip, creating a unified, stable unit.
The reverse overlap keeps the hands connected while slightly limiting the right hand from overpowering the stroke. This is the key mechanical difference from a full-swing grip. Grip pressure should be light — about a 4 out of 10 on a scale where 10 is maximum force.
Who Should Use It: Golfers who rely heavily on feel and those who already have a smooth, pendulum-like stroke. If your primary issue is distance control rather than starting line, the conventional overlap is often the best choice.
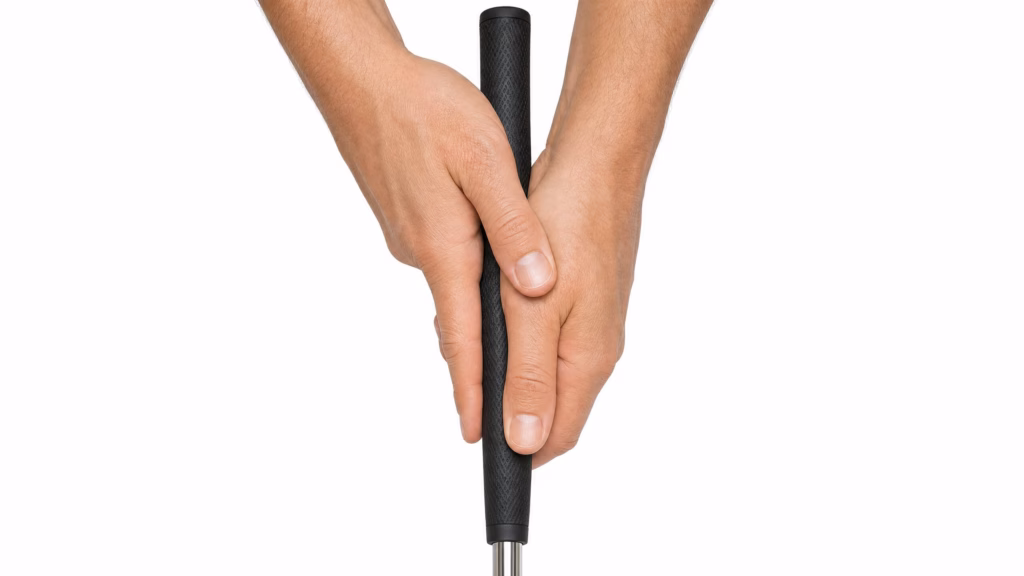
The conventional overlap grip: left index finger rests over the right hand, thumbs pointing straight down the grip.
Putting Grip #2: The Cross-Handed (Left Hand Low) Grip
The cross-handed grip — also called left hand low — flips the traditional hand placement. It was popularized by players like Jordan Spieth and has become one of the most widely used alternative grips on tour. It is not a gimmick; it is a mechanical fix for a very common problem.
How to Execute It:
1.Place your left hand on the putter grip below your right hand. This is the opposite of the conventional setup.
2.The right hand sits at the top of the grip.
3.Both thumbs still run straight down the flat top of the grip.
4.Grip pressure remains light and constant throughout the stroke.


By placing the lead hand lower on the club, you automatically level your shoulders at address. More importantly, you create a straight line from your left shoulder through your left arm and down the putter shaft. This configuration locks the left wrist into a flat position, preventing the hands from breaking down or “flipping” through impact. It is mechanically superior for keeping the putter face square through the hitting zone.
Who Should Use It: If you consistently pull putts left (as a right-handed player), or if your lead wrist breaks down through impact, the cross-handed grip is a revelation. It is the most effective grip for golfers who struggle with short putts and starting the ball on the correct line.
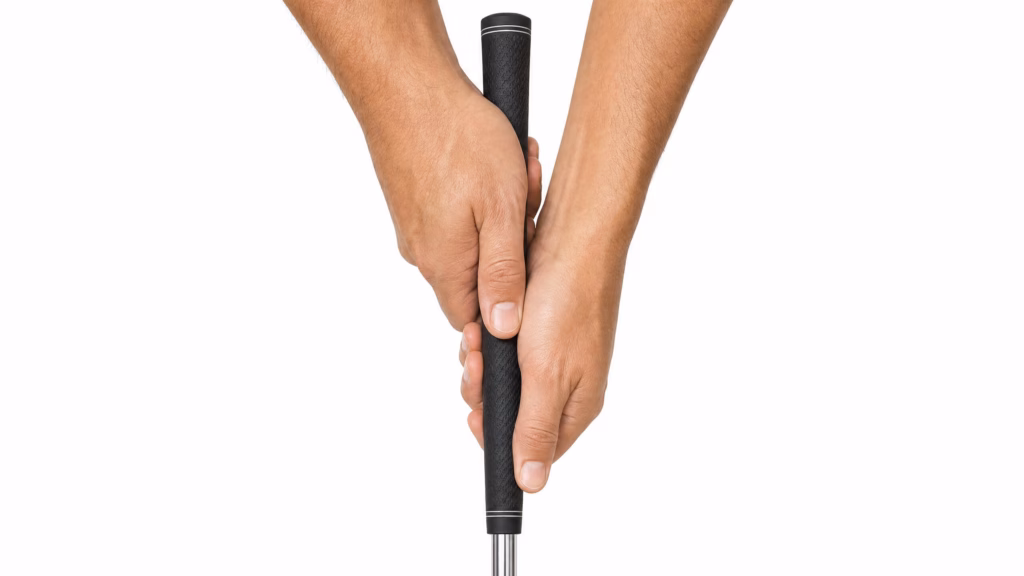
The cross-handed grip: left hand below right, creating a flat lead wrist and level shoulders at address.
Putting Grip #3: The Claw Putting Grip
The claw grip looks unconventional, and it will draw stares on the practice green. But it has saved the careers of multiple professional golfers and is one of the most effective solutions to the most feared problem in putting: the yips.
How to Execute It:
1.Your left hand grips the top of the putter normally, just as it would in a conventional grip.
2.Your right hand does not wrap around the grip. Instead, the grip rests between your right thumb and index finger, with the palm facing the target.
3.The remaining fingers of the right hand rest lightly on the front or side of the grip — they are guides, not grippers.
4.The right hand applies essentially zero force. It is there for stability only.
The claw completely neutralizes the right hand. In a conventional grip, a dominant right hand can easily twist the putter face closed or push it open at the moment of impact. By removing the right hand’s ability to grasp the club, the left hand and shoulders are forced to control the entire stroke. This eliminates the twitchy, involuntary movements known as the yips.
Who Should Use It: Golfers who suffer from the yips, those who have a very “handsy” stroke, or anyone who struggles to keep the putter face square on fast, breaking greens. The feel on long lag putts takes time to develop, but the consistency inside 10 feet is unmatched.
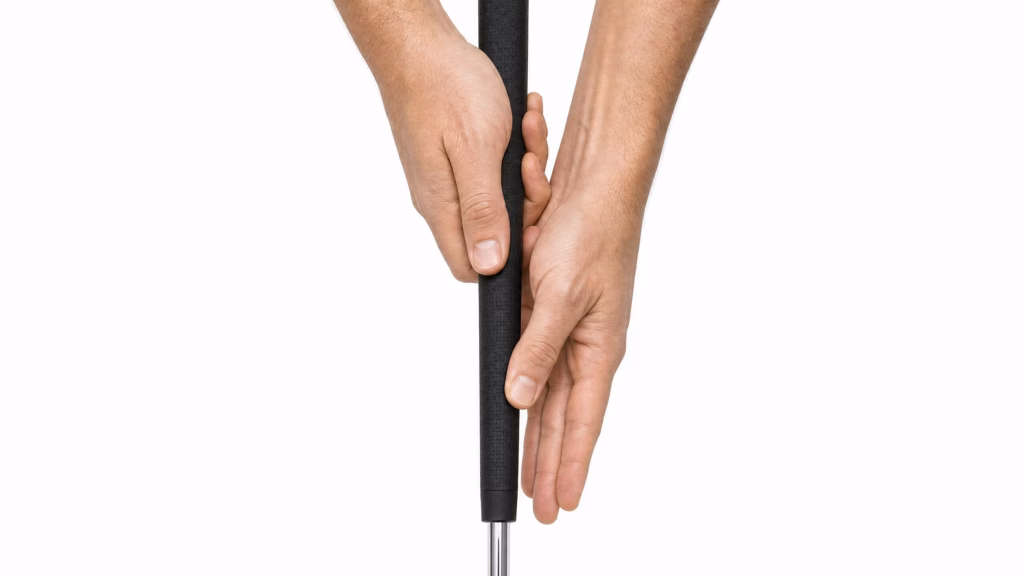
The claw grip: right hand acts as a guide only, completely removing right-hand dominance from the stroke.
How to Choose the Right Putting Grip for Your Game
Choosing a putting grip is not about copying your favorite tour pro. It is about diagnosing your specific putting flaw and applying the correct mechanical fix. Here is a simple diagnostic framework:
Diagnose your miss first. Stand over 10 five-foot putts and note where they go. Are they consistently left? Consistently right? Is the face twisting? Is your distance control erratic?
•If your speed is poor but your line is decent: Stick with the Conventional Overlap and focus on tempo and pendulum consistency.
•If you consistently pull short putts and your lead wrist breaks down: Switch to Cross-Handed. The structural change will be immediate and obvious.
•If your hands shake, twitch, or take over the stroke involuntarily: Commit to the Claw. It is not a last resort — it is a precision tool.
Do not be afraid to experiment. Spend a full week on the practice green with a new grip before taking it to the course. It will feel uncomfortable at first. That discomfort is your nervous system adapting to a more mechanically sound position. Give it time. The results will speak for themselves.
Putting Grip Drills: How to Build Consistency
Once you have selected your putting grip, you need to train your body to trust it under pressure. These two drills address the two most common grip-related errors.
The Coin Drill for Grip Pressure
Place a small coin on top of your putter grip. Take your grip and make a full putting stroke. If the coin falls off, your grip pressure is changing during the stroke — typically tightening at impact, which is one of the most common causes of a pulled putt. Your grip pressure must remain constant from takeaway to follow-through. The coin will tell you the truth.
The One-Handed Lead Arm Drill
Take your normal setup, then remove your trail hand (right hand for right-handed players). Hit 10 putts from 5 feet using only your lead hand. This forces the lead arm and shoulder to control the stroke and prevents any wrist breakdown. Once you put the trail hand back on, maintain that same feeling of lead-arm control. This drill is particularly effective for golfers transitioning to the cross-handed grip.

Consistent grip pressure and lead-arm control are the two keys to a repeatable putting stroke.
Quick Recap: The 3 Putting Grips
| Grip | Key Mechanic | Fix It Solves | Who Should Use It |
| Conventional Overlap | Reverse overlap quiets right hand | Poor feel, inconsistent tempo | Feel-based putters with a smooth stroke |
| Cross-Handed | Lead hand low, flat lead wrist | Pulled putts, wrist breakdown | Golfers who miss left and lose the face |
| Claw | Right hand as guide only | Yips, right-hand dominance | Handsy putters, yips sufferers |
The putting grip is not a minor detail. It is the foundation of every putt you hit. Get it right, and the rest of your stroke has a chance to work. Get it wrong, and no amount of stroke mechanics will save you. Spend 20 minutes on the practice green this week with the grip that matches your miss. You will be surprised how quickly the ball starts going where you are looking.
FAQ
Q: Does it matter which putting grip I use as a beginner?
A: Start with the conventional overlap. It provides the most natural feel and the best feedback as you learn distance control. You can always switch later if a specific problem develops.
Q: Can I use a claw grip with a standard putter?
A: Yes. The claw grip works with any putter. You do not need a special grip or putter to use it, though a wider, flat-sided grip (like a SuperStroke) makes it more comfortable.
Q: How long does it take to get used to a new putting grip?
A: Most golfers need 7 to 14 days of consistent practice before a new putting grip feels natural. Do not judge it after one round.
Q: Should I use a putting glove?
A: A putting glove is optional. Some golfers find it helps with grip consistency, particularly in humid conditions. It is a personal preference, not a mechanical requirement.
Q: What grip pressure should I use for putting?
A: Think of it as a 4 out of 10 — firm enough to control the putter, light enough that your forearms stay relaxed. If you can see the tendons in your forearms, you are gripping too tight.
Q: Can I switch putting grips mid-round?
A: Technically yes, but it is not recommended. Grip changes require practice to ingrain. Making a change mid-round without preparation usually makes things worse, not better.
Related Reading
•How to Stop Three-Putting: 7 Drills That Actually Work