Drills
Advanced Shot Shaping
How to Control Ball Flight Like a Pro
![](https://clickitgolf.com/wp-content/uploads/2024/11/flight-curve.webp)
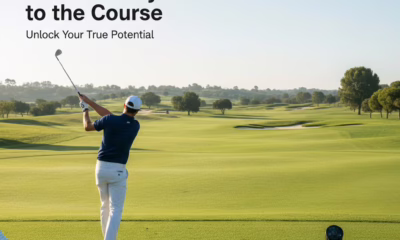
Golf is a beautiful blend of art and science, and nothing illustrates this better than shot shaping. As the resident pro at Clickit Golf, I’ve witnessed countless golfers who seek to break through the plateau and add finesse to their game. Shot shaping—controlling the flight path of the ball to curve left or right, or alter trajectory—is the next level for those ready to play with intention. Today, let’s dive into how to control ball flight like a pro and gain mastery over your game.
Understanding Shot Shaping
![fadedraw](https://clickitgolf.com/wp-content/uploads/2024/11/fadedraw-1024x576.jpg)
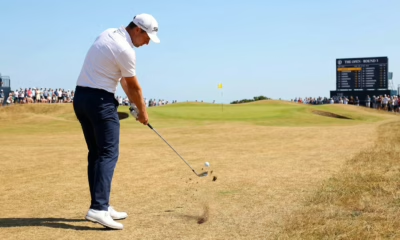
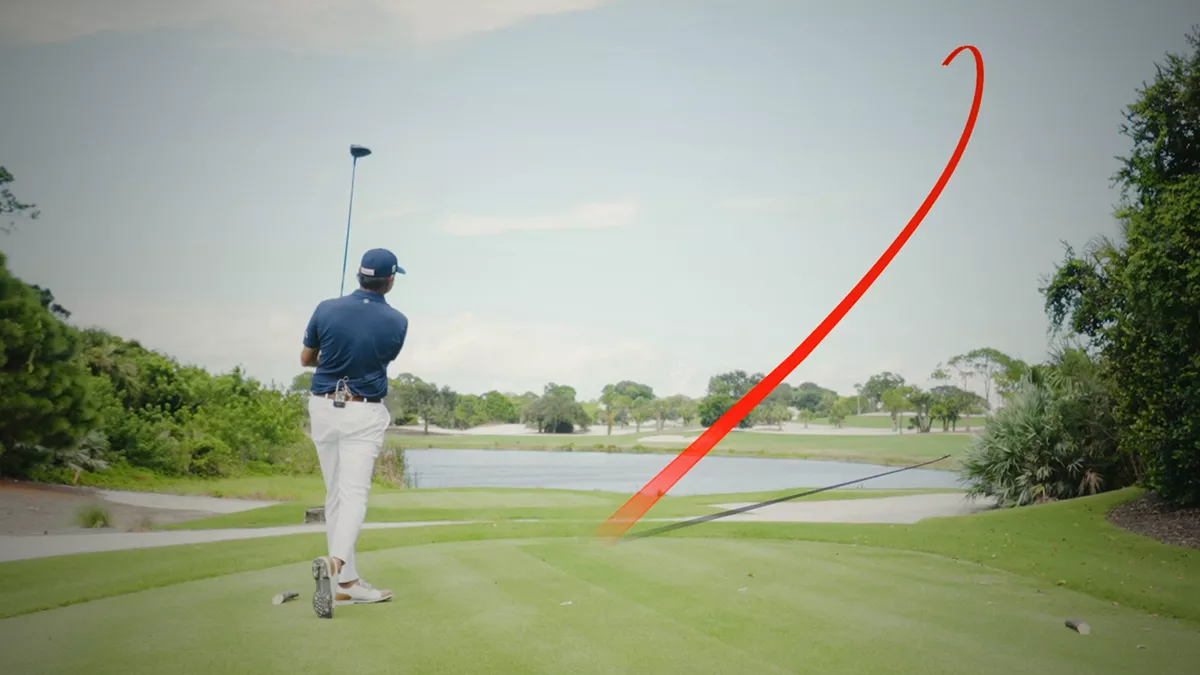
Shot shaping is all about altering the ball’s path to match the demands of the course. It’s not just about power—it’s about finesse, creativity, and control. Mastering shot shaping allows you to navigate around trees, adjust to tricky winds, or set yourself up for the perfect approach. Generally, shot shapes fall into two categories: fades and draws, with stingers and high shots adding depth to your toolkit.
A fade moves gently from left to right (for right-handed golfers), while a draw moves right to left. These controlled movements can keep you out of trouble and enhance accuracy. The ability to manipulate trajectory is equally important—high shots can help land softly on fast greens, while low stingers are perfect for windy days or getting under overhanging branches.
The Fundamentals of Shot Shaping
To shape shots like a pro, start by understanding three fundamental elements: clubface angle, swing path, and body alignment. Each plays a crucial role in determining your ball’s flight.
- Clubface Angle: The face of your club is responsible for where the ball starts. Whether it’s slightly open, closed, or neutral, the clubface determines the initial direction of your shot. To produce a fade, keep the face slightly open relative to your swing path. For a draw, close the clubface slightly while swinging from inside the line.
- Swing Path: The swing path—the direction the clubhead travels through impact—is the key to curvature. To execute a fade, your swing should come across the ball slightly from outside to in. For a draw, focus on swinging from inside to out. It’s this relationship between swing path and clubface that creates spin, ultimately curving the ball mid-flight.
- Body Alignment: Your alignment will guide the path and influence your ability to execute shot shapes consistently. For a fade, aim your feet and shoulders left of your target while keeping the clubface pointed slightly towards the target line. For a draw, align your body slightly to the right and focus on an inside-out swing path.
Tips and Tricks for Advanced Shot Shaping
![pexels-jopwell-1325655](https://clickitgolf.com/wp-content/uploads/2024/11/pexels-jopwell-1325655-1024x1015.jpg)
1. Practice with Purpose
Set up specific practice sessions dedicated to shot shaping. Use alignment sticks or markers to visualize swing paths, and create scenarios that force you to use different shapes. Remember, muscle memory is critical—the more you practice shaping shots deliberately, the more natural it will feel on the course.
2. Control Your Grip Pressure
Grip pressure has a big impact on your ability to shape shots. A relaxed grip allows for more wrist action, which is key in manipulating the face angle through impact. Experiment with a slightly looser grip when trying to fade, and slightly firmer when hitting a draw—but be mindful not to grip too tight, as this often leads to tension and poor results.
3. Master the Low Stinger
![pexels-sebastian-angarita-188980555-12642295](https://clickitgolf.com/wp-content/uploads/2024/11/pexels-sebastian-angarita-188980555-12642295-683x1024.jpg)
The stinger is one of the most versatile shots in a golfer’s arsenal, ideal for keeping the ball below the wind or navigating low-hanging obstacles. To hit a stinger, use a long iron or hybrid and position the ball slightly further back in your stance. Keep your hands ahead of the clubhead through impact, and limit your follow-through. The key is a shallow, sweeping strike that keeps the flight low and piercing.
4. Adjust Ball Position for Trajectory Control
To add height to a shot, move the ball slightly forward in your stance, widen your stance, and increase the loft through your follow-through. For lower shots, position the ball further back, narrow your stance, and focus on keeping your hands ahead. Making small adjustments to ball position can create dramatic differences in trajectory, giving you more control when it counts.
5. Visualization and Mental Approach
Before executing any shaped shot, visualize the entire path. Imagine the ball’s trajectory, where it peaks, and how it lands. Visualization primes your body to follow through in alignment with your intended shape. Confidence is crucial; hesitation can alter your swing path or grip—ruining the shape. Practice committing fully to the shape you intend to play.
Common Mistakes to Avoid
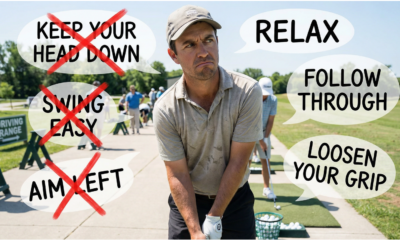
- Overthinking: The key to effective shot shaping is consistency. Avoid overcomplicating your swing by making too many adjustments. Keep changes simple: minor tweaks in stance, swing path, and clubface angle should do the trick.
- Neglecting the Basics: Fundamentals like balance, rhythm, and tempo are still key, even when shaping shots. Be sure not to sacrifice a solid foundation just to execute a shaped shot.
- Ignoring the Lie: The lie of the ball affects your ability to shape it. A downhill lie, for instance, makes it harder to draw the ball, while an uphill lie promotes height. Always assess the conditions and adapt accordingly.
Bringing It All Together
Mastering shot shaping gives you the freedom to truly play the course rather than letting the course play you. It’s about learning to think ahead, solving problems, and finding the best solution—skills that separate scratch players from casual golfers. By understanding your swing and making small adjustments, you’ll unlock the potential to sculpt each shot to perfection.
At Clickit Golf, we believe in helping golfers improve not just through distance, but also with creative strategy and control. Take these tips to the range and let your imagination shape your next round!
Happy golfing, and see you on the course!
![](https://clickitgolf.com/wp-content/uploads/2025/01/bump.jpeg)
When it comes to shaving strokes off your scorecard, few shots are as reliable as the classic bump-and-run. While flashy flop shots and high-arching chips grab the spotlight, it’s the humble bump-and-run that consistently delivers results—especially under pressure.
What Makes the Bump-and-Run So Effective?
Unlike a high-lofted chip, which carries significant risk if not struck perfectly, the bump-and-run keeps the ball low and rolling, reducing the margin for error. This makes it ideal for those unpredictable lies just off the green, or when navigating subtle slopes and uneven terrain.
Key Tips to Nail Your Next Bump-and-Run:
- Club Selection Matters: While many players instinctively reach for a wedge, consider using an 8-iron or even a hybrid. These clubs help keep the ball closer to the ground, allowing for a more predictable roll.
- Position and Posture:
- Set the ball slightly back in your stance to encourage a downward strike.
- Keep your hands ahead of the ball at address and through impact.
- Maintain a balanced stance, favoring a slightly open set up to keep the stroke smooth and controlled.
- A Putting Stroke Mentality:
- Think of the bump-and-run as an extended putt rather than a miniature chip.
- Use a pendulum-like motion with minimal wrist action.
- Focus on rhythm and tempo—your goal is to get the ball rolling as soon as it lands.
- Distance Control:
- Consider the ratio of carry to roll. For example, if you’re just a few paces off the green, aim for a short carry and a longer roll. If you’re further back, plan for a slightly longer carry and less roll.
- Practice on various slopes to understand how different surfaces affect rollout.
When to Use the Bump-and-Run:
This shot shines on tight lies, downhill chips, or greens with plenty of room to work. It’s also an excellent choice when you’re playing on firm courses where the ball will naturally roll out more.
Mastering the bump-and-run might not look as dramatic as pulling off a high, spinning lob shot, but it’s the bread-and-butter play that helps you avoid big numbers. Add it to your arsenal, and you’ll see the payoff in lower scores and a more consistent short game.
![](https://clickitgolf.com/wp-content/uploads/2025/01/putting-grips.webp)
Mastering Golf Putting Grips: Claw, Two Thumbs, Left-Hand Low & More
In the intricate world of golf, where every stroke counts, how a golfer grips their putter can significantly impact their performance on the green. From the traditional to the unconventional, let’s delve into some popular putting grips—the Claw, the Two Thumbs, the Left-Hand Low, the Arm Lock, the Long Putter Claw, and the Alternative Reverse Overlap—to understand their mechanics and benefits.
![clawgrip](https://clickitgolf.com/wp-content/uploads/2025/01/clawgrip-1024x585.webp)
The Claw Grip
The Claw grip has gained popularity among professional and amateur golfers alike due to its ability to promote a more stable putting stroke. In this grip:
- The dominant hand (typically the right hand for right-handed golfers) holds the putter with the fingers forming a “claw” shape.
- The non-dominant hand remains in a conventional grip position on the upper part of the handle.
This method minimizes the influence of the dominant hand, reducing the chances of flipping or excessive wrist movement during the stroke. The result is a smoother and more consistent putting motion. Golfers who struggle with the yips or overly active wrists often find relief using the Claw grip.
![2thumbs](https://clickitgolf.com/wp-content/uploads/2025/01/2thumbs.jpg)
The Two Thumbs Grip
True to its name, the Two Thumbs grip involves positioning both thumbs on the top of the putter grip. Here’s how it works:
- Both hands are placed symmetrically on the handle, with the thumbs running parallel to each other on the flat surface of the grip.
This grip encourages a balanced and unified hand action, which promotes a pendulum-like stroke. Golfers who prefer simplicity and symmetry often gravitate towards the Two Thumbs grip, as it eliminates unnecessary wrist action and helps maintain a straight putter path.
The Left-Hand Low Grip
The Left-Hand Low grip, also known as the Cross-Handed grip, is a popular option for golfers seeking improved control and alignment. In this grip:
- The left hand (for right-handed golfers) is placed below the right hand on the putter handle.
This configuration helps keep the shoulders level and reduces wrist breakdown during the stroke. Many players find that this grip enhances their ability to keep the putter face square to the target line.
![armlock_putting_stroke_500](https://clickitgolf.com/wp-content/uploads/2025/01/armlock_putting_stroke_500.webp)
The Arm Lock Grip
The Arm Lock grip is a modern innovation designed to provide maximum stability. Here’s how it works:
- The grip is extended up the leading arm (usually the left arm for right-handed golfers), creating a locked position.
- Both hands conventionally hold the putter, but the handle’s connection to the arm reduces wrist action.
This grip offers exceptional control and consistency, making it a favorite among golfers looking to eliminate variability in their putting stroke.
![longputterclaw](https://clickitgolf.com/wp-content/uploads/2025/01/longputterclaw.avif)
The Long Putter Claw Grip
The Long Putter Claw grip combines the advantages of a long putter with the stability of the Claw technique. In this grip:
- The non-dominant hand holds the top of the long putter shaft for support and alignment.
- The dominant hand adopts the Claw grip further down the shaft.
This method reduces wrist involvement and provides a pendulum-like motion, ideal for players who prefer the anchoring feel of a long putter without violating current regulations.
The Alternative Reverse Overlap Grip
The Reverse Overlap grip is a traditional favorite, but its alternative variation adds a unique twist:
- The non-dominant hand assumes the primary role, gripping the handle near the top.
- The dominant hand overlaps the non-dominant hand’s index finger, creating a firm connection between both hands.
This grip fosters excellent control and stability, ensuring that your hands work in unison during the stroke. By focusing on the non-dominant hand, golfers can achieve a smoother and more deliberate putting stroke, reducing the influence of jerky movements from the dominant hand.
Choosing the Right Grip
Selecting the ideal putting grip often depends on personal preference, hand size, and the challenges a golfer faces on the green. Experimentation is key—what works for one player might not suit another. The ultimate goal is to find a grip that provides comfort, control, and consistency.
Final Thoughts
The journey to mastering putting is as much about technique as feeling and confidence. Whether you opt for the Claw, the Two Thumbs, the Left-Hand Low, the Arm Lock, the Long Putter Claw, or the Alternative Reverse Overlap, understanding the mechanics and benefits of each grip can help you make an informed decision. Practice diligently, and remember that the right grip can transform your game—one putt at a time.
Blog
What Amateurs Can Learn From the Pros
Learn how to adapt the rhythm, power, and precision of professional golfers to elevate your own game, one swing at a time.
![](https://clickitgolf.com/wp-content/uploads/2024/11/Hovland.jpg)
One of the most exciting aspects of golf is watching the pros play. Their fluid swings, impeccable timing, and consistency are nothing short of mesmerizing. While amateurs might not have the time or resources to replicate a tour-level swing, there’s plenty to learn from analyzing how the pros play. Here’s a closer look at key aspects of professional swings and actionable tips you can apply to your own game.
1. Tempo and Rhythm
Professional golfers have an almost hypnotic rhythm to their swings. Players like Ernie Els, known as “The Big Easy,” make the swing look effortless due to their steady tempo.
What You Can Learn:
- Focus on a smooth, controlled takeaway and transition to your downswing.
- Avoid rushing your swing; a balanced rhythm is key to consistency.
Pro Tip: Practice counting “one-two-three” during your backswing and downswing to establish a steady tempo.
2. Efficient Use of Power
Pros like Rory McIlroy and Jon Rahm generate incredible power not by muscling the ball but by efficiently using their body mechanics.
What You Can Learn:
- Power comes from the ground up. Focus on rotating your hips and transferring weight smoothly from your back foot to your front foot.
- Avoid over-swinging; a controlled, shorter swing often results in better power and accuracy.
Pro Tip: Use drills like the “feet together swing” to feel balance and power in your swing.
3. Clubface Control
One thing pros excel at is controlling the clubface throughout the swing, ensuring square contact at impact.
What You Can Learn:
- Check your grip to ensure it’s neutral—not too strong or weak.
- Focus on keeping the back of your lead hand square to the target through impact.
Pro Tip: Slow down your swing during practice to focus on maintaining a square clubface.
4. Pre-Shot Routine
Every professional golfer has a consistent pre-shot routine to prepare mentally and physically for each swing.
What You Can Learn:
- Develop a routine that includes aligning to the target, a few practice swings, and visualizing the shot.
- Stick to this routine for every shot to build confidence and consistency.
Pro Tip: Watch videos of your favorite golfer’s routine and try adapting elements that suit your style.
5. Short Game Precision
While pros can bomb drives, their short game is often where they save strokes. Watch players like Phil Mickelson around the greens to see how touch and creativity come into play.
What You Can Learn:
- Practice a variety of shots around the green, including bump-and-runs, flop shots, and chips.
- Focus on speed and distance control in putting.
Pro Tip: Spend extra time practicing shots from 50 yards and in; this is where most amateurs can quickly improve.
6. Mental Toughness
Pros like Tiger Woods have shown us that mental strength is as important as physical skill. Staying calm under pressure and focusing on the next shot are hallmarks of great players.
What You Can Learn:
- Don’t dwell on mistakes. Instead, learn to reset and focus on your next opportunity.
- Visualize your shots and approach every hole with a positive mindset.
Pro Tip: Incorporate breathing exercises into your game to stay relaxed and focused.
Final Takeaway: Adapt, Don’t Copy
While watching the pros can be inspiring, remember that their swings are tailored to their bodies, strengths, and years of practice. The goal for amateurs is not to mimic every aspect of a professional swing but to adapt the principles that can enhance your own game. Focus on rhythm, power, and consistency, and watch your scores improve!
-
Product Review5 years ago
The Perfect Practice Putting Mat Review by Jason Tenzer
-
Blog4 years ago
Loophole Rule Offers PGA Tour Pros a Mulligan
-
Blog4 years ago
2021 Buyer’s Guide: The Top 10 Value Golf Balls For Distance & Feel
-
Blog4 years ago
Golf Marriage Counselor
-
Blog6 years ago
9 Biggest Chokes Of The Past Decade
-
Product Review5 years ago
THE ADJUSTABLE IRONS: WALKING STICKS GOLF CLUBS
-
Blog4 years ago
What Your Golf Clubs Say About You
-
Equipment5 years ago
OHK Sports Interview by Jason Tenzer