Connect with us

Golf Hacks

Get Your Golf Gear in Shape with These 5 Easy Tips

Avatar photo

Published

on

So you’re stuck at home and you’ve already binge-watched “The Office” for the third time — in the last week. It’s safe to assume everyone is going a little stir-crazy as we continue to embrace social distancing. And with some courses hitting pause on daily play, it’s becoming increasingly difficult to get your outdoor golf fix — unless your name is Padraig Harrington — which leads to a lot of time milling around the house trying trick shots, all in the name of #PlayingThrough. We get it.

 
Other than your wedges and putter, the rest of your golf clubs (and bag) aren’t getting a lot of love these days, but that doesn’t mean you have to forget about them entirely. It’s about this time every year when much of the country is counting down the hours until the Masters, that you likely get your bag out and start doing an inventory check as the days get longer, and opportunities to play become more frequent.
 
You could wait until coronavirus retreats to do the inventory check, or you could just go ahead and do it now. Let’s be honest, what else are you going to do? Hop on another video conference call? No thanks.
 
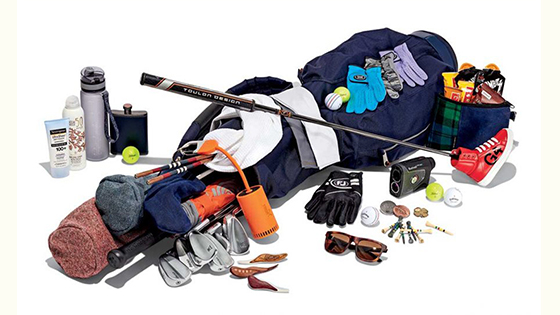
Instead, consider taking a few minutes out to follow these five simple gear tips to ensure everything in your bag is in good working order before you hit the course.
 

1. Check your grips

 
Want to know what isn’t fun? Taking a huge rip at the ball and watching the club twist or even fly out of your hands at impact. Could it have something to do with how you hold the club? Sure. But you might also want to check out your handles to see if they’re still in playing condition.
 
The golf grip is constantly overlooked during the early season tune-up. Golf Pride data shows the average usage for a set of grips is roughly 40-60 rounds — and, yes, practice sessions count as one round — which means you should be replacing your grips every year or two if playing regularly. On average, it’ll run you somewhere between $70-$140 depending on the grip you choose.
 

If your grips are starting to show signs of wear (notice the sheen), it might be time to wash or replace them.
RYAN NOLL

 
If your grips are starting to look slick or rip at the base, it’s probably time to change them out. Or you could consider the idea of using sandpaper to temporarily bring your grips back to life.
 
Another tip? If you don’t want to buy grips on the regular, wash them every so often with a scrub brush and mild detergent to remove the oils and sweat from your hands that break down the rubber. After giving them a good scrub, dry off the grip with a clean towel.
 

2. Clean the grooves

 
I was taught from an early age to always keep the grooves on your irons and wedges clean. (Thanks, Dad!) It’s a simple task that requires you to have a wet towel on hand during the round to clean off the face after each shot. It takes a couple seconds.
 
But chances are you aren’t cleaning off the grooves after each shot. All that dirt and grass currently caked in the grooves of your lob wedge is a problem. Unless you like hitting a flier, go ahead and check the grooves on all your clubs. (Yes, that includes the 3-iron.)
 
Studies have shown you can lose roughly 1,300 rpm’s of spin when the grooves can’t grip the cover of the ball properly, which is fairly significant when we’re talking about a wedge shot that needs to drop and stop.
 

If you’re stuck inside, take inventory of your gear.
JONATHAN WALL

 
Grab a bucket with warm water, a scrub brush (or even a toothbrush) with plastic bristles and go to work. It shouldn’t take you long to dislodge the dirt and reveal clean grooves. And if you don’t have a brush, a golf tee with a sharp tip will work in a pinch. Just make sure you have several handy if you plan on cleaning your whole set, as the tip of the tee will get worn out in a hurry.
 
As for the metal brushes you see hanging from golf bags? I’m not a huge fan of taking something with wire bristles to the face of an iron or wedge, especially if it’s of the soft carbon steel variety. But that’s your call if you want to go the metal brush route.
 

3. Spike check

 
I’ll be the first to admit I don’t check the spikes on my golf shoes as often as I should. Save for Tiger Woods and a few of his colleagues in the professional ranks, everyone is wearing soft spikes on the course. Soft spikes keep your golf sanctuary happy, but they can be somewhat frustrating to remove if you don’t keep tabs on the number of rounds they’ve logged.
 
A set of soft spikes will last between 20-30 rounds before they need to be replaced. For those playing on firmer courses in dry desert climates, it’s probably closer to 20. If you catch them before they completely wear out, it’s easy enough to buy a replacement set online — the wrench needed to remove the spikes costs $5-$10 — to keep from having to break in a new pair of shoes.
 

Keep an eye on how your spikes are looking before the new season.
GETTY IMAGES

 
How can you tell if your spikes need to be replaced? If the rubber spikes have been worn down to nubs, it’s time to make a change. And what happens if you can’t see the two little holes in the soft spike where the wrench attaches to remove said spike? It means they’ve likely been worn to the point where getting new shoes makes the most sense for your sanity. Trust me.
 

Advertisement
Advertisement

4. Do an inventory check

 
Now is the time to empty out the golf bag and see what you’re missing. Are you all stocked up on tees, ball markers, sunscreen (make sure it hasn’t expired), permanent markers (we’ll get to this one in a moment) and koozies? If you’re missing one of the above, now is a great time to make sure it’s in the bag for the new season.
 
What about golf gloves? If you’re anything like me, you have a few fresh options in a Ziploc bag. Also, consider throwing a pair of rain gloves in the mix if you play in the elements, or want to do your best Phil Mickelson impression.
 

How Justin Thomas (L) and Webb Simpson (R) mark their Titleist golf balls.
JONATHAN WALL

 
Something else to consider? It wouldn’t be a bad idea to air out your gain gear if it’s regularly stored in the side pocket of your bag. Also, most bags have a small side zipper that allows you to access the bottom in the event something falls between the club dividers. I’ve found an old peanut butter and jelly sandwich and $20 by simply doing a semi-regular check. You never know what you’re going to find.
 

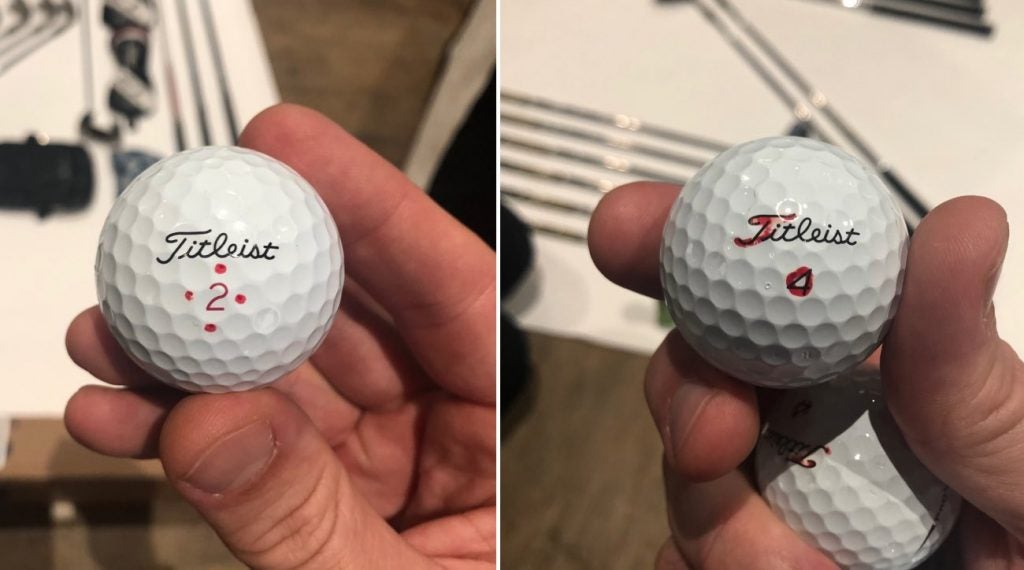
5. Mark your golf balls

 
Please don’t be the guy in your foursome who continually asks, “Is it you or me who’s playing the Titleist red 3?” That guy is the worst. Just mark your golf ball and save everyone the headache. If you’ve never marked your ball before, you could always go “Justin Thomas style” and add four red dots around the play number. There’s also “Castaway style,” if you have a bit more time.
 
If you mark your balls now, you won’t have to worry about doing it right before you tee off. Simple stuff.
 
And if you’re looking for a specific marker, I’d recommend the Milwaukee Inkzall. Did you know it’s Tiger Woods’ marker of choice? Yes, that’s really a thing. It works great for not only marking the ball but the scorecard as well with pinpoint precision.
 
 
By Jonathan Wall
 
This article originally appeared on Golf.com.

Continue Reading
Advertisement

Golf Hacks

Shave 10 Strokes Overnight with This Simple Trick!

Avatar photo

Published

on

Attention golf enthusiasts! Are you tired of watching your golf balls plunge into water hazards or get lost in the rough? Have you spent countless dollars on the latest gear, only to see minimal improvement in your game? What if we told you that there’s a ridiculously simple hack that could revolutionize your game, and it’s something most players overlook?

Unlock the Secret Weapon of Golf Pros

While everyone else is obsessing over driving distances and the latest high-tech clubs, we’ve discovered the secret weapon that golf pros use to dominate the course: mastering the short game. Yes, you read that right. The key to dramatically improving your golf game lies not in the long drive but in the art of putting and chipping.

Why This Trick Is a Game Changer

Forget about complicated swing adjustments or expensive gadgets. By redirecting your focus to the short game, you can achieve astonishing improvements in your overall performance. Here’s why:

Advertisement
Advertisement
  • Transform Your Scorecard: Putting can make up 40-50% of your total strokes. Imagine the impact on your score if you could putt like a pro!
  • Boost Your Confidence: Excelling at chipping and putting builds a level of confidence that transforms your entire game.
  • Save Strokes Like Never Before: Mastering your short game means you’re always just a chip and a putt away from par.

How to Leverage This Hack and Dominate the Greens

  • Revolutionize Your Practice Sessions: Allocate at least 50% of your practice time to mastering the greens. It’s not just about hitting; it’s about hitting with purpose.
  • Master Distance Control: Become a wizard of the greens by practicing putts from various distances. Your future self will thank you.
  • Conquer All Lies: Practice chipping from every imaginable situation. When the pressure’s on, you’ll know exactly how to handle it.
  • Mimic Real-Game Pressure: Challenge yourself with high-pressure putting and chipping scenarios. When it’s game time, you’ll be cool, calm, and collected.

The Shortcut to Golfing Greatness

If you’re seeking a foolproof way to elevate your golf game, look no further. This simple yet wildly effective focus shift is your shortcut to lower scores and higher bragging rights. So, are you ready to leave your golf buddies in awe? Embrace the short game mastery, and watch as your game transforms overnight. Say goodbye to double bogeys and hello to birdies and pars. Your golf game will never be the same again!

Continue Reading

Golf Hacks

How a $1 Dry-Erase Marker Can Help You Perfect Your Iron Striking

Avatar photo

Published

on

Using a marker is an easy way to identify an issue you might have with lie angle

When it comes to club fitting, there are many small details that add up to gaining accuracy and distance, and one of the easiest ways to dial in your gear is to make sure you have the right lie angles with your irons and wedges.

But before we get to how to identify a possible issue with your golf club lie angles — let’s explain exactly what it is first.

What is Lie Angle?

Advertisement
Advertisement

Lie angle is the measured angle formed by the hosel/shaft relative to the ground when the head is at rest or when the grooves are parallel with the ground. The higher the lie angle value, the more “upright” the club is. The lower the lie angle, the more “flat” a club is.

If the lie angle of your clubs isn’t adjusted for your natural impact position, it will limit your ability to hit solid shots and create an unwanted bias in your ball flight.

If your irons are too flat for your swing, the face is naturally going to approach the ball open to the target line, and you will either miss shots to the right or notice your ball fading more than desired. Conversely, if your clubs are too upright, the club face will point more left and result in a pull, or shots that overdraw.

Advertisement
Advertisement

How to Check Your Lie Angles

You can do this test on a mat or on real grass.

Beyond the obvious ball flight issues that might be identified just by hitting shots, one of the easiest ways to make sure your lie angles are adjusted properly involves using a dry-erase marker (or any washable marker) and a few range balls.

The Process

Using the marker, draw a 1-inch line on a golf ball and set it down, pointing at the target line.

Advertisement
Advertisement

Once you’ve hit a shot and observed ball flight, take a look at the face or your iron to see where the line is pointing. If the ball traveled as intended and the line is 90 degrees to the grooves or just a hair in either direction, you’re golden.

Purple: great. Green line: too upright. Red line: too flat

If the line is pointed toward the toe, it means your lie angle is too upright and needs to be adjusted flatter. If the line is toward the heel, it means the clubs are too flat and need to be adjusted upright.

(Note: The marker line is NOT relative to the number of degrees the clubs have to be bent because it also represents the face angle at impact, which will exaggerate the marking. This is why it’s important to have a club-fitter do a final check before any adjustments are made, preferably with a launch monitor.)

You can repeat this process for all of your irons and wedges and use the marks as a guideline for adjusting your entire set. Just make sure to chart the information and ball flight before seeing a fitter, who can then individually adjust each club to fit your swing.

Advertisement
Advertisement

For many golfers, the ideal lie angle through their iron sets isn’t a linear progression, which is why the fitting process is crucial to making sure every club in your set is best matched to you.

Continue Reading

Golf Drills/Practice

The 10 BEST Golf Drills Ever…

Avatar photo

Published

on

Tips on how to play better, the latest equipment reviews, interviews with the biggest names, and more… Check us out at ClickitGolf.com for more

When it comes to golf, sadly there is no one magic solution that covers all common afflictions. We’re all different and therefore what has worked wonders for a member of your fourball is unlikely to do the same for you. So, in the article below, I run through 10 of my favorite drills in the hope that there will be something in there that will help the majority of golfers on their way to lower scores.

1. BEST GOLF DRILLS: BALL-STRIKING

Striking the ball consistently is king. The most important thing is knowing where you strike the ball on the clubface. To get a better idea, use a bit of dry shampoo (or hairspray) and spray it on the face. This will tell you if you are good at hitting the ball in the middle or if you tend to favor the heel or struggle with how to eliminate those dreaded toe strikes. Bottom line you will know your miss and can practice on better center of the face impact.

Advertisement
Advertisement

Using this feedback you can then start to identify swing issues and improve the quality and consistency of your shots.

2. SLICE FIX

So many golfers are desperate for a tip on how to stop slicing the ball and believe it or not, a simple swimming noodle can come in handy. This is because it will improve your understanding of the swing and help you figure out how to check your swing path. You move the club around the body in a semicircular movement, so place the noodle accordingly and take some swings – slowly at first so you can observe the path.

Feel how you move back in a circle. At the bottom, the club is moving down and coming through impact, before going on around in that circle to the finish. Using this drill should improve your directional control, get your clubface more toward the target and start to produce more solid strikes.

3. RHYTHM

Many club golfers get diagnosed with a swing that is too fast when it’s really the order in which they change the direction that needs correcting. We want to get a feel for the rotation of the body, almost setting the club at the top and then having a smooth change of direction.

Take your set-up and feel like you make a really nice shoulder turn, rotating 90 degrees from your start position so your left shoulder is pointing down towards the ball. Then set the arms and wrists, so they take the club to the top of the swing.

Finally, you want a smooth rotation of the lower body, with the lead hip and leg starting to rotate. Avoid making a little turn and a big jerky snatch from the top. Get used to this feeling and the three distinct checkpoints and you’ll notice you start to hone a much better downswing sequence

Advertisement
Advertisement


4. BUNKER DRILL

This is a must-try drill that will improve your understanding of how to play bunker shots and how the club should interact with the sand. When practicing, having an image to look at will help, so draw a box in the sand to form a small rectangle around the ball. Your goal is to remove the sand inside the box. The box gives you a visual of where you want the club to enter before throwing the sand out toward the target.

Take your set-up with the ball a fraction forward of the center and a little more pressure on your lead side. Then, open the clubface slightly so you start to use the sole in a more efficient way to prevent the leading edge from digging into the sand, which slows momentum.

Take a big swing and let your right-hand work down and underneath, so the sand is thrown out nice and high and the ball comes out toward the target.

5. STRIKE THE MATCH

You won’t get the desired result with your long irons without the correct speed through impact. But it’s not all about swinging as fast as you can. Learning how to compress the golf ball is far more important. As the club comes into impact, imagine yourself striking a match, imagine that same sound.

Advertisement
Advertisement

A sharp sound through impact means you’ve generated good speed, and crucially, at the right moment. This will help you improve the launch, control and increase the distance you hit your irons.

6. TEE PEG DRILL

The is a difference between pitching and chipping, so before working on your short game, it pays to improve your understanding. Designed to help your pitching, this drill is especially useful in getting rid of that nasty habit where the leading edge of the club digs down too much, one reason for those dreaded duff (chunk) shots.

Instead, tee the ball up, take your normal set-up position, and rehearse a few swings, visualizing just clipping the ball up and away off the tee. A shallower angle of attack will allow the sole of the club and the bounce angle to do the work. Breaking the tee is a no-no, as this means that the leading edge of your club is digging down.

7. HYBRID DRILL

Even though the best golf hybrids are designed to be easy to hit, there’s a tendency for club golfers to get too shallow and try to “lift” the ball instead of compressing it flush. In fact, you need more of a downward impact, which is where this drill will help. Place a coin two or three inches in front of the ball and play your shot as you would do normally. If you miss the coin, it’s because the sole of the club is traveling upwards too soon – the likely result is a thin contact and a dreaded skull or skinny shot.

You want to hit the coin, as this tells you that you have the correct downward angle of attack. This will lead to ad more pure and consistent strikes, which is going to give you added distance too.

Advertisement
Advertisement

8. PUTTING DRILL

You could be the best player in the world at reading greens, but if you don’t start the ball on the right lines, the putts simply won’t drop. This is why clubface alignment at impact is so crucial. In a bid to improve in this area, many people turn to their putting technique, but the answer is often much simpler. 

The task here is clear: hit the ball along the yardstick into the hole. This is one of my favorite putting drills that will help you to square the clubface at impact on a more consistent basis while giving you visual feedback as to whether you’re pushing putts by opening the face or pulling them by closing it.

In both cases, the ball will roll along the yardstick or whatever flat surface you chose. If your speed is right, you’ll find the bottom of the cup. 

9. FACE CONTROL

You can practice this at home to improve your awareness of how the clubface is affected by the way you hold the club. Attach a pencil to the center of your clubface with Blu Tack, as shown. You will be surprised at where you are aimed vs. where you think you are aimed!

At address, the pencil should cover the alignment stick. From here, you’ll get an understanding of where your clubface is during the backswing and whether you tend to open it (pencil up), close it (pencil down), or keep it fairly neutral (pencil straight).

A strong golf grip with lots of knuckles showing on the top hand will encourage more of a closed clubface when you take the club back; a weak golf grip will see the pencil pointing more toward the sky. Work on presenting the club back to the target without any twisting or manipulation.

Advertisement
Advertisement

10. FIXING THAT DREADED TOP

Topping often comes as a result of trying to hit up on the ball. It’s a common fault in which you see the elbows separating and the wrists then acting to save the shot. If you’re guilty of this and want a drill on how to stop topping the golf ball, you’ve come to the right place. First, apply the resistance band as shown. 

What I’m having to do is fight the resistance pulling my arms back toward my body. It helps you get used to the feeling of your arms extending as you go out and down toward the ball.

After a few swings, remove the band and you should find it’s far easier to get your arms extended. Brush the ground with the sole and get that ‘whoosh’ sound (One of my favorite sounds on the planet). This will tell you that you’re extending your arms more and your chances of topping the ball will be greatly reduced.

IMPORTANT: Practice these individually. You don’t want to be bogged down by too many swing thoughts. We all know what happens with paralysis by analysis…At your next range session pick one that applies to your game and focus solely on the drill. Pay no mind to immediate results – it’s the 10,000 hours theory – it will not happen overnight. But, if you perfect each of these drills, and really practice them individually and with intent/purpose…you can and will reap the benefits. Once you feel comfortable, take some of these to the course and watch your scores creep down slowly but surely.

Advertisement
Advertisement
Continue Reading

Trending